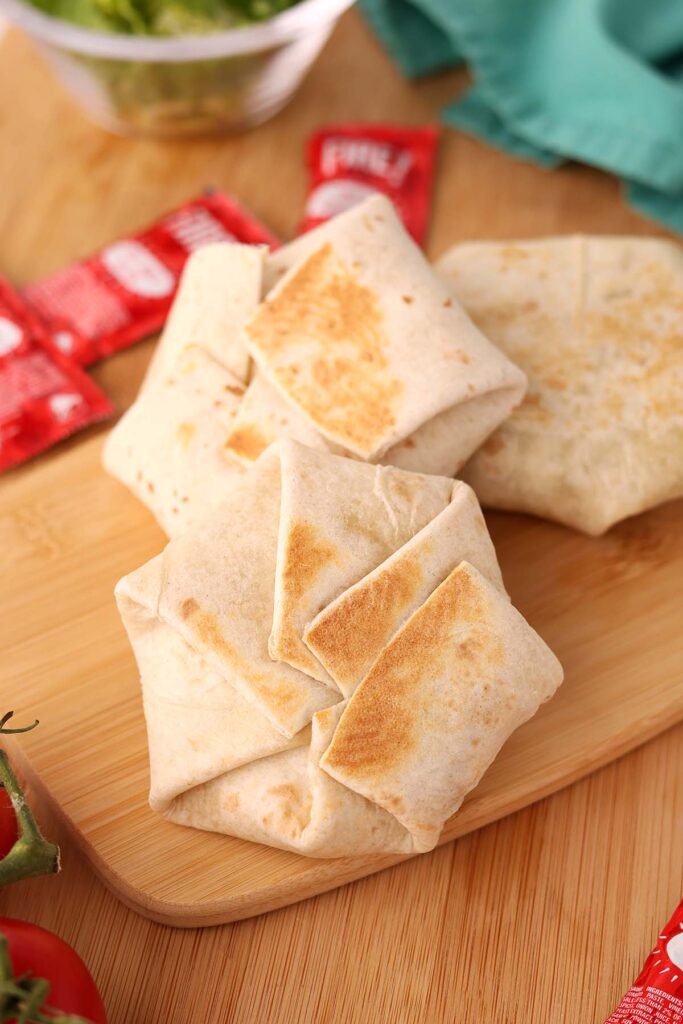
Crunchwrap Sliders
This post may contain affiliate links.
These Crunchwrap Sliders are everything we love about the Taco Bell favorite, just smaller and packed with even more filling. We originally started making them to save money on takeout, but they’ve become a regular part of our dinner rotation. Easy, customizable, and incredibly satisfying, they’re always a hit.
Why Make Mini Crunchwraps Instead of Full Size?
- Easier to fold and cook
- Perfect for parties and game day
- Kid-friendly portions
- More crispy edges in every bite
- Easy to customize with different fillings
- Great for serving a crowd
Traditional Crunchwraps are always a good idea, but these mini versions have a few advantages. The smaller size makes them easier to assemble, easier to flip, and much less likely to fall apart while cooking.
They’re also perfect for feeding a group. Whether you’re making them for dinner, game day, or a family movie night, everyone can grab one (or two) and customize the fillings to their liking. Plus, the smaller tortillas mean more crispy, golden edges, which might just be the best part.
Crunchwrap Slider Ingredients
These mini Crunchwraps use simple ingredients to recreate all of the flavors of the Taco Bell favorite at home. A combination of seasoned beef, nacho cheese, crunchy tortilla chips, and fresh toppings gives you that classic Crunchwrap experience in a smaller, easier-to-make package.
- Ground Beef: The base of the filling. I typically use lean ground beef so there’s less grease to drain after cooking.
- Taco Seasoning + Water: This gives the beef that classic Taco Bell-inspired flavor. Use a packet of Taco Bell seasoning or your favorite taco meat recipe.
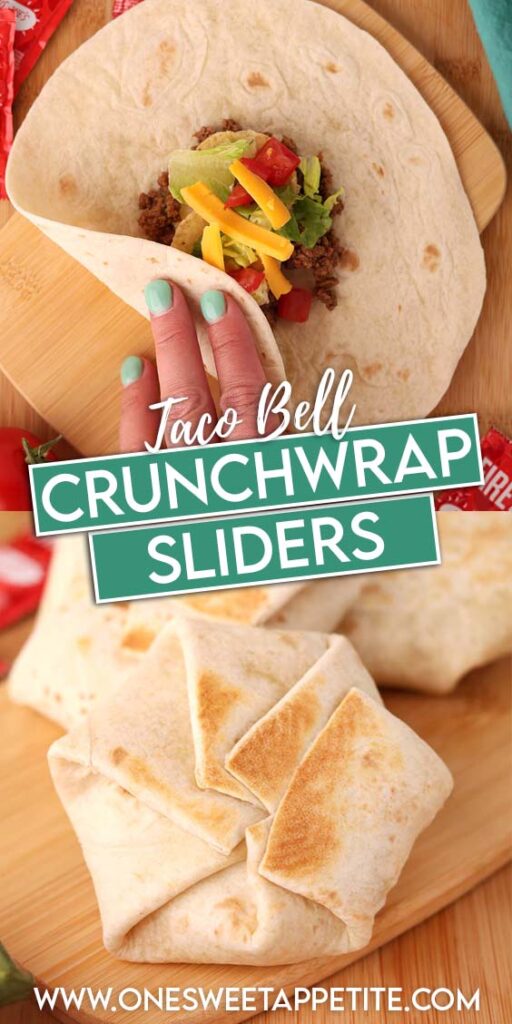
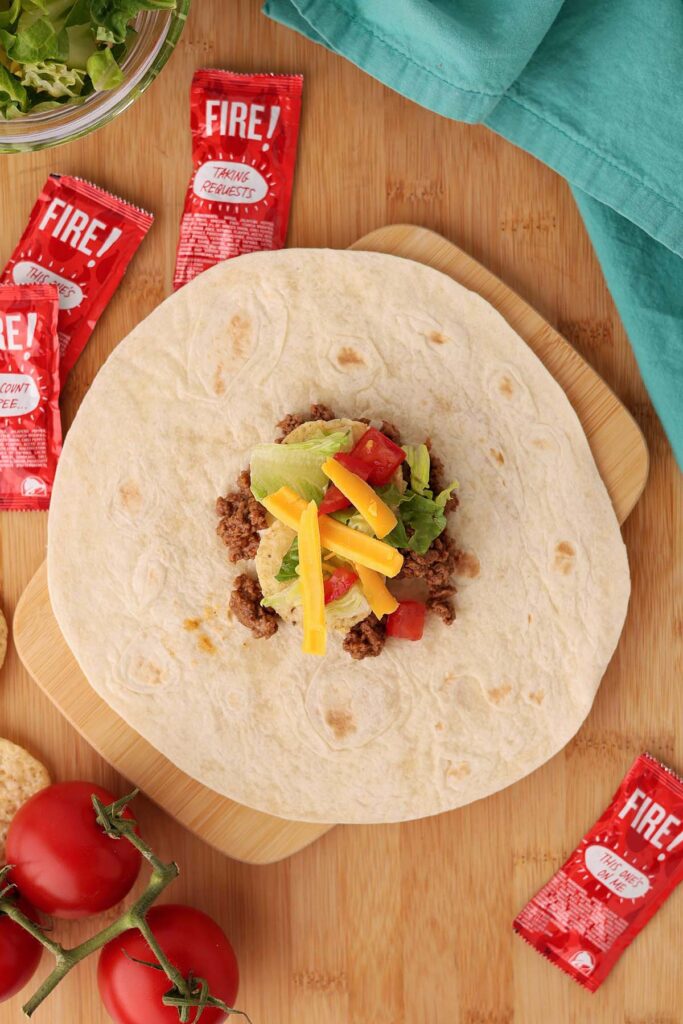
- Flour Tortillas: You’ll need larger tortillas for folding around the filling and smaller street taco tortillas for the center layer. The smaller tortilla helps keep all of the ingredients tucked inside while cooking.
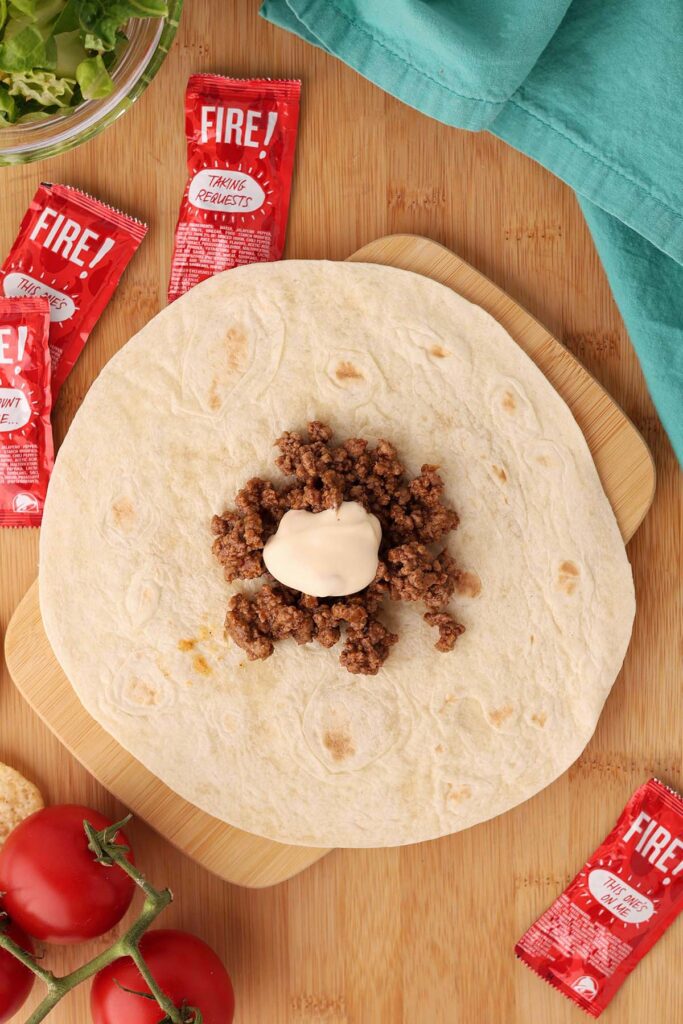
- Nacho Cheese Sauce: One of the key ingredients for getting that signature Crunchwrap flavor. Warm it slightly before assembling so it’s easy to spread.
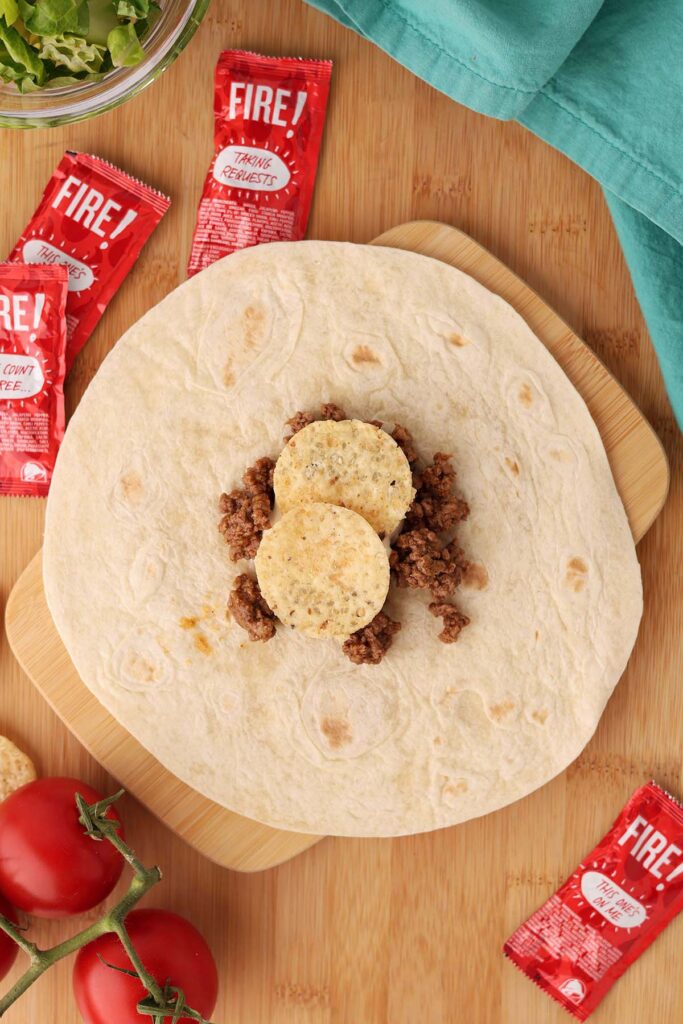
- Round Tortilla Chips: Instead of tostada shells, I use round tortilla chips for the crunchy center. They’re easier to find, less expensive, and work just as well.
- Sour Cream: Adds a cool, creamy layer that balances the seasoned beef and cheese.
- Shredded Lettuce: Adds freshness and texture. For the best crunch, use freshly shredded iceberg lettuce.
- Tomatoes: Diced tomatoes add a pop of freshness and help recreate the flavors of the Taco Bell original.
- Shredded Cheddar Cheese: Melts beautifully and helps hold everything together. Feel free to swap in a Mexican cheese blend if that’s what you have on hand.

Jesseca’s Recipe Review
My husband always gravitates toward sliders whenever they’re on a menu, but at $3 a pop and barely enough filling to make them satisfying, I knew I could do better. These Crunchwrap Sliders have all of the flavors we love from the Taco Bell classic, but they’re loaded with filling and cost a fraction of the price.
The smaller size makes them surprisingly easy to fold, and everyone can customize their own with their favorite toppings. They’re fun to make, budget-friendly, and one of those dinners that gets zero complaints at our house.
Tip from Jesseca:
Let the taco meat cool for a few minutes before assembling. It helps keep the lettuce crisp and makes the Crunchwraps easier to fold.
The Best Tortillas for Crunchwrap Sliders
For the easiest assembly, you’ll want two sizes of flour tortillas:
- Soft taco tortillas for the outside
- Street taco tortillas for the center
The larger tortilla wraps around all of the fillings, while the smaller tortilla helps keep everything tucked neatly inside.
Can’t find street taco tortillas? No problem. Simply cut smaller circles from a larger flour tortilla.
A quick note: stick with flour tortillas for this recipe. They’re flexible, easy to fold, and crisp up beautifully in the skillet. Corn tortillas tend to crack and don’t hold the fillings as well.
Air Fryer vs Skillet vs Oven
There are a few different ways to cook Crunchwrap Sliders, and each has its advantages depending on how many you’re making.
| Method | Best For | Results |
|---|---|---|
| Skillet | Everyday dinners | Crispy exterior and melty center |
| Air Fryer | Small batches | Extra crispy with very little effort |
| Oven | Feeding a crowd | Cooks several at once |
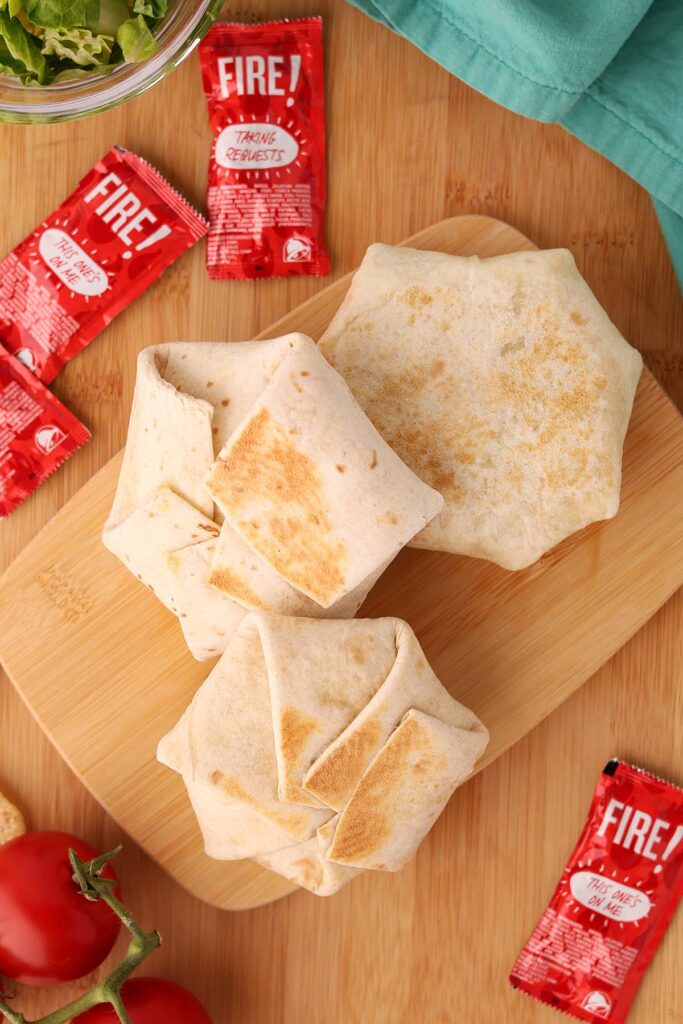
- Skillet: This is my favorite method. The tortillas get golden brown and crisp while the cheese melts perfectly inside. It’s also the closest to the texture you get from a traditional Crunchwrap.
- Air Fryer: If you’re making a smaller batch, the air fryer works great. Cook at 375°F for 4 to 5 minutes, starting seam-side down, until crispy and heated through.
- Oven: Need to make a bunch at once? Arrange the Crunchwraps on a baking sheet and bake at 425°F for 8 to 10 minutes, flipping halfway through. They won’t be quite as crispy as the skillet version, but it’s the easiest option when feeding a crowd.
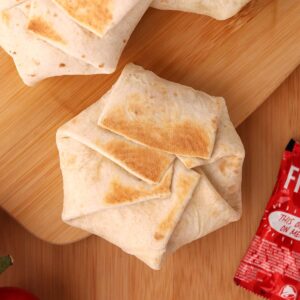
How to Fold Mini Crunchwraps
Folding looks intimidating the first time, but it’s actually pretty simple once you get the hang of it.
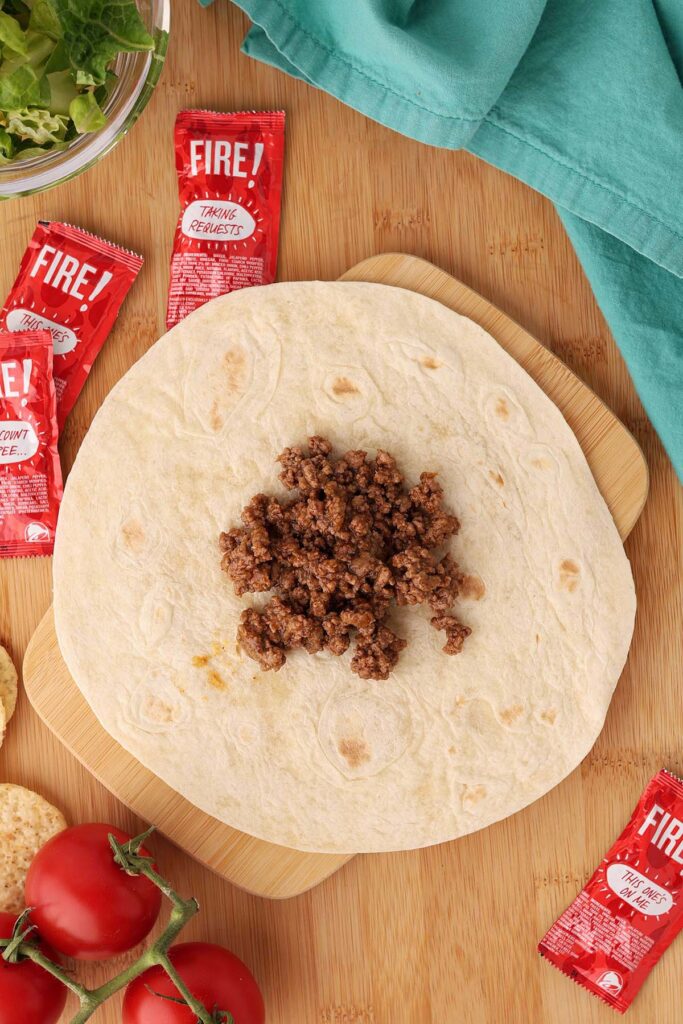
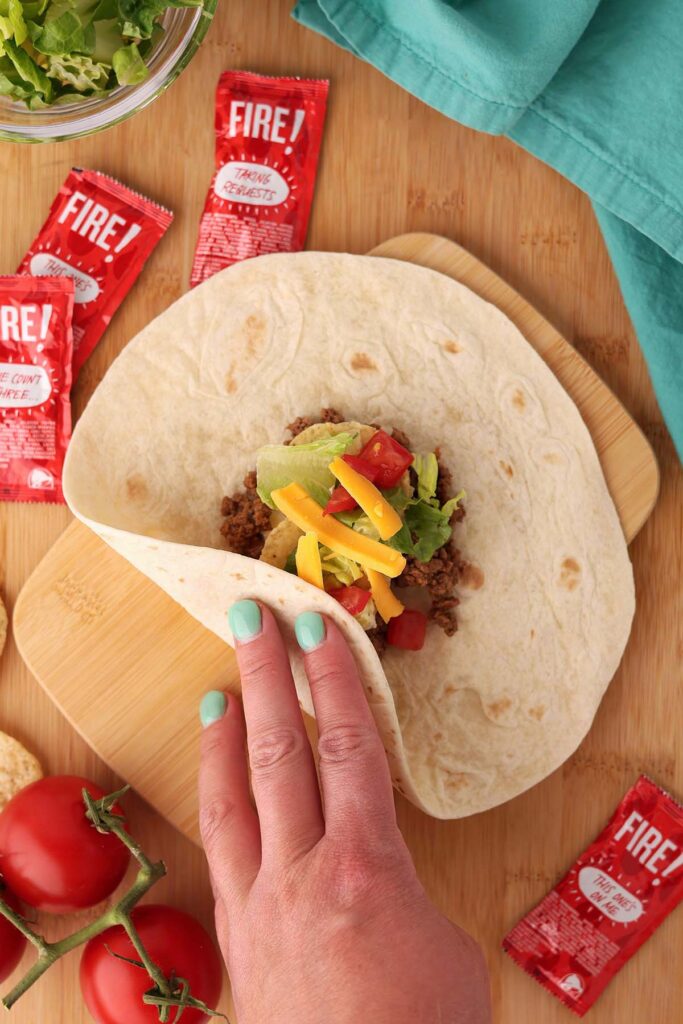
- Place your fillings in the center of the tortilla, keeping everything stacked rather than spread out.
- Top with the smaller tortilla.
- Starting at one edge, fold the larger tortilla toward the center.
- Continue working your way around the tortilla, creating small pleats as you go.
- Finish with the last fold tucked neatly into the center.
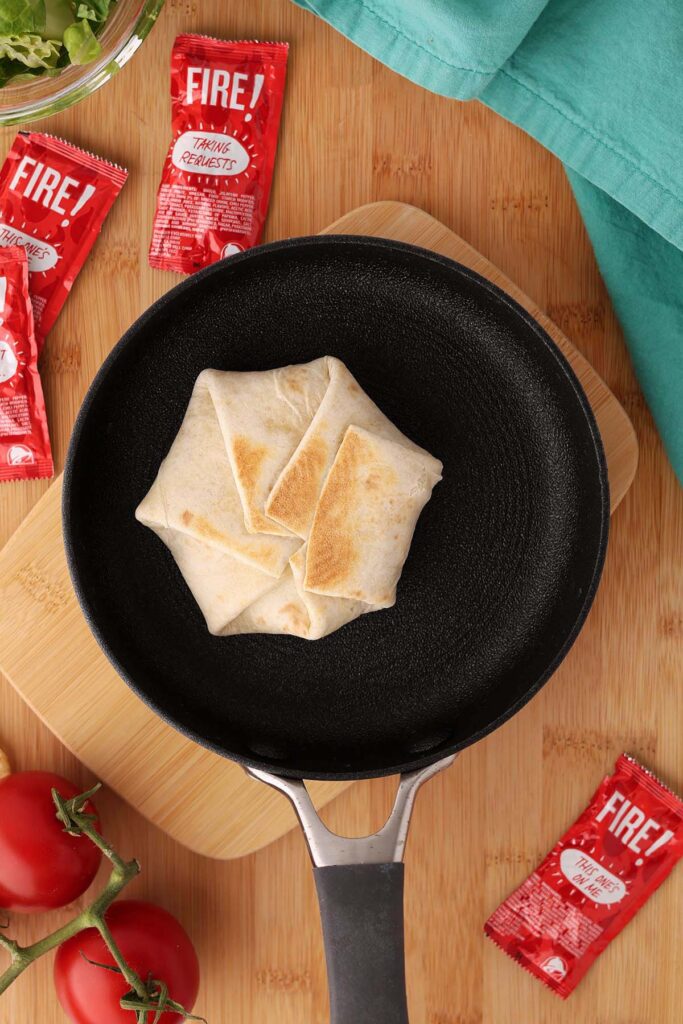
- Place seam-side down in a hot skillet to help seal everything together.
The key is not overfilling. If the fillings extend too close to the edge of the tortilla, you’ll have a hard time creating those folds. Keeping everything stacked in the center makes assembly much easier and helps the Crunchwrap stay sealed while cooking.
Mini Crunchwrap Variations
This is also a great recipe for using up leftovers. Extra taco meat, shredded chicken, or vegetables can easily be worked into the filling, making dinner feel a little different each time you make it.
- Chicken: Use shredded or diced chicken in place of the ground beef.
- Spicy: Add jalapeños, pepper jack cheese, or your favorite hot sauce.
- Doritos: Swap the round tortilla chips for Nacho Cheese Doritos.
- Loaded Taco: Add black beans, diced onions, or sliced olives.
- Vegetarian: Use black beans, refried beans, or a plant-based meat alternative.
- Breakfast: Fill them with scrambled eggs, breakfast sausage, cheese, and hash browns.
Crunchwrap Sliders Recipe FAQs
This usually means they’re overfilled or not folded tightly enough. Keep the fillings stacked in the center and place the folded side down in the skillet first to help seal everything together.
The round chips fit neatly inside the tortilla and create an even crunch, but regular tortilla chips will work in a pinch. Just arrange them in a single layer over the cheese.
Less than you think. Keeping the fillings stacked in the center makes folding much easier and helps prevent leaks while cooking.
The filling pile is probably too large. Remove a little filling and try again. You should have enough tortilla around the edges to create several folds that meet in the center.
The outside should be golden brown and crisp, and the cheese inside should be melted. This usually takes just a few minutes per side.
Storage and Reheating Instructions
Store leftovers in an airtight container for up to 3 days.
- Skillet: Reheat over medium-low heat for 2 to 3 minutes per side, or until warmed through and crispy.
- Air Fryer: Reheat at 350°F for 3 to 4 minutes.
- Microwave: This works in a pinch, but the tortilla will soften and lose some of its crisp texture.
- Make Ahead Tip: If you’re planning for leftovers, leave out the lettuce and tomatoes during assembly and add them after reheating for the best texture.
Want to save this recipe?
Enter your email below & we’ll send it to your inbox. Plus get great new recipes from us every week!
Taco Bell Crunchwrap Sliders
Ingredients
- 1 pound lean ground beef
- 1 1-ounce packet Taco Bell taco seasoning, or 2 tablespoons taco seasoning
- 3/4 cup water
- 8 soft taco-size flour tortillas
- 1/2 cup nacho cheese sauce
- 16 round tortilla chips
- 2/3 cup sour cream
- 1 cup shredded lettuce
- 1 cup diced tomatoes
- 2 cups shredded cheddar cheese
Instructions
- Cook the ground beef in a large skillet over medium heat, breaking it apart as it browns. Drain excess grease.
- Stir in the taco seasoning and water. Simmer for 5 to 10 minutes, or until the liquid has reduced and the beef is evenly coated.
- Lay a soft taco tortilla on a clean work surface. Add about 1/4 cup of taco meat to the center.
- Drizzle with nacho cheese sauce and top with 2 tortilla chips.
- Add a spoonful of sour cream, followed by lettuce, tomatoes, and shredded cheddar cheese.
- Starting at one edge, fold the larger tortilla toward the center. Continue folding around the tortilla, creating pleats until the filling is enclosed.
- Heat a clean skillet over medium heat. Place the Crunchwrap seam-side down and cook for 2 to 3 minutes, or until golden brown.
- Flip and cook for an additional 1 to 2 minutes.
- Repeat with the remaining ingredients and serve warm.
Nutrition
The nutrition facts provided are calculated using a third-party tool and are estimates only. Actual nutritional content may vary based on the ingredients and brands you use, as well as portion sizes. For accurate results, please consult a registered dietitian or nutritionist.