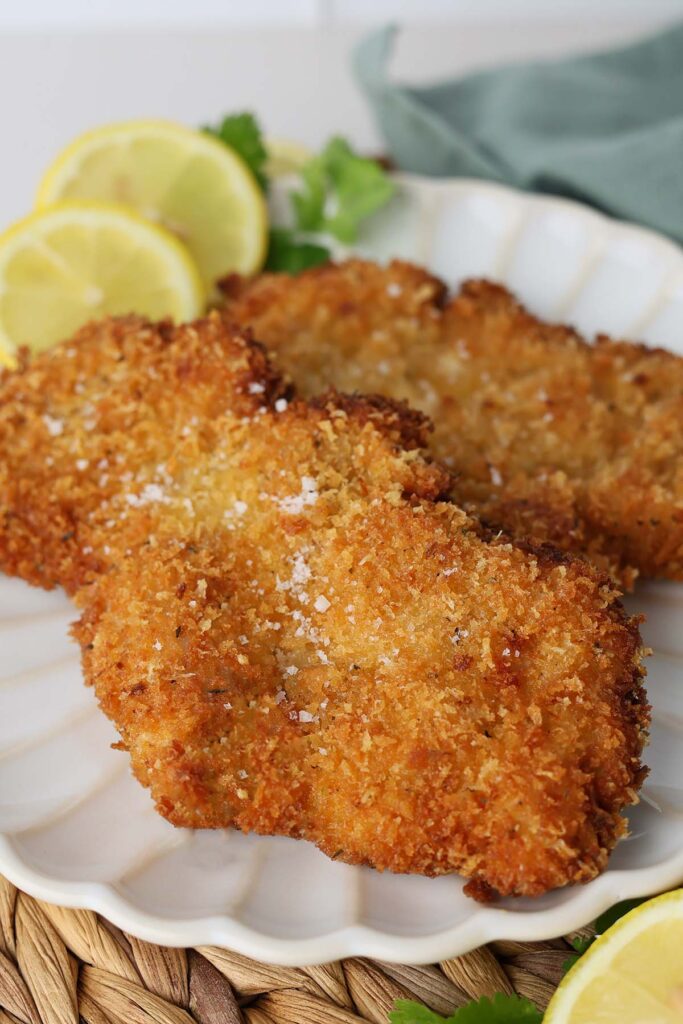
Crispy Fried Chicken Thighs
This post may contain affiliate links.
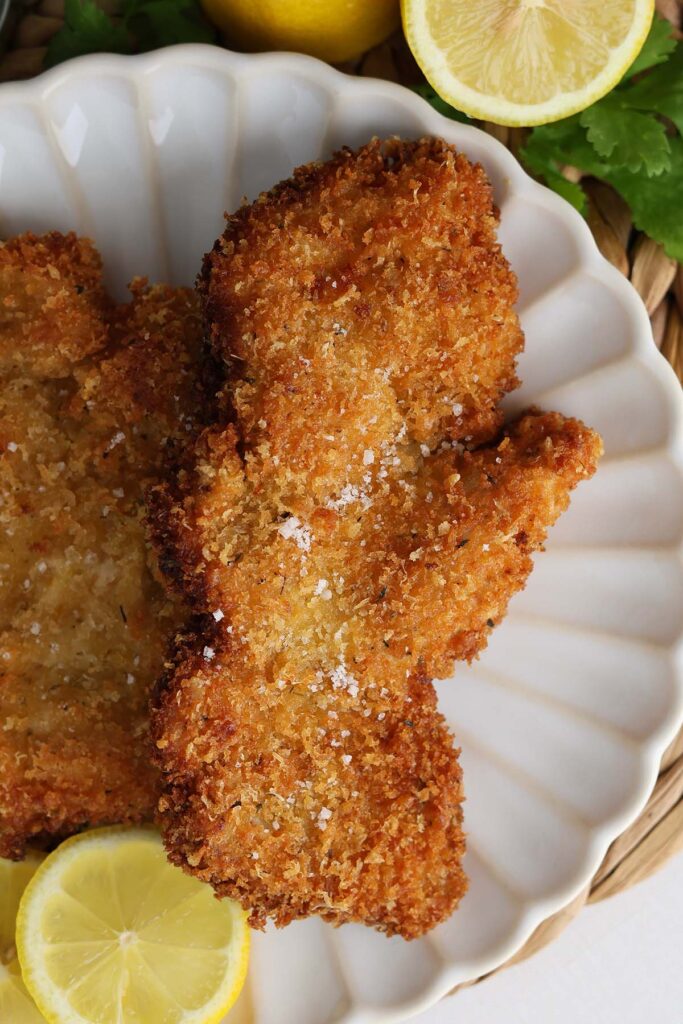
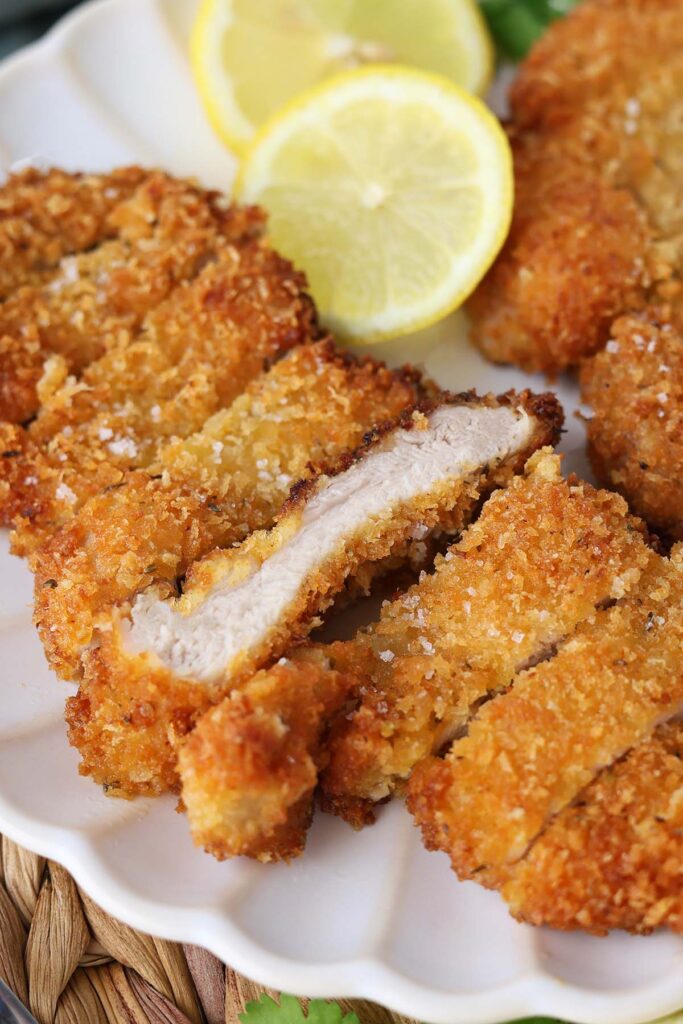
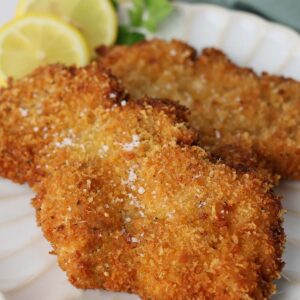
These Crispy Fried Chicken Thighs are everything I want in a homemade chicken dinner. The outside turns perfectly golden and crunchy while the chicken stays juicy and flavorful inside. They’re simple enough for a weeknight meal but taste like something you’d order at your favorite comfort food restaurant. Serve them with mashed potatoes, a simple salad, or tucked into a sandwich for an easy dinner that everyone at the table will happily eat.
Why You’ll Love
- Restaurant-Style Results at Home. You get that golden, crunchy crust without needing a deep fryer or special equipment.
- Made with Pantry Staples. Most of the ingredients are things you likely already have in your kitchen.
- Juicy Chicken Every Time. Chicken thighs stay tender and flavorful, making them a forgiving choice for home cooks.
- Budget-Friendly Meal. Chicken thighs are often less expensive than chicken breasts while delivering plenty of flavor.
Fried chicken has a reputation for being fussy, but this recipe proves otherwise. The simple breading creates a crisp, golden crust while the chicken stays tender and juicy inside. A little Parmesan, lemon zest, and seasoning add just enough flavor to make it feel special without turning it into a complicated weekend project. It looks impressive on the plate but relies on pantry staples and a handful of easy steps.
Once you make this once or twice, you’ll see how simple it really is. I’ve made this with both chicken breasts and thighs, but I keep coming back to thighs because they’re forgiving, flavorful, and stay juicy every time. Add a squeeze of fresh lemon over the top and you’ll have a crispy chicken dinner that’s hard to beat.
Ingredients For Pan-Fried Chicken Thighs
The beauty of this recipe is that it uses simple ingredients to create a crispy, flavorful coating without a lot of fuss. Most of what you need is probably already in your pantry.
- Boneless skinless chicken thighs or breasts: Thighs stay especially juicy, but either option works well. Pound to an even thickness for the best results.
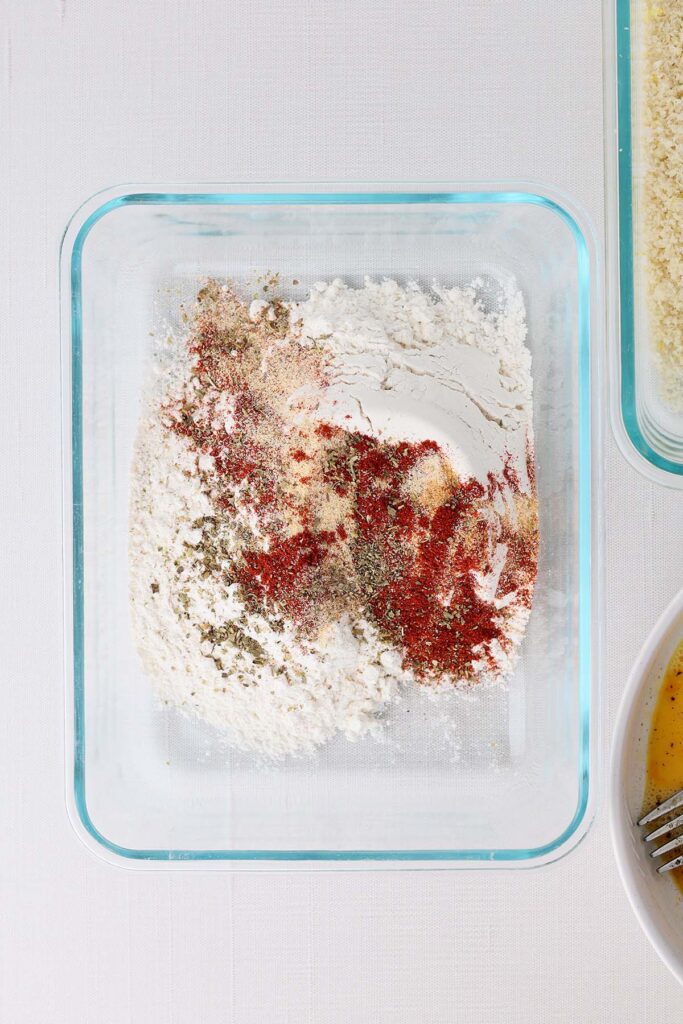
- Flour: Helps the breading stick and creates the foundation for a crispy crust.
- Seasoning salt: Adds flavor right from the first layer.
- Garlic powder: Brings savory flavor without the risk of burning fresh garlic.
- Onion powder: Adds depth and rounds out the seasoning blend.
- Paprika: Helps create that golden color everyone loves.
- Black pepper: Adds a subtle kick and balances the flavors.
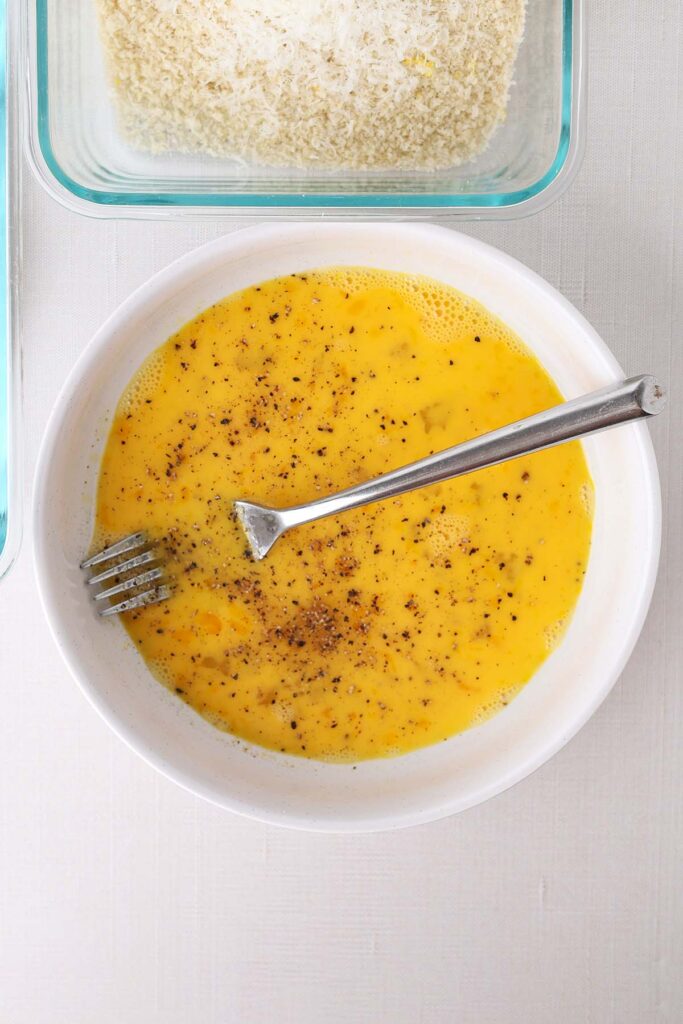
- Eggs: Act as the glue that holds the breading in place.
- Water: Thins the egg wash slightly for more even coverage.
- Panko breadcrumbs: The key to a light, crispy coating.
- Parmesan cheese: Adds a salty, savory flavor to the crust.
- Italian seasoning: Brings a hint of herb flavor without overpowering the chicken.
- Lemon zest: Brightens the coating and pairs perfectly with the crispy breading.
- Avocado oil: Ideal for frying thanks to its high smoke point, though canola or vegetable oil also work.
- Flaky salt and lemon wedges: The finishing touches that take this chicken from good to great.
Don’t let the ingredient list fool you. Most of these are pantry staples, and together they create a crispy, golden chicken dinner that’s well worth the few extra minutes of prep.

Jesseca’s Recipe Review
This feels a little fancy but is surprisingly easy once you get started. I tested it with both chicken breasts and thighs, and while both were delicious, I kept coming back to the thighs. They’re juicy, flavorful, and much more forgiving, which makes them perfect for cooking chicken thighs in a frying pan.
Tip from Jesseca:
Don’t skip the 5 to 10 minute rest after breading the chicken. It gives the coating time to adhere, which means less breading falling off in the pan and a crispier finished result.
Crispy Chicken Thigh Variations
A few simple swaps can completely change the flavor while keeping that crispy, golden coating everyone loves.
- Use chicken breasts instead of thighs. Pound them to an even thickness and reduce the cooking time slightly to avoid overcooking.
- Add a little heat. Mix ½ teaspoon of cayenne pepper or red pepper flakes into the breadcrumb mixture for a spicy version.
- Try different seasonings. Swap the Italian seasoning for ranch seasoning, Cajun seasoning, or your favorite all-purpose blend to create a new flavor profile.
- Skip the Parmesan. The recipe will still be delicious if you don’t have Parmesan on hand. The panko coating provides plenty of crunch on its own.
- Make it gluten-free. Use your favorite gluten-free flour and gluten-free panko breadcrumbs.
- Brighten it for summer. Serve with extra lemon wedges and a simple cucumber salad for a lighter meal that’s perfect during warmer months.
- Turn it into sandwiches. Tuck the crispy chicken into toasted buns with lettuce, tomato, and a simple sauce for an easy chicken sandwich dinner.
Don’t be afraid to make this recipe your own. The basic technique stays the same, which means you can experiment with flavors and ingredients while still ending up with crispy, flavorful chicken every time.
Why Chicken Thighs Work Better Than Breasts for Frying
This recipe works with either chicken thighs or chicken breasts, but if you’re asking for my preference, it’s chicken thighs every time.
Why I love using chicken thighs:
- They stay juicier. The extra fat helps keep the meat tender while frying.
- They’re more forgiving. A minute or two of extra cooking time won’t dry them out as quickly as chicken breasts.
- They have more flavor. Thighs naturally have a richer taste that pairs perfectly with the crispy breading.
- They’re beginner-friendly. If you’re new to frying chicken at home, thighs are much easier to get right.
Chicken breasts are still a great option and work well in this recipe. Just keep a close eye on the cooking time since they can dry out more quickly. If your goal is crispy fried chicken with the best chance of juicy, flavorful results, boneless skinless chicken thighs are hard to beat.
Best Oil for Frying Chicken
Choosing the right oil can make a big difference when frying chicken. The goal is to use an oil with a high smoke point and a neutral flavor so the crispy coating can shine.
My favorite option is avocado oil because it handles high heat well and has a clean, mild taste. If you don’t have avocado oil on hand, canola oil and vegetable oil are also excellent choices and work just as well for this recipe.
Best oils for frying chicken:
- Avocado oil: High smoke point and neutral flavor.
- Canola oil: Affordable and widely available.
- Vegetable oil: A reliable option that produces crispy results.
- Peanut oil: Great for frying, though not ideal if you’re serving anyone with peanut allergies.
I generally avoid olive oil for frying chicken. While it’s great for sautéing and roasting, it has a lower smoke point and a stronger flavor that can compete with the crispy breading.
No matter which oil you choose, try to keep it around 350°F while frying. That temperature helps the coating become golden and crisp without absorbing excess oil.
Your Crispiest Chicken Thighs Questions, Answered
Absolutely. Chicken breasts work well in this recipe, but they cook a little faster and can dry out more easily, so keep an eye on them.
The most common reason is skipping the resting time after breading. Let the chicken sit for 5 to 10 minutes before frying so the coating has time to adhere.
The easiest way is to use an instant-read thermometer. Chicken thighs should reach 175°F, while chicken breasts should reach 165°F.
Yes, but the coating won’t be quite as light and crispy. Panko breadcrumbs give the best crunch.
Mashed potatoes, roasted vegetables, macaroni and cheese, coleslaw, or a simple salad all make great side dishes.
Storage and Reheating
This crispy chicken thigh recipe is easy to prep ahead and tastes great the next day, making it a solid option for busy weeks.
- Refrigerator: Store cooled chicken in an airtight container for up to 4 days.
- Freezer: Freeze cooked chicken in a freezer-safe container for up to 3 months. Thaw overnight in the refrigerator before reheating.
- Make Ahead: Bread the chicken up to 8 hours in advance and store it covered in the refrigerator until you’re ready to cook.
- Reheating: For the best texture, reheat in a 375°F oven or air fryer for 5 to 8 minutes, or until warmed through. This helps bring back the crispy coating far better than the microwave.
One of my favorite things about this recipe is that the leftovers don’t go to waste. The chicken is just as delicious sliced onto a salad, tucked into a sandwich, or served alongside a few simple sides the next day.
Want to save this recipe?
Enter your email below & we’ll send it to your inbox. Plus get great new recipes from us every week!
Pan Fried Chicken Thighs
Ingredients
Chicken
- 1½ pounds boneless skinless chicken thighs or breasts
- 1 teaspoon kosher salt
- ½ teaspoon black pepper
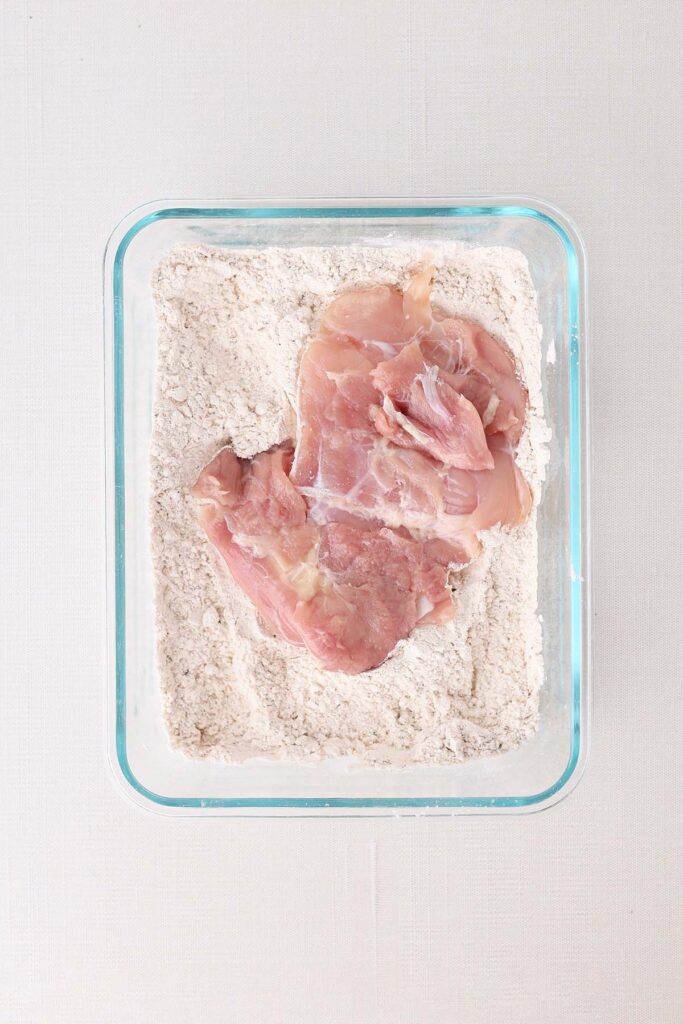
Flour Dredge
- 1 cup flour
- 1 teaspoon seasoning salt
- 1½ teaspoons garlic powder
- 1 teaspoon onion powder
- 1 teaspoon paprika
- ½ teaspoon black pepper
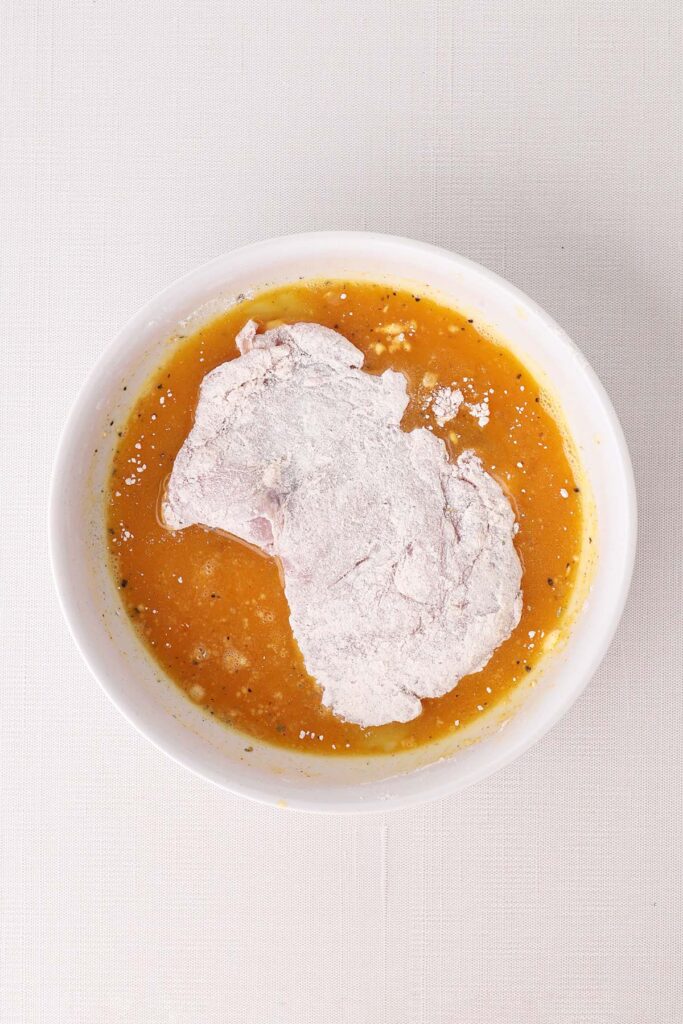
Egg Wash
- 2 eggs
- 1 tablespoon water
- ½ teaspoon salt
- ¼ teaspoon black pepper
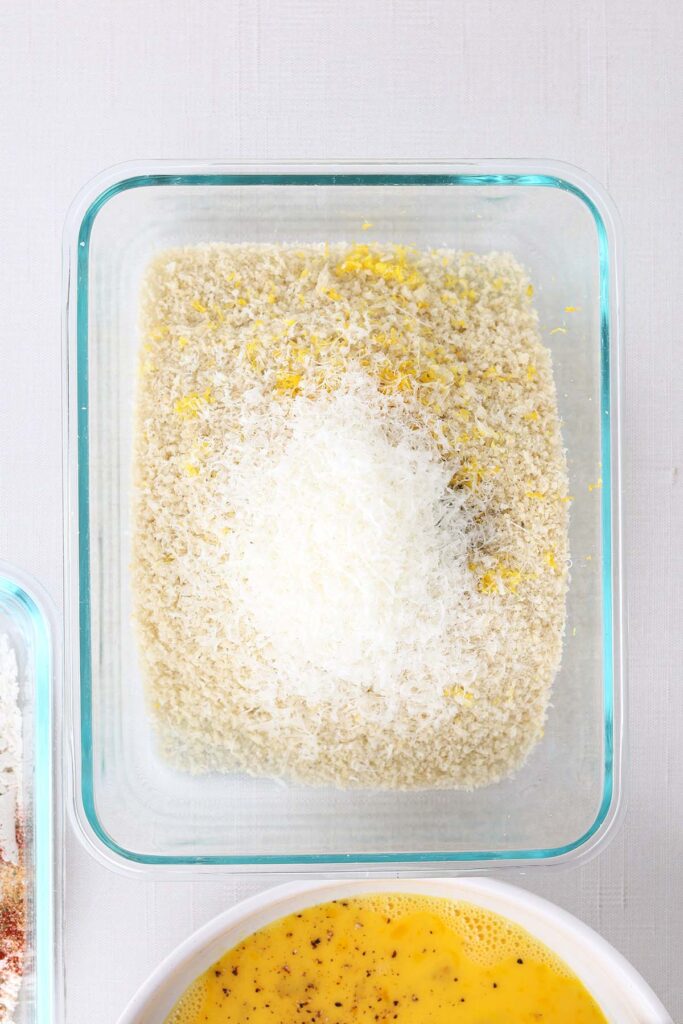
Breadcrumb Coating
- 1½ cups panko
- ¼ cup finely grated Parmesan
- 1 teaspoon salt
- 1 teaspoon garlic powder
- 1 teaspoon onion powder
- 1 teaspoon Italian seasoning
- Zest of 1 lemon
Finish
- Avocado oil (for frying)
- Flaky salt
- Lemon wedges
Instructions
- Place the chicken between two sheets of plastic wrap and pound to an even ¼-inch thickness.
- Season both sides of the chicken with the kosher salt and black pepper.
- In a shallow bowl, whisk together the flour, seasoning salt, garlic powder, onion powder, paprika, and black pepper.
- In a second shallow bowl, whisk together the eggs, water, salt, and black pepper.
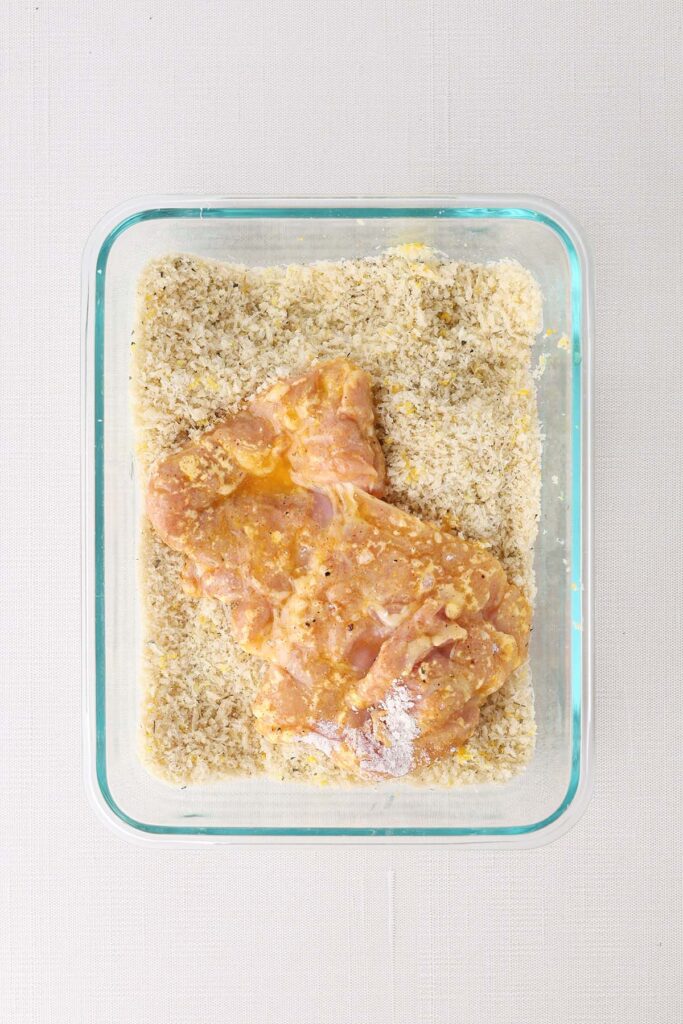
- In a third shallow bowl, combine the panko, Parmesan cheese, salt, garlic powder, onion powder, Italian seasoning, and lemon zest.
- Dredge each piece of chicken in the flour mixture, shaking off any excess.
- Dip into the egg mixture, allowing any excess to drip off.
- Press firmly into the panko mixture, coating both sides evenly.
- Place the breaded chicken on a wire rack and let rest for 5 to 10 minutes. This helps the coating adhere during cooking.
- Pour about ¼ inch of avocado oil into a large skillet and heat over medium heat until the oil reaches 350°F.
- Carefully add the chicken to the hot oil, working in batches if needed. Cook until golden brown and crisp:
- Chicken thighs: 3 to 4 minutes per side, or until the thickest part reaches 175°F. Chicken breasts: 2 to 3 minutes per side, or until they reach 165°F.
- Transfer to a clean wire rack and immediately sprinkle with flaky salt.
- Serve warm with lemon wedges and an extra squeeze of fresh lemon juice, if desired.
Notes
- Letting the breaded chicken rest before frying helps the coating stay attached.
- Maintain an oil temperature of 350°F for the crispiest results.
- Chicken thighs are more forgiving and stay juicier, but chicken breasts work well too.
- Reheat leftovers in the oven or air fryer to help restore the crispy coating.
The nutrition facts provided are calculated using a third-party tool and are estimates only. Actual nutritional content may vary based on the ingredients and brands you use, as well as portion sizes. For accurate results, please consult a registered dietitian or nutritionist.