
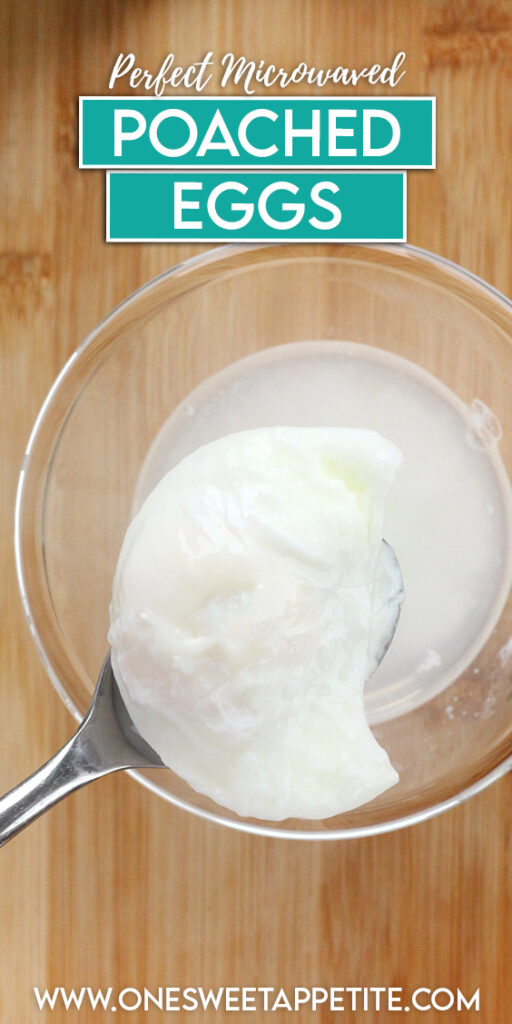
Microwave Poached Eggs
This post may contain affiliate links.
These Microwave Poached Eggs are the fastest way to make perfectly poached eggs at home. Using just an egg, water, and a microwave-safe bowl, you can make a poached egg with a tender white and runny yolk in about 90 seconds. No special equipment, no boiling water, and no vinegar required.

Why Make Poached Eggs in the Microwave?
If you’ve ever tried poaching eggs on the stovetop, you know it can be a little hit or miss. Between simmering water, swirling techniques, and timing the perfect runny yolk, there’s a lot that can go wrong. That’s exactly why I started making poached eggs in the microwave.
- Ready in about 90 seconds. No waiting for a pot of water to boil.
- No special equipment needed. All you need is a microwave-safe bowl, water, and an egg.
- Perfect for one or two eggs. Great when you’re making breakfast for yourself and don’t want to dirty extra dishes.
- Easy to customize. Cook the egg for less time if you like a runny yolk or a little longer for a firmer center.
- Ideal for quick meals. Add a microwave poached egg to avocado toast, grain bowls, ramen, salads, or eggs Benedict.
After testing several versions of this method, I’ve found that preheating the water and covering the bowl gives the most reliable results. Once you learn the timing that works best for your microwave, making a poached egg becomes almost effortless.

Jesseca’s Recipe Review
I was fully prepared for this method to be a gimmick the first time I tried it. I’ve made poached eggs on the stovetop for years, and honestly didn’t think a microwave could produce the same results. I was wrong.
After testing different bowls, water amounts, and cook times, I found that preheating the water and covering the bowl made the biggest difference. The result is a tender egg white with a perfectly runny yolk, all without standing over a pot of simmering water.
Tip from Jesseca:
The exact cook time will depend on your microwave’s wattage. The first time you make this recipe, start with 30 seconds and check the egg before adding more time. Once you find the sweet spot for your microwave, you’ll be able to make perfect poached eggs in minutes.
Poached Egg Ingredients
One of the best things about making microwave poached eggs is how simple the ingredient list is. You only need a few basics to get started.
- Water: Hot water helps gently cook the egg and create that classic poached texture. While some recipes call for vinegar, I find it’s completely optional and not necessary for great results.
- Egg: Fresh eggs work best because the whites stay together more easily while cooking. Older eggs tend to spread more in the water.
- Salt and Pepper: Optional, but highly recommended for serving.
That’s it. Just an egg, water, and a microwave-safe bowl stand between you and a perfectly poached egg.
Ways to Serve Poached Eggs
A perfectly poached egg can instantly make even the simplest meal feel a little special. The runny yolk acts like its own sauce, adding richness and flavor to whatever it’s paired with.
- Avocado Toast: My favorite quick breakfast. Place a poached egg on top of mashed avocado and finish with flaky salt and cracked pepper.
- Eggs Benedict: Layer the egg on a toasted English muffin with Canadian bacon and hollandaise sauce for a classic brunch favorite.
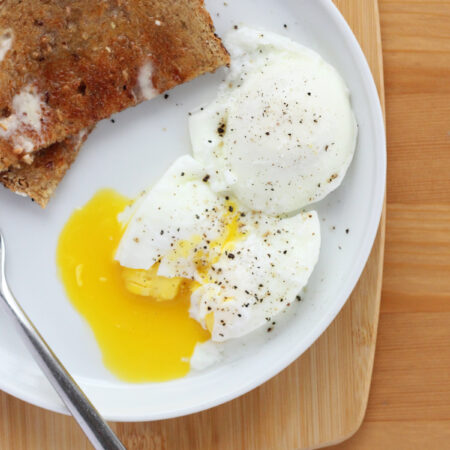
- Toast or Artisan Bread: Sometimes simple is best. Serve on buttered toast with a sprinkle of salt and pepper.
- Breakfast Bowls: Add a poached egg to roasted potatoes, breakfast sausage, and vegetables for an easy protein-packed meal.
- Ramen: A runny yolk takes instant ramen to the next level.
- Salads: Add a poached egg to a green salad for a restaurant-worthy lunch.
- Grain Bowls: Serve over rice, quinoa, or farro with roasted vegetables and your favorite dressing.
- Hash: Pair with crispy breakfast potatoes, onions, and peppers for a hearty breakfast or brunch.
If you ask me, the best way to enjoy a microwave poached egg is on a thick slice of toast. It’s quick, satisfying, and lets that perfectly runny yolk steal the show.

Microwave Poached Egg Timing Chart
Every microwave cooks a little differently, so think of these times as a starting point rather than a strict rule. The goal is to cook the whites until they’re set while leaving the yolk exactly how you like it.
| Desired Texture | Microwave Time* |
|---|---|
| Very Runny Yolk | 30 seconds |
| Soft, Jammy Yolk | 45 seconds |
| Medium Yolk | 60 seconds |
| Firm Yolk | 75 seconds |
*Times are based on a single large egg cooked in hot water. Your microwave’s wattage may require slight adjustments.
If the egg isn’t quite done, continue cooking in 10 to 15-second intervals until it reaches your preferred doneness. It’s much easier to add more time than it is to fix an overcooked egg.
My sweet spot: In my microwave, 30 seconds gives me a perfectly runny yolk that’s ideal for toast, avocado toast, ramen, and eggs Benedict.


Frequently Asked Questions
No. While some recipes call for a splash of vinegar, I’ve found that it’s completely optional. Fresh eggs naturally hold their shape well, and the microwave method works beautifully without it.
Yes! A microwave-safe coffee mug works just as well as a ramekin or bowl. Just make sure the egg is fully submerged in water and that the mug is large enough to prevent spills.
Eggs can explode when steam builds up inside the yolk. Gently piercing the yolk with a toothpick before cooking helps release pressure and prevents messy surprises.
Yes, but you’ll need a larger bowl and a little extra cooking time. Add the eggs to the same bowl of water and increase the cook time by 15 to 30 seconds, checking frequently to avoid overcooking.
The key is to start with shorter cook times. Check the egg after 30 seconds and continue cooking in small increments until the whites are set and the yolk reaches your preferred consistency.

Want to save this recipe?
Enter your email below & we’ll send it to your inbox. Plus get great new recipes from us every week!
Microwaved Poached Egg Recipe
Ingredients
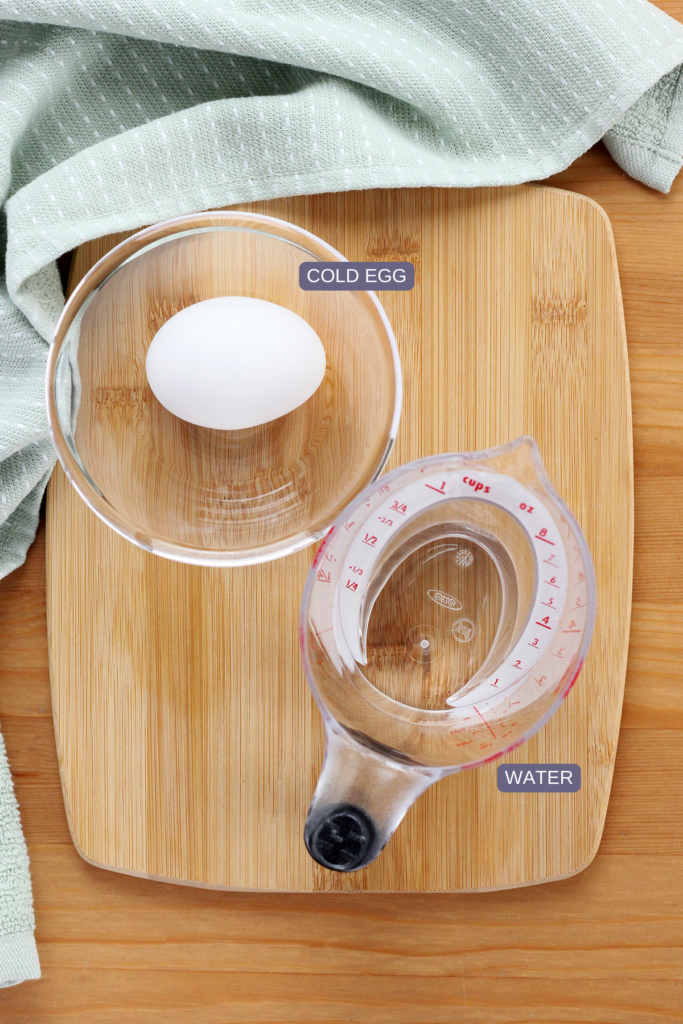
- 1/4 cup water
- 1 large egg (cold)
Instructions
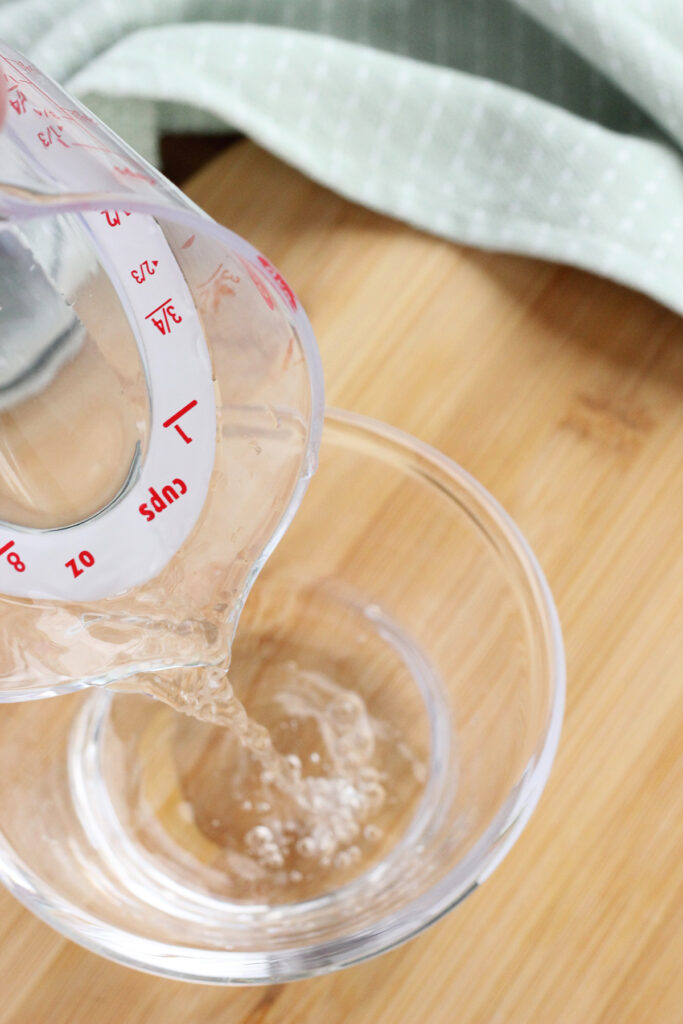
- Pour about 1/4 cup of cold water into a bowl, mug, or small ramekin. Heat for 1 minute in the microwave.
- Gently crack a single egg into the hot water, ensuring it’s fully submerged. Gently pierce the egg yolk with a toothpick to prevent it from exploding, but making sure not to press too hard.
- Place a microwave-safe plate or lid on top of the bowl. This helps steam the egg.
- Microwave on high for 30 seconds. Microwaves vary, so you might need to adjust the cook times. The goal is for the whites to be set but the yolk still runny.
- Once cooked, carefully remove the bowl (it’ll be hot!) and gently lift the egg out with a slotted spoon. Let it drain on a paper towel.
- Season with salt and pepper, and serve as desired.
Notes
Nutrition
The nutrition facts provided are calculated using a third-party tool and are estimates only. Actual nutritional content may vary based on the ingredients and brands you use, as well as portion sizes. For accurate results, please consult a registered dietitian or nutritionist.


how long do you ZAP the eggs?