
Baked Taco Shells
This post may contain affiliate links.
Get ready to take your taco game to the next level with this baked taco shells recipe! Say goodbye to store-bought shells and hello to crispy, homemade perfection. With just a few simple ingredients and easy steps, you’ll have golden-brown taco shells ready to be filled with your favorite toppings.
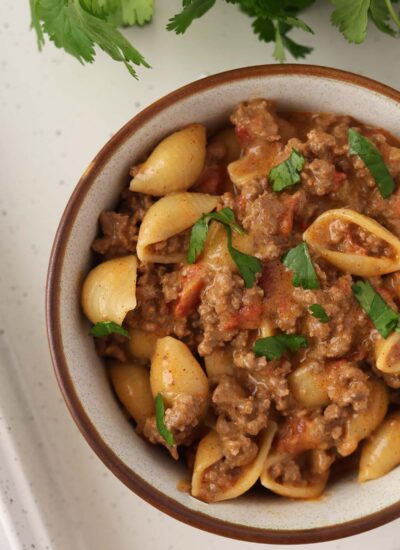
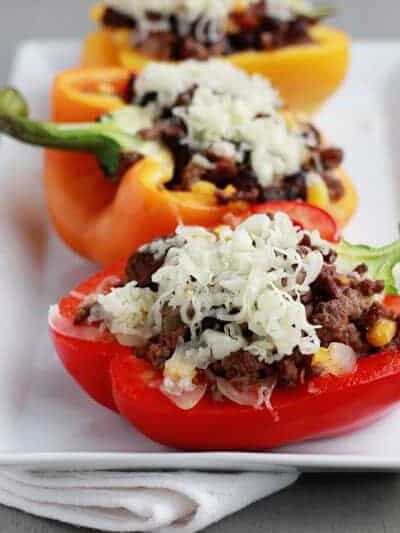
Try filling these with homemade taco meat, shredded chicken, or any of your favorite taco toppings!

Why You’ll Love These Crispy Taco Shells
- Texture and Taste: Some people prefer the texture and taste of baked shells over fried ones. Baking can result in a lighter, crispier shell without the greasy aftertaste often associated with frying.
- Ease of Preparation: Baking taco shells is generally simpler and less messy than frying. It requires less supervision and cleanup, making it a convenient option for busy individuals or those with limited kitchen space.
- Customization: With baked shells, you have the flexibility to experiment with different seasonings and toppings to create unique flavor profiles that suit your preferences.
If you didn’t know, I actually am Hispanic. I know what a good authentic taco tastes like. That being said, I also live for a good Americanized taco. These crispy baked shells are seriously so delicious and the perfect addition to taco night. Is it the best way to fry a shell? I’ll let you decide!
When you bake corn tortillas with a bit of cooking spray it gives them a delightful crunch that is hard to resist, especially with beef tacos. It’s not as oily as its fried cousin, but it’s got all the charm to make your taco fillings feel right at home. You can also make so many at one time, which makes your taco Tuesday prep easy as pie.

Oven Baked Taco Shell Ingredients
Here’s what you’ll need for this crispy escapade:
- Tortillas: Corn tortillas are traditionally used in tacos and have a distinct, earthy taste that pairs wonderfully with a variety of fillings. Plus, they’re naturally gluten-free, which is great for those with dietary restrictions. I wouldn’t recommend this recipe with flour tortillas. Save those for soft tacos.
- Cooking Oil: I like to use avocado oil, it has less taste than other oils which helps the tortilla to shine through. That being said, you can use any cooking oil or cooking oil spray for this recipe. We tested it with avocado oil, olive oil, and canola or vegetable oil. Both worked fine.
- Optional: Seasonings: You’ll be amazed what a sprinkle of salt can do in the flavor department. Not necessary, but a delightful addition.


Taco Shell Seasonings
These seasoning blends are 100% optional but a fun way to add a layer of flavor. Here are some taco seasoning combos that’ll make your taco shells go from basic to brilliant:
- Classic Tex-Mex: Mix cumin, garlic powder, paprika, and a pinch of cayenne pepper. This gives a warm, smoky, and slightly spicy kick.
- Chili-Lime Zest: Combine chili powder with some lime zest for a tangy, spicy twist. It’s zesty, vibrant, and adds a nice pop!
- Smoky Chipotle: Chipotle powder or smoked paprika mixed with a bit of onion powder offers a deep, smoky flavor that’s hard to resist.
- Herb Bliss: A mix of dried oregano, garlic powder, and onion powder for an aromatic and earthy touch. It’s subtle but adds a nice herby background note.
- Cheesy Fiesta: Sprinkle some nutritional yeast or parmesan for a cheesy, nutty flavor. It’s like a taco and cheese party in your mouth!
How To Make Crispy Taco Shells In The Oven
Here’s a step-by-step guide for making crispy homemade taco shells using this clever hack:
- Preheat Oven: Heat the oven to 375°F (190°C). This high heat is key for getting that perfect crisp.
- Prep the Tortillas: If your tortillas are a bit stiff, warm them slightly in the microwave (wrapped in a damp paper towel) for about 20-30 seconds. This makes them more pliable and less likely to crack when you mold them.
- Oil and Season: Lightly spray or brush both sides of each tortilla with cooking oil. If you’re using seasonings, now’s the time to sprinkle them on.
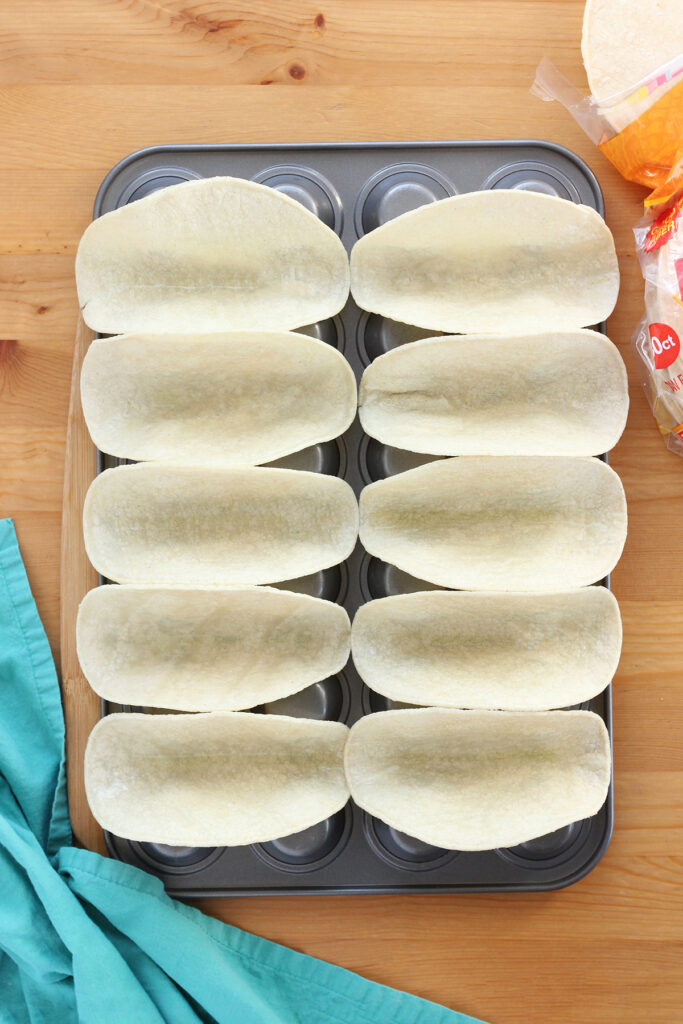
- Shape the Shells: Flip your cupcake tin upside down. Gently fold each tortilla in half, creating a taco shell shape, and place between the cupcake molds. The edges of the tortillas will rest on the raised parts of the tin, holding the taco shape in place.
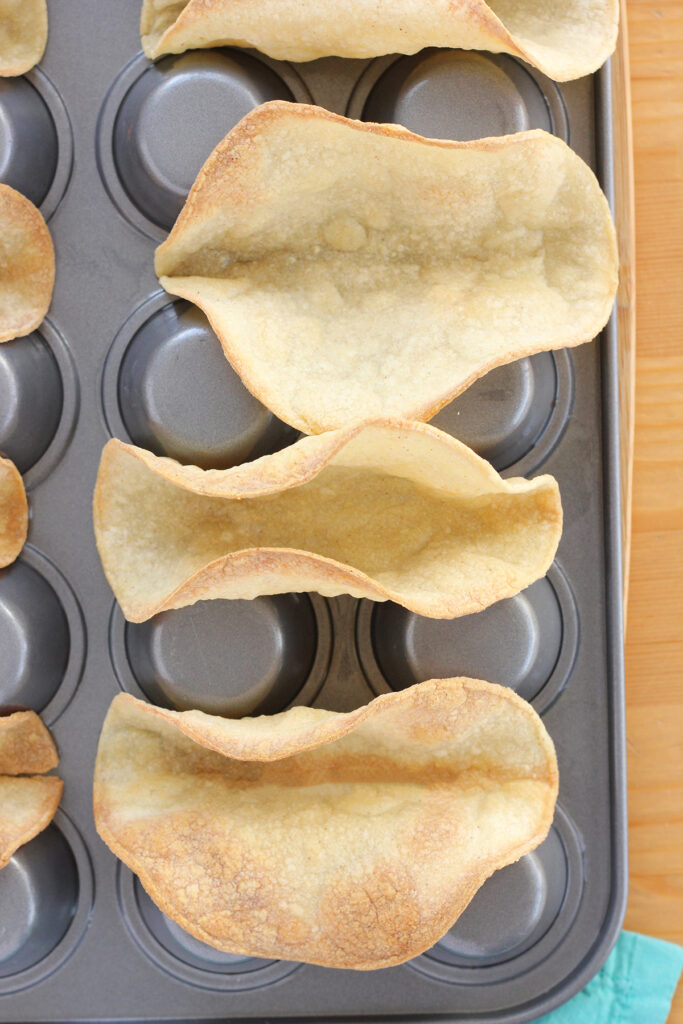
- Bake: Slide the tin into the oven and bake for about 8-10 minutes. Keep an eye on them – you want them golden and crispy, but not burnt.
- Cool and Serve: Use tongs to carefully remove the shells from the tin. Let them cool to room temperature for a minute or two – they’ll crisp up even more as they cool. Now, they’re ready to be filled with your favorite meat mixture and taco fixings!
Helpful Tools
Crafting baked tacos or taco shells is like a mini kitchen expedition, and having the right tools makes all the difference. Here are some helpful tools that’ll turn this task into a breeze and perhaps give your readers some cool kitchen gadget ideas for their next taco night:
- Pastry Brush or Oil Sprayer: For evenly coating your tortillas with oil. A brush or sprayer gives you control over the amount, ensuring a light, even coat for that perfect crisp.
- Cupcake or Muffin Tin: The star hack for shaping taco shells. Turn it upside down, and you have a perfect mold for your taco shells. It’s a game-changer!
- Tongs: For safely flipping and removing hot tortillas from the oven. No burnt fingers here!
- Cooling Rack: Ideal for letting your freshly baked shells cool and crisp up even more. A rack ensures air circulation, avoiding any sogginess.

Recipe Notes:
To avoid cracking, warm the tortillas first. You can do this by microwaving them between damp paper towels for 20-30 seconds. This makes them more pliable and easier to shape.
No need to grease the tin since you’re using it upside-down. However, lightly oiling or spraying your tortillas is recommended for crispiness and flavor.
Typically, it takes about 8-10 minutes in a 375°F (190°C) oven. But keep an eye on them! Oven temperatures can vary, and you don’t want them to burn.
Let them cool completely and store them in an airtight container. They’ll stay crisp for a few days. To re-crisp them, just pop them back in a warm oven for a few minutes.
Yes, you can bake them ahead of time and reheat them in the oven when ready to serve. They’re perfect for meal prep or for serving at parties.
Let the shells cool slightly after baking – they become sturdier as they cool. Hold the shell gently and don’t overstuff. It’s all about that delicate balance!


Still Hungry? Follow One Sweet Appetite on Instagram, Pinterest, and Facebook!
Want to save this recipe?
Enter your email below & we’ll send it to your inbox. Plus get great new recipes from us every week!

Crispy Baked Taco Shells
Ingredients
- 8 corn tortillas (we like white corn)
- cooking oil or cooking oil spray
Instructions
- Heat the oven to 375°F (190°C).
- If your tortillas are a bit stiff, warm them slightly in the microwave (wrapped in a damp paper towel) for about 20-30 seconds. This makes them more pliable and less likely to crack when you mold them.
- Lightly spray or brush both sides of each tortilla with cooking oil. If you’re using seasonings, now’s the time to sprinkle them on.
- Flip your cupcake tin upside down. Gently fold each tortilla in half, creating a taco shell shape, and place between the cupcake molds. The edges of the tortillas will rest on the raised parts of the tin, holding the taco shape in place.
- Slide the tin into the oven and bake for about 8-10 minutes. Keep an eye on them – you want them golden and crispy, but not burnt.
- Use tongs to carefully remove the shells from the tin. Let them cool to room temperature for a minute or two – they’ll crisp up even more as they cool. Now, they’re ready to be filled with your favorite meat mixture and taco fixings!
Notes
The nutrition facts provided are calculated using a third-party tool and are estimates only. Actual nutritional content may vary based on the ingredients and brands you use, as well as portion sizes. For accurate results, please consult a registered dietitian or nutritionist.


A great way to cut the greasy taco syndrome. Also they are quick and easy
Totally agree. These are such a great way to ditch the grease without losing the crunch. Plus, they’re quick, easy, and perfect for busy weeknights!