Butterfinger Poke Cake
This post may contain affiliate links.
Butterfinger Poke Cake – Easy and Gooey Chocolate Dessert! This recipe is perfect for all the chocolate peanut butter lovers out there, combining moist cake layers with that iconic Butterfinger crunch. Perfect for sharing—if you’re feeling generous—but we wouldn’t blame you for keeping it all to yourself.
Don’t forget to browse more of our cake recipes! Some fan favorites to try? My Oreo Poke Cake, Chocolate Peanut Butter Mug Cake, and Chocolate Peanut Butter Cupcakes!

Why You’ll Love this Recipe
- Perfect for Leftover Halloween Candy: Got a stash of Butterfingers? This recipe turns those extras into something truly spectacular.
- Crowd-Pleaser: Whether it’s a potluck, birthday party, or family gathering, this cake is sure to impress and satisfy everyone’s sweet tooth.
- A Treat for All Ages: Kids and adults alike will love the combination of soft cake and crunchy Butterfinger pieces—there’s something for everyone to enjoy!
Okay, imagine this: you’ve got this super moist chocolate cake, right? Now, poke a bunch of holes in it—bear with me—and pour over a heavenly mix of caramel and sweetened condensed milk. The cake just soaks it all up like a sponge, turning into the most insanely rich and gooey dessert you can imagine. It’s like every bite melts in your mouth, with that caramel goodness oozing through every layer.
But here’s where it gets even better. You sprinkle crushed Butterfinger pieces all over the top, letting them sink into the cake and mix with that caramel sauce. The combination of the soft cake and crunchy Butterfinger is just unreal. Seriously, it’s like your favorite candy bar and the best cake you’ve ever had got together and decided to throw a party in your mouth. Trust me, you’ll be hooked from the first bite!

Ingredients You Need
To make your Butterfinger Cake recipe absolutely perfect, here are some pro tips for each ingredient.
- Chocolate Cake Mix: Opt for a high-quality chocolate cake mix for the best flavor.
- Flour: Adding a tablespoon or two of flour to the cake mix helps create a slightly denser cake, which is perfect for soaking up all that caramel and sweetened condensed milk goodness without falling apart.
- Buttermilk: Swap out water for buttermilk to give your cake a richer flavor and tender crumb.
- Eggs: Use room temperature eggs for a smoother batter and a more evenly baked cake.
- Oil: Stick with a neutral oil like vegetable or canola oil for a moist cake that doesn’t overpower the chocolate flavor.
- Butterfinger Candy Bars: For the best crunch, freeze the Butterfingers before chopping. This makes them easier to break into nice, even pieces without too much mess.
- Sweetened Condensed Milk: Warm the sweetened condensed milk in a bowl slightly before pouring it over the cake—it helps it soak into the cake more evenly, making every bite ultra-moist and flavorful.
- Caramel Ice Cream Topping: Choose a thick, high-quality caramel sauce for the topping. If it’s too thin, the flavor might get lost in the cake, so you want something that’ll really stand out.
- Whipped Topping (like Cool Whip or Homemade Whipped Cream): If you’re using store-bought whipped topping, fold it gently before spreading to keep it light and fluffy. For homemade whipped cream, add a little vanilla extract for an extra touch of flavor.

Jesseca’s Recipe Review
This Butterfinger poke cake is a total show-off—and I mean that in the best way. It’s rich, gooey, and absolutely loaded with that crispy peanut buttery crunch we all secretly (or not so secretly) love. I made this for a weekend get-together, and not a single crumb made it out alive. It’s the kind of dessert that has people scraping the pan “just to even it out.”
Tip from Jesseca:
For the ultimate texture, freeze your Butterfingers before chopping. It keeps them crisp and helps avoid that sticky, melty mess when folding them into the warm cake or sprinkling on top. Also, don’t skip the chill time—this cake gets better the longer it sits.
Recipe Variations
- White or Chocolate Cake Mix: Swap the chocolate cake mix for white or yellow cake if you prefer a lighter flavor. The Butterfinger pieces will still shine, and it’ll give the cake a different but equally delicious twist.
- Other Candy Options: Not a Butterfinger fan? No worries! Try using chopped Snickers, Reese’s Peanut Butter Cups, or Heath bars instead. Each candy brings its unique flavor, making this cake endlessly customizable.
- Frosting Variations: While whipped topping is light and fluffy, you could go richer with chocolate ganache, cream cheese frosting, or even a thick layer of peanut butter frosting. Each option adds a new level of indulgence to your cake.
- Crushed Cookies Instead of Candy: If you’re out of candy or just want to switch things up, crushed cookies like Oreos, Nutter Butters, or even chocolate chip cookies work great as a topping. They add a different kind of crunch and flavor that pairs perfectly with the sweet toppings.

How to Make Butterfinger Poke Cake
This cake is the stuff dessert dreams are made of—and it’s so simple to pull off.
- Prep it: Preheat your oven to 350°F and spray a 9×13 pan with baking spray.
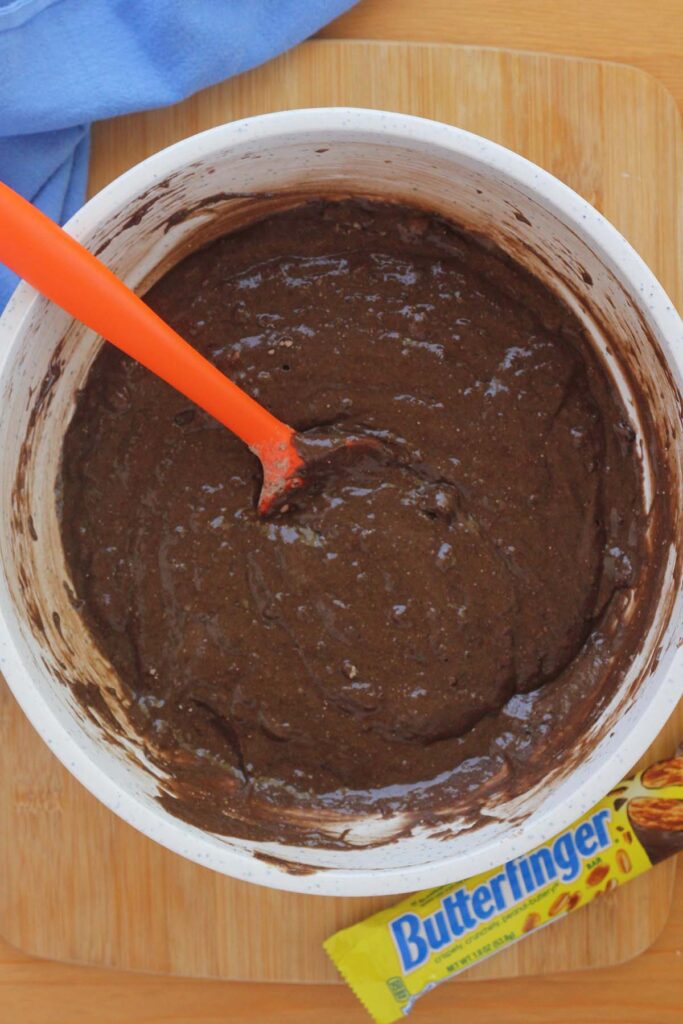
- Mix it: Combine the cake mix, eggs, oil, buttermilk, and flour. Stir until smooth, then fold in one chopped Butterfinger bar.
- Bake it: Pour into the pan and bake 25–30 minutes, or until a toothpick comes out clean.
- Poke it: Cool for 5 minutes, then use a spoon handle to poke holes all over the cake.
- Soak it: Mix caramel sauce and sweetened condensed milk. Pour slowly over the cake so it sinks into every bite. Sprinkle with more chopped Butterfinger.
- Chill it: Cover and refrigerate for at least 2 hours.
- Top it: Just before serving, spread on whipped topping and add more Butterfinger bits if you’re feelin’ fancy.


Storage Instructions
To keep your Butterfinger Cake fresh and delicious, follow these storage tips:
- Refrigerate: Cover the cake tightly with plastic wrap or aluminum foil and store it in the refrigerator. The cake will stay fresh for up to 3-4 days. The chilling process not only keeps the cake fresh but also helps the flavors meld together beautifully.
- Serving After Storage: Before serving, let the cake come to room temperature for about 15-20 minutes to bring back some of that soft, gooey texture. If you’ve frozen the cake, allow it to thaw completely in the fridge before serving.

Recipe FAQs
The filling inside Butterfingers is a unique blend of crispy, flaky layers of peanut butter and sugar that’s been cooked and cooled to create that signature crunchy texture we all love.
The name “Butterfinger” was actually chosen through a public contest back in the 1920s. The term “butterfingers” was a popular slang for someone who was clumsy, like someone who might let a ball slip through their fingers. The name stuck, and now it’s synonymous with that delicious candy bar.
A poke cake is a cake that’s baked, then poked all over with holes using the handle of a spoon or similar tool. These holes are filled with a variety of liquids or fillings—like sweetened condensed milk, pudding, or jello—making the cake extra moist and flavorful as the fillings soak into the cake.
Absolutely! In fact, making it in advance is a great idea. The cake gets even better as it sits in the fridge, allowing all those delicious flavors to meld together. Just store it covered in the refrigerator, and it will be ready to serve when you need it.
The best way to crush Butterfingers is to freeze them for about 15 minutes first, then place them in a sealed plastic bag and use a rolling pin or the bottom of a heavy pan to crush them into pieces. This method keeps the pieces from sticking together and makes it easy to get the perfect size for your cake.

Want to save this recipe?
Enter your email below & we’ll send it to your inbox. Plus get great new recipes from us every week!

Butterfinger Cake
Ingredients
- 1 (15.25oz) chocolate cake mix
- 1/4 cup flour
- 1 1/3 cup buttermilk
- 3 large eggs
- 1/2 cup oil
- 2 butterfinger candy bars (more for garnish)
- 1 (14oz) sweetened condensed milk
- 1 (12oz) jar caramel ice cream topping
- 8 oz cool whip
Instructions
- Preheat the oven to 350°F (175°C).
- Spray a 13 x 9-inch baking pan with nonstick baking spray that includes flour and set aside while you prepare the cake.
- Combine the cake mix, flour, buttermilk, eggs and oil in a large mixing bowl. Stir just until the mix is incorporated with the wet ingredients.
- Chop up one Butterfinger candy bar and mix it into the cake batter. Stir well so the pieces are evenly distributed.
- Pour the prepared batter into the baking pan. Place the pan in the preheated oven and bake according to the time on the cake mix package (usually 25-30 minutes). The cake is done when a toothpick inserted into the center comes out clean.
- After baking, let the cake cool in the pan for 5 minutes. Then, using the handle of a wooden spoon, poke holes all over the cake, spacing them about 1 inch apart. Make sure to poke about halfway through the cake.
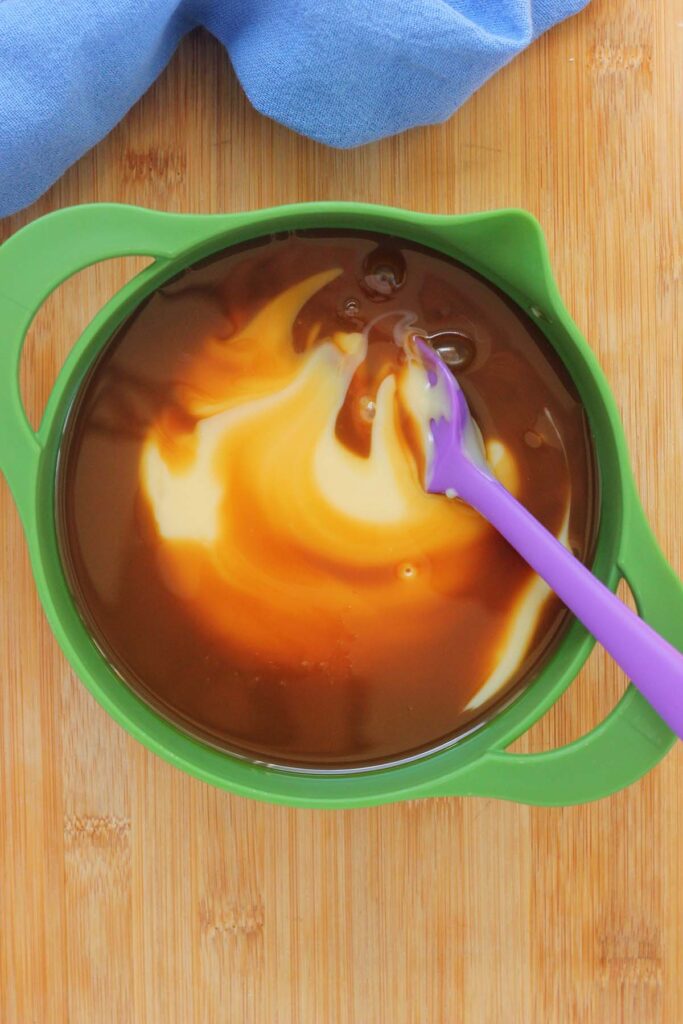
- Mix the sweetened condensed milk and caramel topping in a large measuring cup. Pour evenly over the cake, making sure they soak into the holes you just made. Then, sprinkle the remaining chopped Butterfinger over the top.
- Cover the cake with plastic wrap or aluminum foil and place it in the refrigerator to chill for at least two hours.
- Before serving, spread a layer of whipped topping evenly over the entire cake.
- If you like, sprinkle some extra chopped Butterfinger pieces on top of the whipped topping for added crunch and flavor.
Nutrition
The nutrition facts provided are calculated using a third-party tool and are estimates only. Actual nutritional content may vary based on the ingredients and brands you use, as well as portion sizes. For accurate results, please consult a registered dietitian or nutritionist.