
Butterscotch Sauce
This post may contain affiliate links.
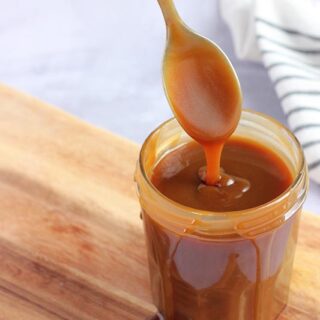
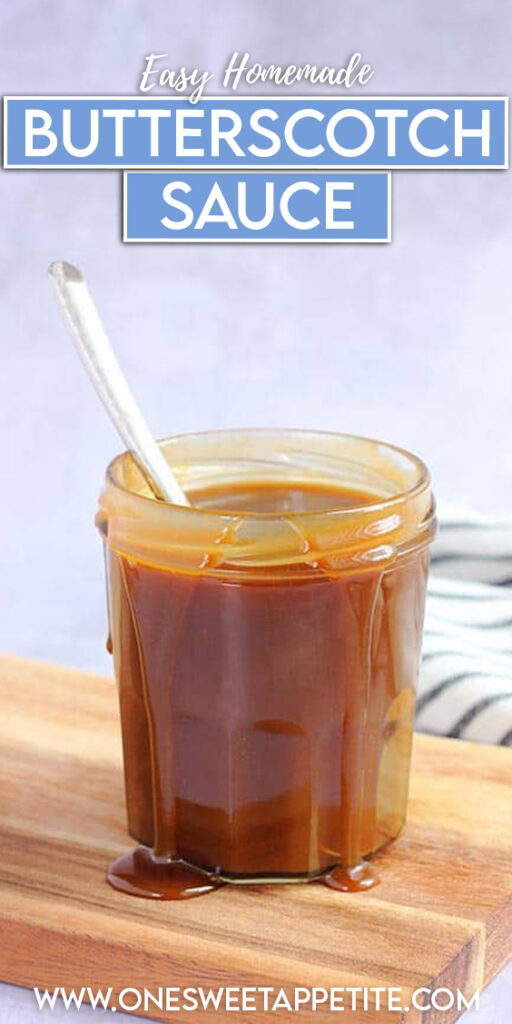
This butterscotch syrup recipe is dangerously easy and wildly delicious. Think buttery caramel vibes with half the effort. Perfect for drizzling over ice cream, pancakes, or straight from the spoon (no judgment). If you’ve got sugar, butter, and cream, you’re minutes away from your new go-to topping.
Some of our favorite ways to use this butterscotch syrup? Drizzled on vanilla ice cream, as a topping for Cheesecake, Harry Potter Butterbeer Cupcakes, on top of Banana Cream Pie, and stirred into a latte!
Why You’ll Love This Recipe
- Ice cream topping idea: Take your scoops to the next level with this warm, gooey butterscotch drizzle.
- Sweet sauces for pancakes or waffles: Move over maple—this syrup is a sweet, buttery upgrade for your breakfast favorites.
- Giftable homemade food ideas: Jar it up with a cute label and you’ve got a sweet, thoughtful edible gift.
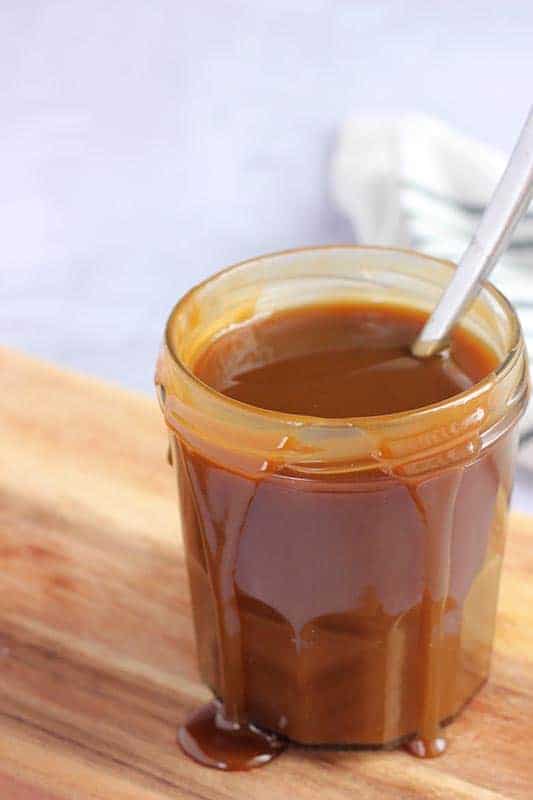
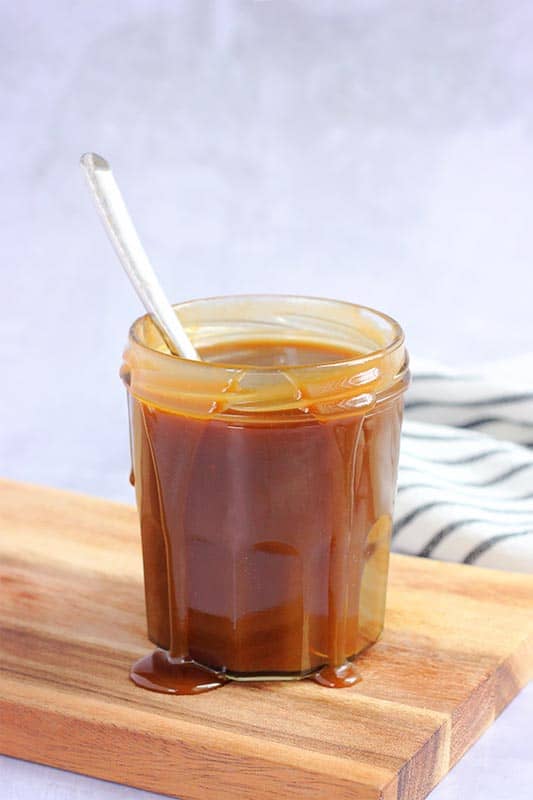
This butterscotch syrup is buttery, rich, and wildly easy to make. With just five ingredients and about 15 minutes, you’ll have a warm, caramel-like drizzle that instantly upgrades everything from ice cream to waffles.
It’s smooth, sweet, and totally pantry-friendly—no fancy tools or ingredients required. Once you try it, you’ll wonder how your desserts ever lived without it.
Ingredients You’ll Need
With just five simple ingredients, this butterscotch sauce comes together fast, but don’t let the simplicity fool you. Each one plays a key role in delivering that rich, buttery flavor that keeps people coming back for more.
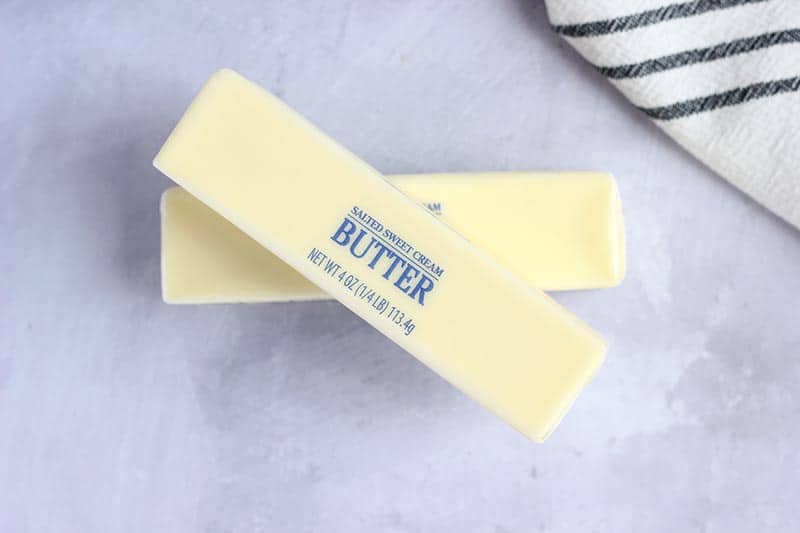
- Butter – Use unsalted butter so you can control the saltiness. It adds that classic, velvety base to the syrup.
- Brown Sugar – Light brown sugar gives a soft caramel flavor, while dark brown sugar adds deeper molasses notes. Either works!
- Heavy Cream – This makes the syrup thick, rich, and pourable. Room temperature cream helps it blend smoothly.
- Vanilla Extract – Adds warmth and depth. Use pure vanilla if you can. It really makes a difference.
- Salt – Just a pinch sharpens all the flavors and balances the sweetness. Don’t skip it!
Once everything’s in the pan, the magic happens fast. These pantry staples transform into a golden, spoon-licking syrup you’ll want to put on everything.

Jesseca’s Recipe Review
This butterscotch sauce is dangerously good. It’s the kind of recipe you make once and then suddenly find excuses to drizzle it on everything—ice cream, waffles, coffee, even straight from the spoon (don’t judge me). It’s rich, buttery, and comes together in minutes with pantry staples. Basically, a win for lazy-day cravings or last-minute dessert upgrades.
Tip from Jesseca:
For a deeper flavor, use dark brown sugar and let the syrup cook closer to the 5-minute mark before adding the cream. It adds a richer molasses note that’s chef’s kiss.
What Is The Difference Between Butterscotch and Caramel?
They might look similar and taste equally dreamy, but butterscotch and caramel are not the same. The key difference? It’s all about the sugar.
- Butterscotch is made with brown sugar and butter, which gives it that deep, molasses-y flavor and rich, buttery finish.
- Caramel, on the other hand, is made by heating white granulated sugar until it melts and browns, often with cream or butter added afterward for smoothness.
In short: caramel is a little more intense and slightly bitter, while butterscotch is warmer, cozier, and a whole lot easier to make at home.
Butterscotch Syrup Recipe
Making homemade butterscotch syrup is way easier than it sounds, and once you taste it, you’ll wonder why you ever bought the store stuff. It takes less than 15 minutes and uses ingredients you probably already have.
- Melt butter in a heavy-bottomed pot.
- Stir in brown sugar just until combined.
- Simmer (no stirring!) until bubbly and smooth, about 3–5 minutes.
- Whisk in cream, then reduce heat and cook until the temp hits 225°F.
- Remove from heat and stir in vanilla and salt.
- Cool and store in a jar in the fridge.
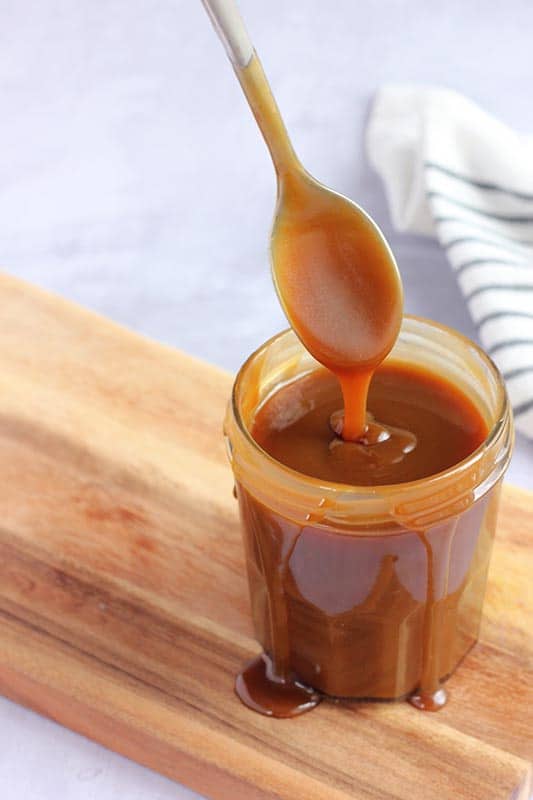
Let it cool completely, then get ready to drizzle it over everything. Ice cream, pancakes, coffee, you name it.
Recipe FAQs
Technically yes, but it won’t be as rich or thick. If you do swap, use whole milk and expect a thinner syrup.
This usually happens if the sugar was over-stirred or didn’t fully dissolve before adding the cream. Make sure to stop stirring once the sugar and butter are combined and let it cook undisturbed.
It’s highly recommended for consistent results. Hitting 225°F ensures the syrup is thick but still pourable. No thermometer? Aim for a slow bubble and test thickness by spooning a little on a plate and letting it cool briefly.
Microwave in 10–15 second bursts, stirring between each, or warm it gently in a saucepan over low heat.
Storage and Make-Ahead Instructions
This butterscotch topping stores like a dream, which makes it perfect for prepping ahead!
- To Store: Once the syrup has cooled completely, pour it into a glass jar or airtight container. Keep it in the refrigerator for up to 2 weeks. The texture may thicken slightly when chilled—just warm it in the microwave for 15–20 seconds and give it a stir before using.
- To Make Ahead: You can easily make this syrup a few days in advance for desserts, brunches, or gifting. It reheats beautifully and still tastes freshly made. Just don’t skip the airtight container—this helps keep the flavor and consistency just right.
Want to save this recipe?
Enter your email below & we’ll send it to your inbox. Plus get great new recipes from us every week!
Homemade Butterscotch Sauce
Ingredients
- 4 tablespoons butter
- 1 cup brown sugar
- 3/4 cup heavy cream
- 1 tablespoon vanilla extract
- 1/2 teaspoon salt
Instructions
- Melt the butter in a large, heavy-bottomed pot over medium-low heat. A stainless steel 2-quart saucepan works best for even cooking and easy cleanup.
- Add the brown sugar as soon as the butter is fully melted. Use a wooden spoon to stir just until the sugar is fully incorporated with the butter—no need to overmix.
- Let it cook undisturbed for 3 to 5 minutes. The mixture should begin to bubble and take on a smooth, caramel-like texture. Avoid stirring during this step to help the sugar dissolve evenly.
- Slowly whisk in the cream once the sugar mixture is smooth and bubbly. The mixture may bubble up—this is normal! Reduce the heat to low immediately after adding the cream.
- Continue cooking on low until the syrup reaches 225°F on a candy thermometer. This ensures the perfect thickness and texture.
- Remove from heat and stir in the vanilla extract and salt until fully combined.
- Cool the syrup completely before transferring to a glass jar. Store it in the refrigerator and use within two weeks for best flavor and texture.
Notes
- Try to avoid mixing the sugar mixture as it caramelizes.
- Use a wooden spoon to begin and transfer to a whisk once you add the cream.
- A good quality 2 quart pot is ideal for this sauce recipe.
- Add a small amount of the salt and vanilla, taste, and add more as needed.
Equipment
Nutrition
The nutrition facts provided are calculated using a third-party tool and are estimates only. Actual nutritional content may vary based on the ingredients and brands you use, as well as portion sizes. For accurate results, please consult a registered dietitian or nutritionist.


terima kasih untuk resepnya, rasanya sangat enak sekali🥰
Love this! Can it be canned for longer storage?
can this be kept on the pantry shelf? if yes how long?
Hi Jill, this sauce is best kept refrigerated and can be stored for up to eight weeks.