
Easy Cheesecake Recipe
This post may contain affiliate links.
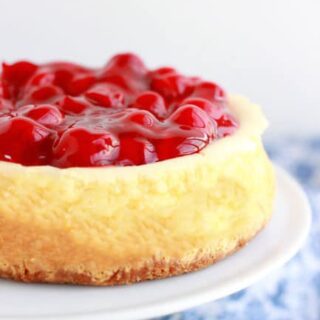
Classic Cheesecake is one of those desserts that stops you in your tracks. Silky smooth and a keeper for every occasion. Whether you’re baking it for a holiday, a birthday, or simply because you deserve a slice of something amazing, this cheesecake delivers that bakery-worthy taste right from your own kitchen.
Looking for a different option? Try making Cheesecake Bars! One of the most popular and no-fail recipes on my site that you can add almost any topping to.

Why This Cheesecake is a Keeper
- Best cheesecake recipe – Tried, tested, and loved by cheesecake fans.
- Holiday dessert – Show-stopping treat for Thanksgiving, Christmas, or any celebration.
- Make ahead dessert – Perfect for prepping before parties or holidays.
This cheesecake recipe is everything a cheesecake should be. Smooth, creamy, and just the right amount of sweet. With a buttery graham cracker crust and rich, tangy filling, it’s the kind of dessert that feels special but is easy enough for any home baker to master. Whether you’re making it for a holiday, birthday, or just a quiet night in, this recipe delivers consistent, bakery-quality results.
My brother and dad BEG me to make this for every family function. It’s won awards and wins the crowd every single time. Using tried-and-true methods, the right ingredients, and step-by-step guidance, you’ll have a dessert that’s as beautiful as it is delicious, and one you’ll want to make again and again.

Before You Start Baking
Now that you’re on board with making philidelphia cheesecake, let’s talk ingredients. The list is short, the flavors are big, and most of what you need is probably already in your kitchen.
- Graham crackers – Classic plain grahams give the crust structure; cinnamon-sugar versions can crumble when sliced.
- Cinnamon – Optional, but a pinch deepens the crust flavor.
- Butter – Salted butter binds the crumbs and adds richness.
- Cream cheese – Use original Philadelphia for the creamiest texture; skip low-fat for best results.
- Sugar – Granulated sugar sweetens without affecting texture.
- Milk – Whole milk gives the most richness, though 2% works in a pinch.
- Eggs – Large, at room temp, so the batter blends smoothly and bakes evenly.
- Sour cream – Adds creaminess and a subtle tang that balances sweetness.
- Vanilla – Pure extract for clean, warm flavor.
- All-purpose flour – Just enough to stabilize the batter for a dense yet fluffy bite.
Tip: Bring dairy and eggs to room temperature before starting, measure flour lightly to avoid a dense texture, and don’t rush the crust—press it firmly so it slices beautifully.
Note: I used my classic graham cracker crust with just a few tweaks for the base.

Jesseca’s Recipe Review
This Cheesecake recipe is hands-down my go-to dessert when I need something that impresses. The crust is buttery and firm, the filling is rich yet perfectly balanced, and every bite feels like it came straight from a bakery. I’ve tested a lot of cheesecakes over the years, but this one wins for both flavor and reliability.
Tip from Jesseca:
For the smoothest texture and zero cracks, make sure all your dairy and eggs are at room temperature before mixing, and resist the urge to open the oven while it bakes. Patience pays off here.
Cheesecake Toppings
One of the best parts about this dessert is dressing it up with toppings. You can keep it simple for a timeless look or go big for a show-stopping dessert. Here are a few ideas to inspire your next slice:
- Fresh berries – Strawberries, blueberries, raspberries, or a mix. Add a dusting of powdered sugar for an elegant finish.
- Fruit compote – Warm cherries, blueberries, or peaches simmered with a little sugar make a sweet, glossy topping.
- Chocolate ganache – A silky pour of melted chocolate and cream takes it over the top.
- Caramel sauce – Drizzle over each slice and sprinkle with flaky sea salt for a sweet-salty combo. My salted caramel sauce is a dreamy finish to this cake.
- Whipped cream – Light and fluffy, perfect for balancing the richness.
- Nut crunch – Toasted almonds, pecans, or hazelnuts add a satisfying bite.
- Cookie or candy pieces – Crushed Oreos, peanut butter cups, or toffee bits for extra indulgence.
Tip: Add toppings right before serving so they stay fresh and don’t soften the cheesecake’s surface.

Easy Cheesecake Recipe
This cheesecake comes together in simple steps and bakes to creamy perfection. Here’s the quick breakdown so you know exactly what to expect before diving in.
- Prep the crust – Mix crushed graham crackers, cinnamon, and melted butter until sandy, then press firmly into a springform pan.
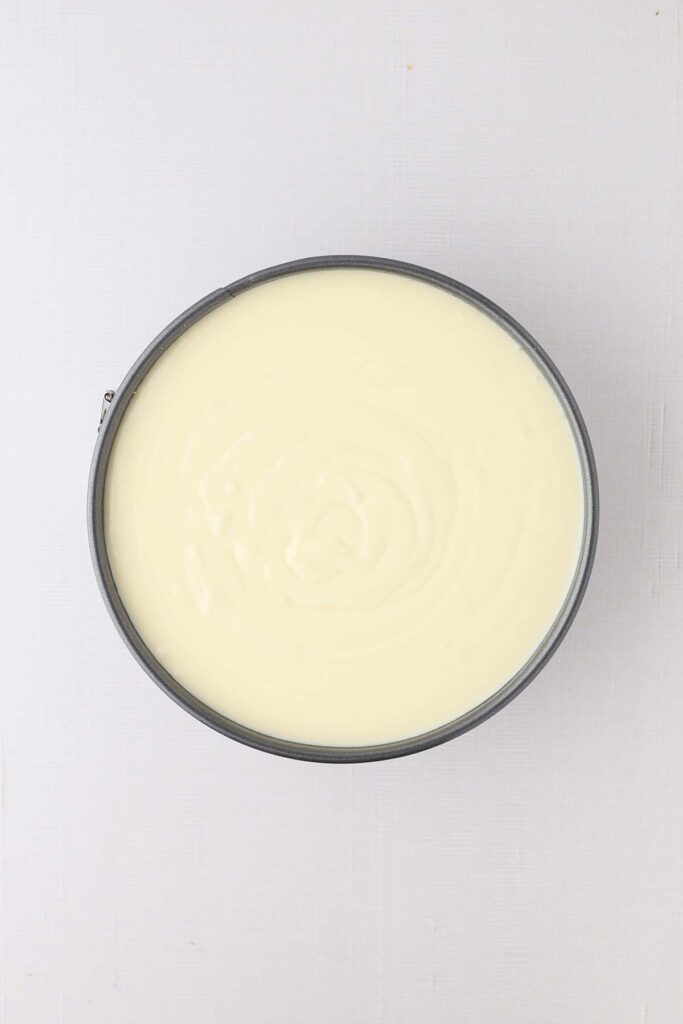
- Make the filling – Beat cream cheese, sugar, and milk until smooth. Whisk in eggs one at a time.
- Add flavor – Fold in sour cream, vanilla, and flour just until combined.
- Bake & rest – Bake at 325°F for 1 hour, then turn off the oven and let it cool inside.
- Chill & serve – Refrigerate for at least 4 hours before slicing.
That’s it. A classic cheesecake with a buttery crust, creamy filling, and a smooth finish every time.


Cheesecake Water Bath
A water bath (bain-marie) helps your cheesecake bake gently and evenly, preventing cracks and keeping the texture ultra-creamy. There’s more than one way to do it. Here are a few options:
- Traditional Method (Pan-in-Pan) – Wrap the outside of your springform pan in heavy-duty foil to keep water from seeping in. Place it inside a larger roasting pan, then pour hot water into the roasting pan until it comes about halfway up the sides of the cheesecake pan.
- My Method (Pan + Tray) – Place the springform pan inside a slightly larger pan for extra protection, then set both on a rimmed baking sheet. Fill the sheet with hot water before sliding into the oven. This double-layer setup minimizes the risk of leaks.
- Separate Water Bath – If you’re nervous about leaks, place the cheesecake on the middle oven rack and set a separate baking dish filled with hot water on the rack below. You still get added moisture in the oven without direct contact.
Tip: Always use hot water to help the oven temperature recover quickly and keep baking times accurate.
- For a cheesecake water bath, you don’t need a ton of water. Too much and it can splash into your batter, too little and it won’t help regulate the temperature. The sweet spot: about 1 to 2 inches of hot water in the roasting pan (usually halfway up the springform pan).


Recipe FAQ’s
Yes, but a water bath helps prevent cracks and keeps the texture creamier. If you skip it, bake at the same temp but keep a close eye near the end and don’t overbake.
The edges should look set, and the center should still jiggle slightly when gently shaken. It will firm up as it cools.
Cracks can come from overmixing, baking at too high a temperature, or cooling too quickly. Don’t worry — it’s still delicious, and you can cover cracks with toppings.
Stored covered in the refrigerator, cheesecake will stay fresh for up to 5 days. You can also freeze slices for up to 2 months.
It gives the best texture and flavor, but any full-fat brick-style cream cheese will work. Avoid whipped or spreadable versions.
For a cheesecake water bath, you don’t need a ton of water. Too much and it can splash into your batter, too little and it won’t help regulate the temperature. The sweet spot: about 1 to 2 inches of hot water in the roasting pan (usually halfway up the springform pan).
Storage and Make-Ahead Instructions
- Make Ahead: Cheesecake is a great dessert to prep in advance because the flavor improves after a night in the fridge. You can make it up to 2 days ahead — just bake, cool, and chill until ready to serve. Add toppings right before slicing.
- Refrigerator: Store cheesecake covered in the fridge for up to 5 days. A cake carrier works best, but plastic wrap or foil pressed loosely over the top also works.
- Freezer: To freeze, chill the baked cheesecake completely, then wrap tightly in plastic wrap followed by foil. Freeze whole or in individual slices for up to 2 months. Thaw overnight in the fridge before serving.
Tip: If freezing slices, place them on a baking sheet to freeze solid before wrapping. This keeps the edges clean and prevents sticking.

Want to save this recipe?
Enter your email below & we’ll send it to your inbox. Plus get great new recipes from us every week!
The Best Cheesecake
Ingredients
- 1½ cups graham cracker crumbs
- 1/4 teaspoon cinnamon
- 4 tablespoons butter (melted)
- 4 8 oz cream cheese packages (softened)
- 1½ cups sugar
- 3/4 cup whole milk
- 4 eggs
- 1 cup sour cream
- 1 tablespoon vanilla extract
- 1/4 cup flour
Instructions
- Preheat the oven to 325°F (163°C). Line or lightly grease a 9-inch springform pan with parchment or baking spray. Set aside.
- In a small bowl, combine the crushed graham crackers, cinnamon, and melted butter. Stir until the mixture resembles wet sand. Press firmly and evenly into the bottom of the prepared pan using the bottom of a measuring cup or flat glass. Set aside.
- In a large mixing bowl, or the bowl of an electric mixer fitted with the paddle attachment, beat the cream cheese, sugar, and milk on medium speed until smooth and slightly fluffy, about 2 minutes.
- Switch to a hand whisk and add the eggs one at a time, mixing gently by hand after each addition. Scrape down the sides of the bowl to ensure everything is evenly incorporated.
- Gently fold in the sour cream, vanilla extract, and flour using a silicone spatula or whisk. Stir only until combined, being careful not to overmix.
- Pour the batter into the prepared crust. Bake for 1 hour. Without opening the oven, turn off the heat and let the cheesecake rest inside until it reaches room temperature.
- Once cooled, transfer to the refrigerator and chill for at least 4 hours or overnight.
- Run a knife around the edge of the cheesecake before releasing the sides of the springform pan. Slice with a sharp knife, wiping between cuts for clean slices, and serve plain or with your favorite toppings.
Notes
- Use room temperature ingredients. Over mixing is one of the main in creating cracked tops. By using room temperature ingredients you are reducing the time needed to fully incorporate the ingredients.
- Do not over mix the batter. Like stated above, over mixing will cause big ol’ cracks in your baked cheesecakes. Be sure to mix carefully just until the ingredients are combined.
- As tempting as it might be, avoid opening the oven door. Opening and closing the door releases heat causing the oven temperature to fluctuate. This can cause uneven baking and… you guessed it… cause cracking.
- If all else fails, and you find yourself faced with a cracked top, top with fruit! The cheesecake will still taste incredible.
- Some stores sell graham cracker crumbs. If you can’t find them, add graham crackers into a blender and pulse until smooth.
Equipment
Nutrition
The nutrition facts provided are calculated using a third-party tool and are estimates only. Actual nutritional content may vary based on the ingredients and brands you use, as well as portion sizes. For accurate results, please consult a registered dietitian or nutritionist.
Even More Recipes You Will Love:
- Easy Cheesecake Bars
- Strawberry Cheesecake Bars
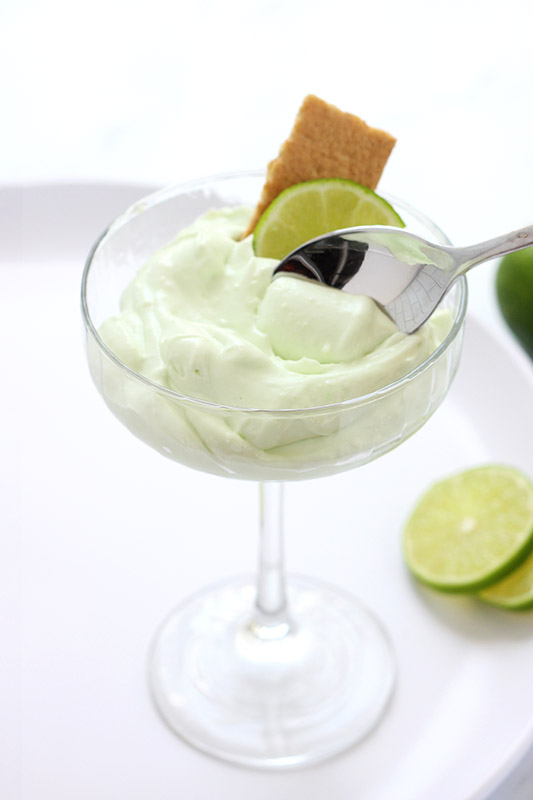
- Lime Cheesecake Bites
- Salted Caramel Cheesecake Bars
- Cherry Cobbler


Everyone in my family agrees, we have never had a better cheesecake!
That makes me so happy to hear, Cynthia! I love knowing it was a hit with your family. That’s the best kind of review.
I tried this cheesecake today and was amazed at how well it turned out. I don’t bake often, but her clear, intuitive directions made the process simple and stress-free. The cheesecake came out smooth, beautiful, and delicious. My wife even said it’s one of the best she’s ever had. Highly recommend her recipes!
I honestly don’t know how this can be done in an hour. I baked for 80 minutes at least and it was still really jiggly. I just turned my oven off and am letting it cool now. Hoping it’s ok after it sets in frig.
I’ve been wanting cheesecake for a while now. I’ve never made it before, but I could probably handle this one. Thanks!
This looks delicious! I am definitely pinning this recipe for later.
Ummm, I’ll be right over! This looks so yummy! Cheesecake is one of my favorites.
This looks so delicious especially with the cherries on top! Its been so long since I’ve made cheesecake. Thank you for sharing this recipe!
My hubby loves cheesecake! I will definitely be trying this for him! Pinning now!
Thanks for the pin Kimber!
How did you know Cherry Cheesecake was my favorite. I would get this for my birthdays growing up because I didn’t love cake. Looks delicious!
Leanne!! You can have cheesecake with me anytime!
OK. Now I NEED cheesecake. Truly NEED. This looks amazing!
This is beautiful and I’m sure delicious! Can’t wait to try it thanks for sharing!
This cheesecake looks oh so delicious. Love love love it
Having made 3 New York Cheesecakes in the last week (1 birthday request, 1 fundraiser giveaway and 1 for home) I would try: cutting the flour down to 1/8c. and instead of using tin foil on the inside of the springform pan try a thick layer of butter smeared on with a paper towel (just make sure it’s thick enough the paper towel doesn’t lose thin pieces or you could also use wax paper or the wrapper the butter comes in) and then 3 layers of tinfoil on the outside of the springform pan, I wrap it over it’s self where it comes over the edge and create like a 1/2″ tin foil lip off the top of the pan. Then I place the cheesecake in a deep roasting pan (a cast iron pan would work also) and fill it with hot, hot water halfway up the springform pan. Remember also, the smaller the pan the less time it will take to cook, I pull them out as soon as the top only does a little jiggle in the middle, lol. You could also check it with a toothpick but it will continue cooking for 5-10 minutes after you pull it from the oven, so I jiggle it and then let it sit for 10 mins on the counter in the water bath. After it sits for 10 I remove it from the bath and take a butter knife around the edge, then I let it cool completely before removing the springform. Hope that helps you get a no crack top. Cheesecakes are one of those things that oven temp differences or altitude effects the outcome of so IMO folks need to find a method that works in their kitchen 😉
These are all great tips! I’ll be sure to implement them next time I make this recipe!
Oh my gosh, this looks amazing! I wish I had a slice for breakfast!! Love the cherries on top to hide the crack – why is cheesecake so hard to get perfect?!
Jesseca, I totally hear your cheesecake pain! Mine always, always crack. My solution is identical– just top them with the most decadent stuff so no one even sees it 🙂 This cheesecake looks amazing, especially all those gorgeous cherries.
I’m so happy you explained the wrinkled edges – I was so curious! I really like the look! Cheesecake is fabulous (we had the same idea!)
Great minds think alike!