
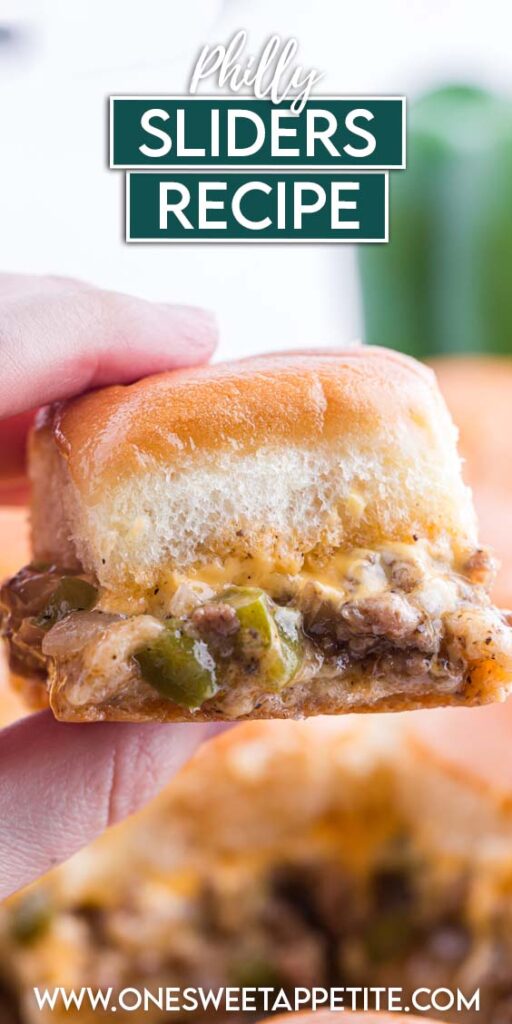
Cheesesteak Sliders
This post may contain affiliate links.
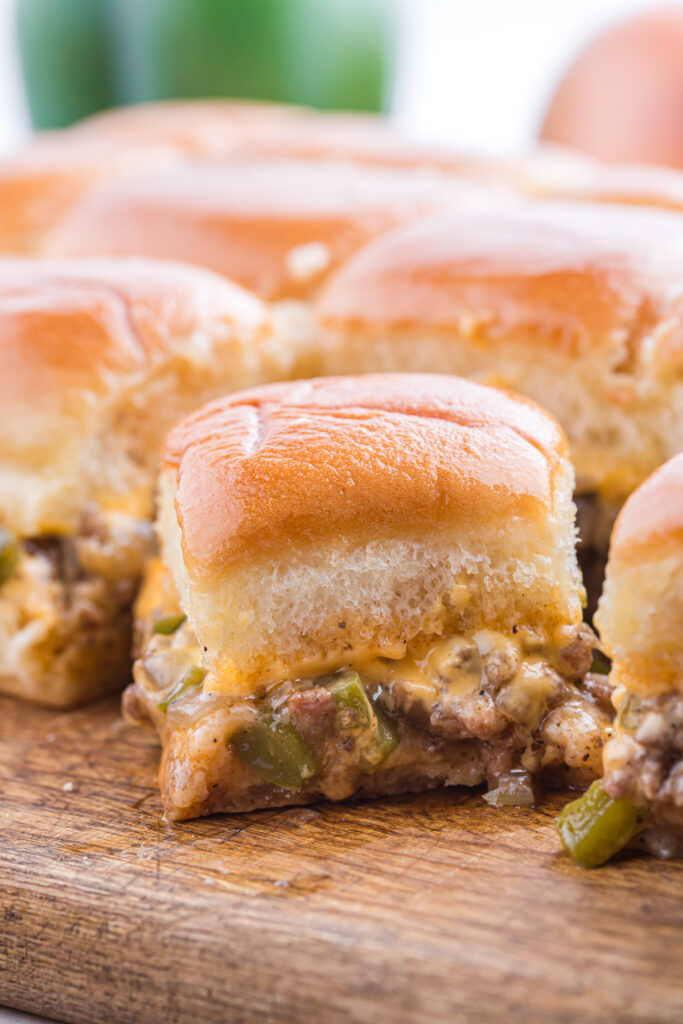
These Philly cheesesteak sliders have become a regular on our weekly dinner rotation and are easily one of my son’s favorite meals. Soft Hawaiian rolls, savory beef, peppers, onions, and melty cheese make them just as good for a busy weeknight as they are for feeding a crowd on game day.
I’m a sucker for a good cheesesteak. If you like this recipe you HAVE to try my Cheesesteak Sloppy Joes. Unbelievably easy and a family favorite!

Why You’ll Love This Philly Cheesesteak Sliders Recipe
- Quick and weeknight friendly – The filling comes together fast and the sliders bake in about 20 minutes, making this an easy dinner when time is tight.
- Simple, everyday ingredients – Everything in this recipe can be found at a regular grocery store. Ground beef, peppers, onions, cheese, and a pack of Hawaiian rolls do most of the heavy lifting.
- Perfect for feeding a crowd – These are great for game day, casual get-togethers, or family movie night. Just slice and serve.
This ground beef Philly cheesesteak version started as a quick weeknight experiment when I didn’t have shaved steak on hand, and it turned into one of those recipes we keep coming back to. The filling cooks up fast with onions and peppers, then gets tucked into soft Hawaiian rolls with plenty of melty cheese. It’s simple, hearty, and exactly the kind of dinner that disappears quickly around our table.
What I love most about this method is how reliable it is. The quick sauce thickens the beef mixture just enough so the sliders stay flavorful without getting soggy once baked. This method has worked well every time I’ve made it, which is exactly what you want from a recipe you plan to keep in regular rotation.
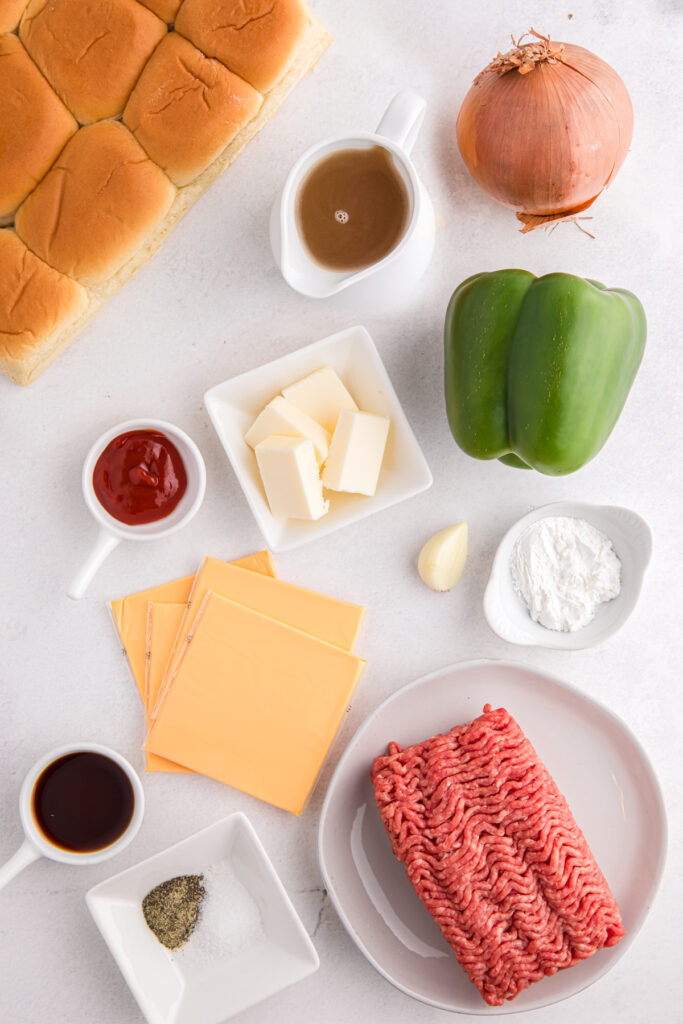
Philly Steak Sliders Ingredients
This recipe keeps it simple but packs a serious flavor punch. Everything comes together in one pan One of the reasons this recipe works so well is the simple ingredient list. Everything is easy to find at a regular grocery store, and each ingredient plays a small role in building that classic cheesesteak flavor.
- Ground beef. Use lean ground beef (around 85/15) for the best balance of flavor without too much grease. If there’s excess fat after cooking, simply drain it before adding the sauce.
- Onion. A yellow onion works best here because it softens and becomes slightly sweet as it cooks. Dice it small so it blends nicely with the beef.
- Green pepper. Green bell peppers add that classic cheesesteak flavor. Chop them fairly small so they cook quickly and distribute evenly.
- Worcestershire sauce. Adds depth and a savory boost that helps the beef taste a little more like a traditional cheesesteak filling.
- Beef broth + cornstarch. These two combine to create a quick sauce that coats the meat mixture and keeps the sliders flavorful without getting soggy.
- Hawaiian rolls. Soft, slightly sweet rolls are perfect for sliders. Try to slice them in half while keeping the rolls connected so they’re easier to assemble. We also love the Kings Hawaiian butter rolls.
- Provolone or American cheese. Provolone gives a more traditional cheesesteak flavor, while American melts extra creamy. Both work great here.
- Butter and garlic. Brushed over the tops of the rolls before baking, this adds flavor and helps the sliders turn golden in the oven.
Everything in this recipe is easy to grab during a quick grocery run, and once you have it all together, the sliders come together quickly with great results.

Jesseca’s Recipe Review
These sliders are hands-down one of my favorite “feed-a-crowd-without-losing-your-mind” recipes. They’re quick, cheesy, and always the first to vanish at any get-together. Even my teenager, who claims to hate onions, goes back for seconds. That’s a win in my book.
Tip from Jesseca:
Lightly toasting the bottom half of the rolls before adding the filling helps prevent sogginess, especially if you’re making these ahead or serving a little later. Just pop them in the oven for 5 minutes while the beef mixture cooks.
Recipe Variations
One of the best things about these Philly cheese steak sliders? They’re super flexible. Whether you’re working with what’s in your fridge or feeding picky eaters (we see you), here are some easy swaps and fun twists to make this recipe your own:
- Ground beef: Swap with ground turkey or chicken for a lighter option, or go meatless with your favorite plant-based crumble.
- Green pepper: Not a fan? Try red or yellow bell peppers for a sweeter flavor, or skip it entirely if you’re cooking for veggie skeptics.
- Cheese: Provolone and American are classics, but Swiss, pepper jack, or even a cheese blend can totally work. Just make sure it melts well!
- Hawaiian rolls: Any soft slider buns or dinner rolls will do the trick. Brioche is a great backup if you want something buttery and rich.
- Butter + garlic: Don’t have fresh garlic? Use garlic powder, or go wild with Italian seasoning or everything bagel seasoning for a different vibe.
- Add mushrooms: Want a heartier filling? Sauté some chopped mushrooms with the onions and peppers.
- Make it spicy: Add sliced jalapeños, a dash of hot sauce, or swap the cheese for pepper jack.
Whether you’re cleaning out the fridge or making sliders for the third time this month (because your family keeps asking), this recipe rolls with the punches.
What’s the Best Meat for Cheesesteak Sliders?
While this recipe uses ground beef for a quick and budget friendly option, there are actually several meats that work well for cheesesteak sliders. If you want to change things up, here are a few great options:
- Ribeye. Ribeye is the most traditional meat used for Philly cheesesteaks. It’s rich, tender, and full of flavor when sliced thin.
- Shaved steak. Many grocery stores sell pre-sliced shaved beef in the meat department or freezer section. It cooks quickly and gives you that classic cheesesteak texture.
- Ground beef. Ground beef is an easy and affordable option that still delivers great flavor. It’s also simple to cook and works perfectly for feeding a family.
- Deli roast beef. If you need a super quick shortcut, chopped deli roast beef works surprisingly well. Just warm it with the peppers and onions before assembling the sliders.
The truth is, Philly cheese sliders are pretty forgiving, so you can easily use what you have on hand and still end up with a delicious pan of sliders.

Philly Cheeseburger Sliders Questions, Answered
Yes! You can fully prep the meat mixture up to two days in advance. Store it in the fridge, then assemble and bake the sliders when you’re ready. If you need to assemble the entire sliders ahead of time, wait to add the garlic butter until just before baking for the best texture.
Provolone is the classic pick, but American cheese gives that extra melty factor. You can also use mozzarella, pepper jack, or a blend—just make sure it’s a good melting cheese.
Toast the bottom half of the rolls in the oven for 3–5 minutes before adding the filling. This creates a barrier and helps keep everything sturdy (even with saucy meat).
Absolutely. This recipe is easy to scale for a crowd. Just grab a second package of rolls and use a full-size sheet pan.
Yes, but for best results, freeze the assembled sliders before baking and hold off on the garlic butter. Wrap tightly, freeze, and when ready to serve, thaw in the fridge overnight, brush with butter, and bake as directed.
Pop them in the oven at 350°F for 10–15 minutes or until warmed through. The microwave works in a pinch, but the oven keeps the buns from getting too soft.
Storage and Make-Ahead Instructions
These beef steak sliders are just as great the next day—if you’re lucky enough to have leftovers. Here’s how to store and prep them ahead for maximum ease:
- Make-Ahead:
You can prep the meat mixture up to 2 days in advance. Just cook it, let it cool, and store it in an airtight container in the fridge. When you’re ready to serve, assemble the sliders, top with garlic butter, and bake as directed. This is a huge win for party prep or busy weeknights. - Storage:
Leftover sliders can be stored in an airtight container in the fridge for up to 3 days. To reheat, pop them in a 350°F oven for about 10 minutes or until warmed through. The microwave works too. Note the buns won’t be quite as crisp. - Freezing:
Want to freeze them? Assemble the sliders but hold off on the garlic butter topping. Wrap tightly in foil and place in a freezer-safe bag or container. When ready to bake, thaw in the fridge overnight, brush with garlic butter, and bake as usual.

Want to save this recipe?
Enter your email below & we’ll send it to your inbox. Plus get great new recipes from us every week!
Ground Beef Philly Cheesesteak Sliders
Ingredients
- 1 lb ground beef
- 1 onion (chopped)
- 1 green pepper (chopped)
- 1 tablespoon ketchup
- 1 tablespoon Worcestershire sauce
- 1 tablespoon cornstarch
- 1 cup beef broth
- 1/2 teaspoon each salt and pepper
- 12 count Hawaiian Rolls
- Provolone or American Cheese
- 4 tablespoons butter
- 1 clove garlic
Instructions
- Preheat your oven to 350°F. This way it’s ready to go once your sliders are assembled.
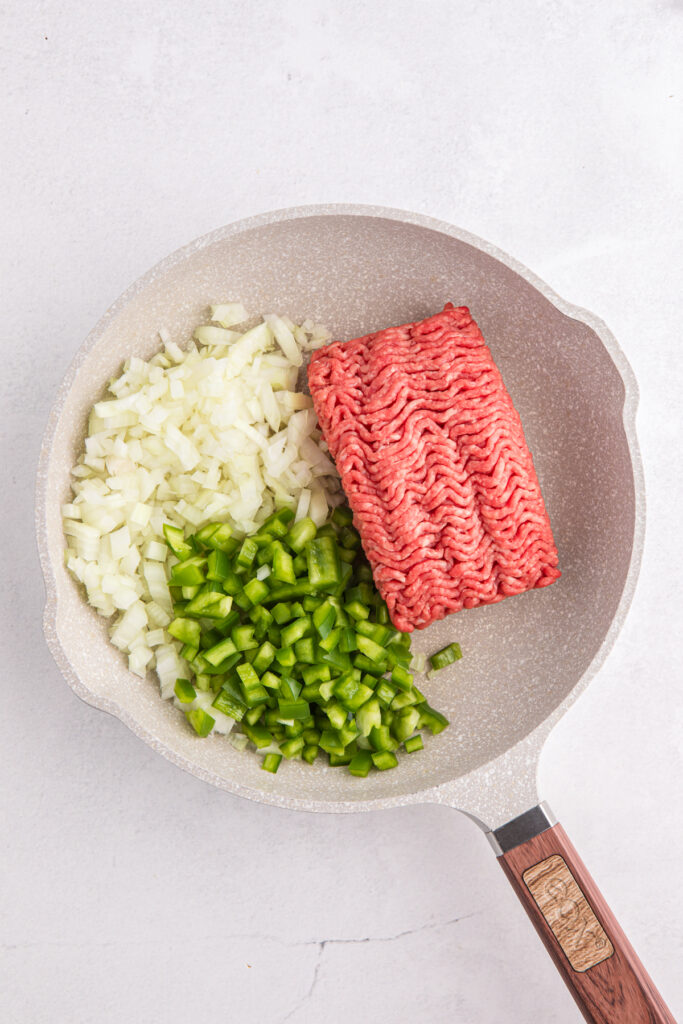
- In a large skillet over medium heat, add the ground beef, diced onion, and chopped green pepper. Cook, breaking up the meat with a spoon, until the beef is browned and the vegetables are tender, about 2 to 4 minutes.
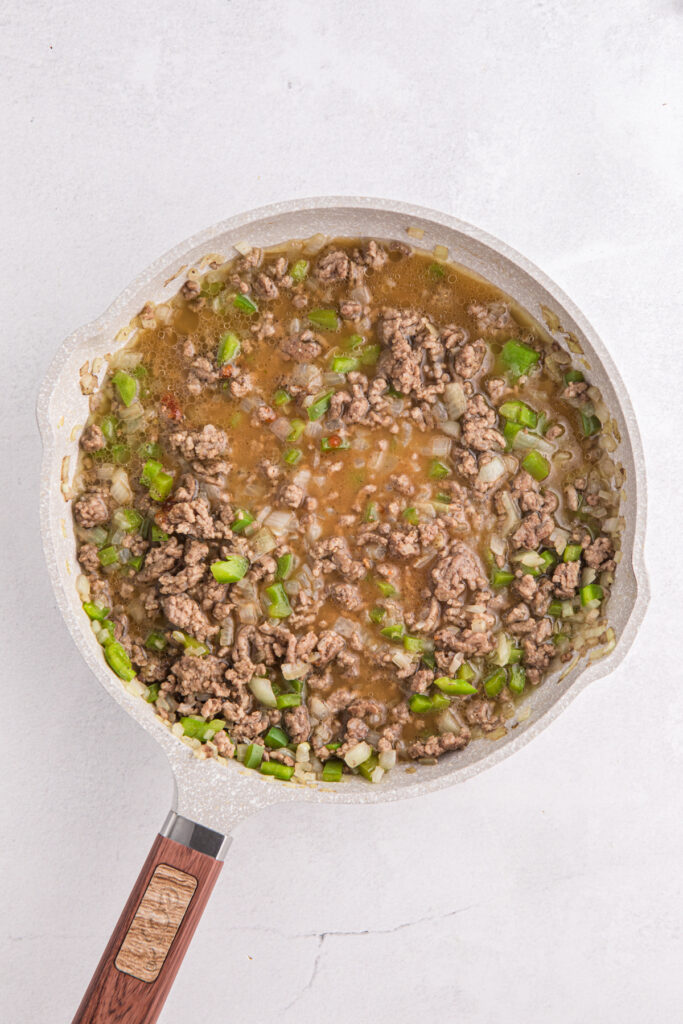
- In a measuring cup or small bowl, whisk together the ketchup, Worcestershire sauce, salt, pepper, cornstarch, and beef broth until smooth.
- Pour the sauce mixture into the skillet with the beef. Stir to combine, then cook for 3 to 5 minutes, or until the mixture thickens slightly. Remove from heat.
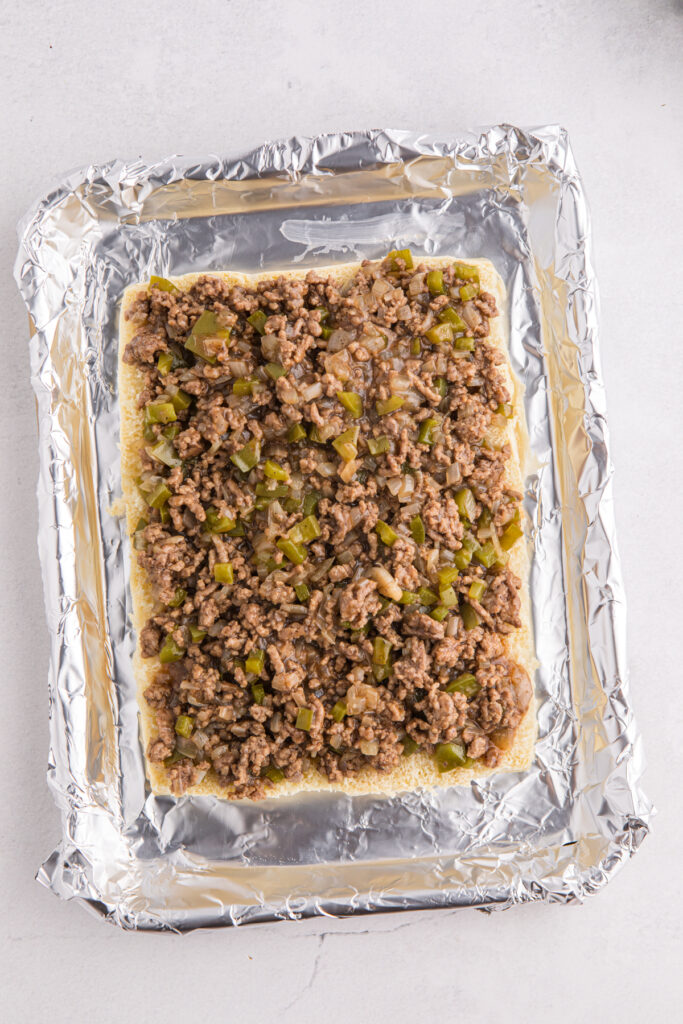
- While the meat mixture finishes cooking, use a serrated knife to slice the Hawaiian rolls in half horizontally, keeping them connected if possible. Place the bottom halves in a half sheet pan or a 9×13 baking dish.
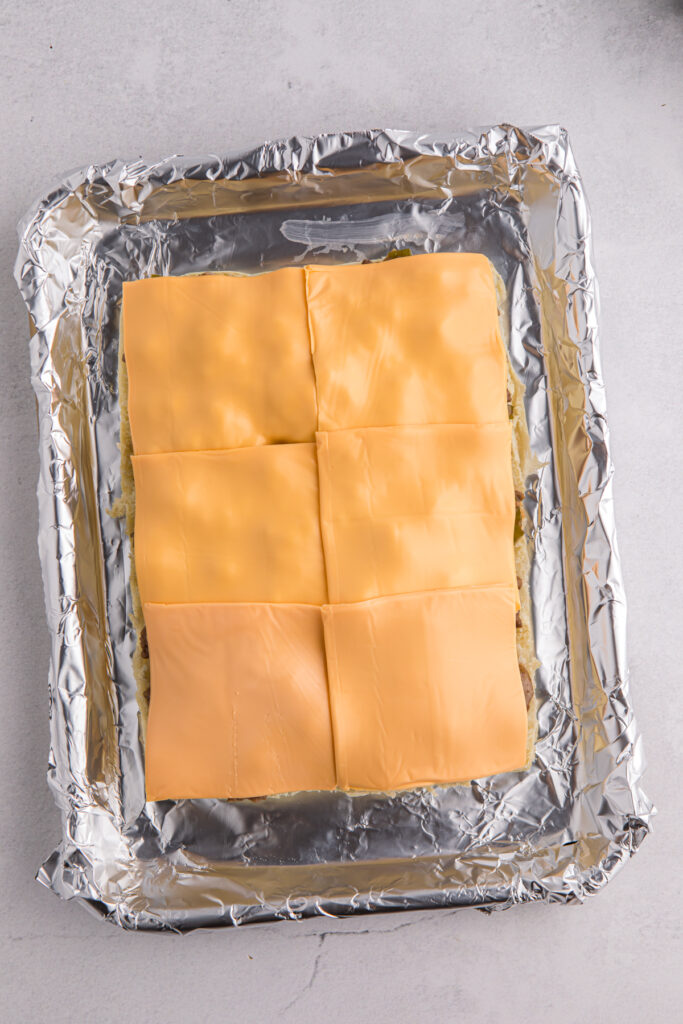
- Spoon the beef mixture evenly over the bottom rolls. Layer the provolone or American cheese slices on top, then add the top half of the rolls.
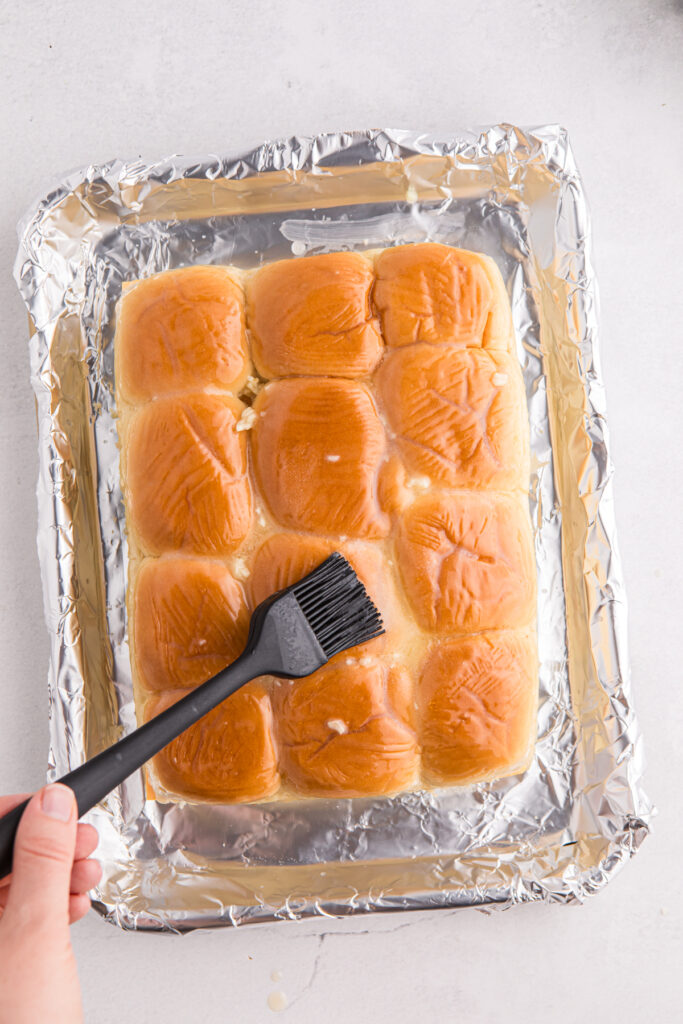
- In a small bowl, mix the melted butter and minced garlic. Brush or pour it over the tops of the rolls.
- Cover the pan loosely with foil and bake in the preheated oven for 20 minutes, or until the cheese is melted and the tops are lightly golden.
- Let cool slightly before cutting. Serve warm—and maybe make a double batch, because these go fast!
Notes
Nutrition
The nutrition facts provided are calculated using a third-party tool and are estimates only. Actual nutritional content may vary based on the ingredients and brands you use, as well as portion sizes. For accurate results, please consult a registered dietitian or nutritionist.


You know what? I don’t think I’ve ever had a Philly cheesesteak sandwich! These may just change that – thanks for the yummy recipe!