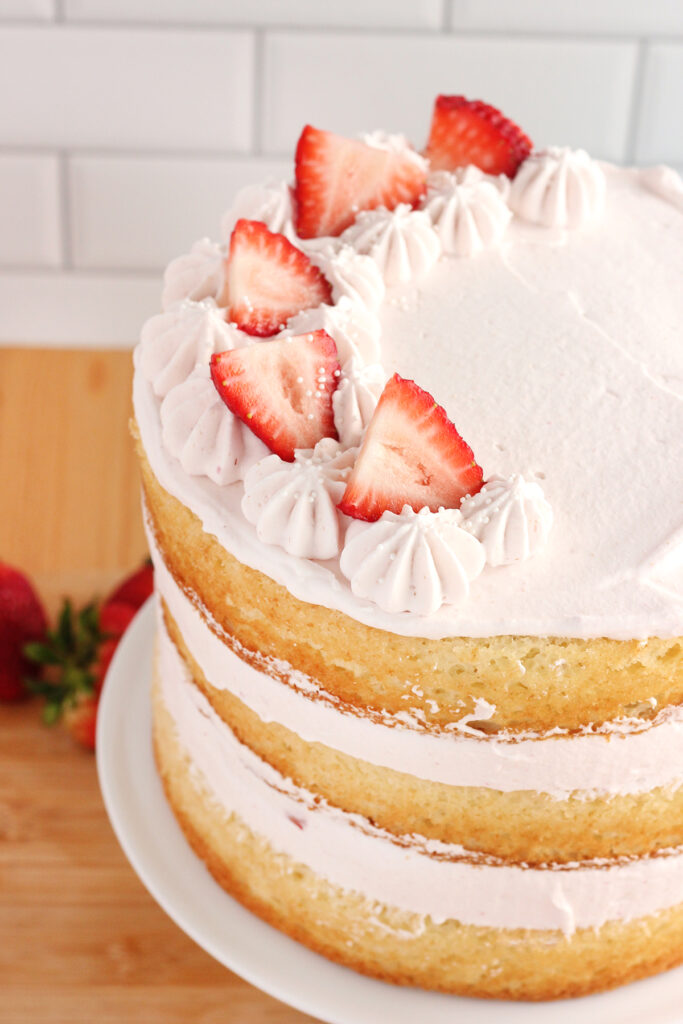
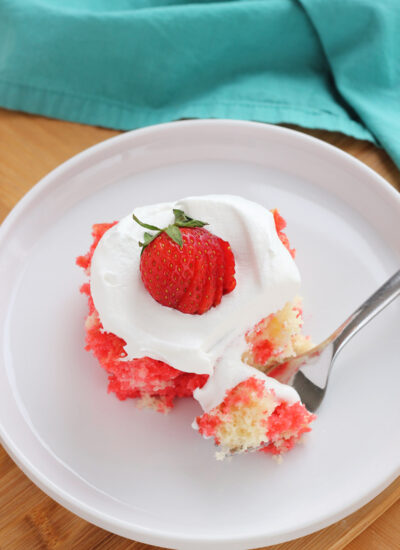
Dive into the effortless charm of this Strawberry Whipped Cream Cake, a family favorite recipe! We start with a jazzed-up cake mix for a flawless base, then layer on dreamy strawberry whipped cream for a fruity, creamy twist. It’s a simple yet stunning dessert that’s sure to wow your guests.
This recipe was adapted from my Chocolate Whipped Cream Cake, which is a fan favorite, and my Strawberry Whipped Cream!

Why You’ll Love This Strawberry Whipped Cream Cake
- Crowd-Pleaser: It’s a versatile dessert that appeals to both kids and adults, perfect for family dinners, picnics, or even as a classy birthday cake.
- Easy to Make: Despite its impressive appearance, it’s surprisingly simple to make, which is great for both novice and experienced bakers.
- Perfect for Celebrations: Its elegant and festive look makes it a wonderful centerpiece for special occasions like anniversaries, Mother’s Day, or bridal showers.
I tested this recipe 13 times before I felt like it was ready to share. That’s over a dozen cakes made in my kitchen and sent off to friends and neighbors. A labor of love that was well worth it. Why? Glad you asked.
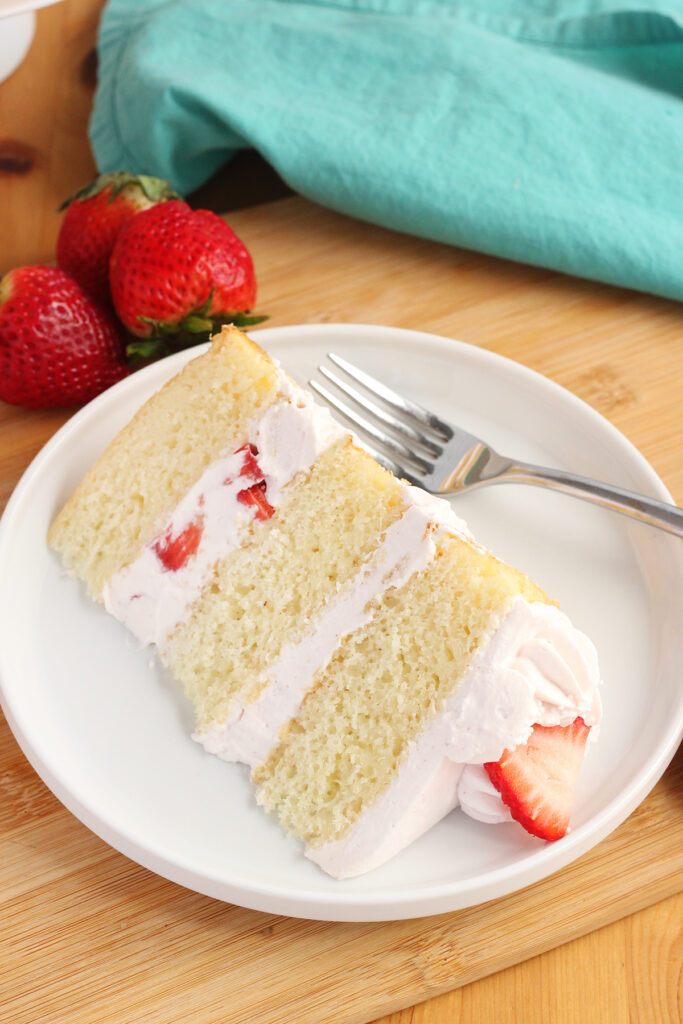
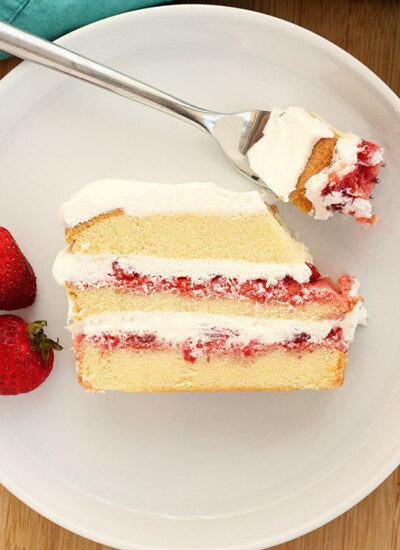
This is the best cake mix recipe I have ever made, and there are plenty of cake mix hacks here on the site so that is saying a lot. This does not taste like a cake mix. It tastes like it was straight out of a bakery. Soft, fluffy, sweet layers of cake are enough to make anyone happy, but when you layer that with strawberry whipped cream it sends this to an entirely different level.
It is SO. DANG. GOOD.

Ingredients You’ll Need
- Cake Mix: It’s so important that you check the weight of the cake mix you purchase. Shrinkflation has box sizes shrinking and you’ll need to find a 15.25 oz box. This is also why you’ll need to add a few more ingredients than called for on the box, like flour and sugar.
- Sugar: Sugar is hygroscopic, meaning it attracts and retains moisture. This helps keep your cake moist and tender for longer, preventing it from drying out too quickly. You’ll need both granulated sugar, for the cake, and powdered sugar, for the whipped cream.
- Flour: Because this is a stacked cake, you’ll need a smidge better structure than you’ll get from the box mix. A little added flour helps give you a slightly more dense cake- and is why this tastes like a bakery cake.
- Butter: This is a swap from what is called for on the back of the box. You can use oil if you prefer, but I like the additional flavor you get from melted butter.
- Milk: Also a quick substitute from what is called for on the box, which normally calls for water. Either will work in this recipe.
- Eggs: Large eggs work best. They help to support the cakes structure as it bakes while also providing lift.
- Sour Cream: The surprise ingredient! Sour cream is high in fat, which adds richness and moisture to the cake. This results in a softer, more tender texture that’s really enjoyable.
You can find a list of the remaining ingredients in the recipe card below.

Save This Recipe!
Add your email below and we’ll send it straight to your inbox + you’ll receive all our newest recipes!

Cake Mix Strawberry Whipped Cream Cake
- Ingredient Prep: Preheat the oven to 350°F (175°C). Lightly grease three 8-inch round cake tins and line the bottoms with parchment paper.
- Combine Dry Ingredients: In a large mixing bowl, whisk together one box of white cake mix, flour, and granulated sugar.
- Add Wet Ingredients: To the dry mixture, add melted butter, milk, sour cream, eggs, vanilla extract, and almond extract.
- Mix the Batter: Using an electric mixer, beat the ingredients on a low setting for 30 seconds to combine. Then, increase the speed to medium and continue mixing for about 2 minutes, until the batter is smooth and well combined.
- Divide the Batter: Evenly distribute the batter between the three prepared cake tins. You can use a measuring cup or a scale to ensure each tin gets an equal amount of batter.
- Bake the Cakes: Place the tins in the preheated oven and bake for 25-30 minutes. The cakes are done when they are lightly golden on top and a toothpick inserted into the center comes out clean.
- Cool the Cakes: After removing them from the oven, let the cakes cool in the tins for about 10 minutes. Then, carefully turn them out onto wire racks to cool completely. This step is crucial to prevent the cakes from breaking.
For the full recipe instructions see the recipe card below.


Helpful Tools
Having the right tools can make the process smoother and more enjoyable. Here’s a list of helpful kitchen tools:
- Mixing Bowls: Various sizes for mixing cake batter and whipped cream.
- Electric Mixer: Preferably a stand mixer or a handheld mixer for whipping cream and batter.
- Measuring Cups and Spoons: For precise ingredient measurements.
- Rubber Spatula: Essential for folding ingredients gently and scraping out all the batter.
- Cake Pans: Round pans for baking the cake layers.
Expert Recipe Tips
- Room Temperature Ingredients: Make sure your eggs, milk, and sour cream are at room temperature before mixing. This helps them blend more seamlessly into the batter, resulting in a smoother, more uniform cake.
- Properly Preparing Pans: Don’t just grease your pans; line the bottom with parchment paper as well. This guarantees that your cakes will release easily without sticking or breaking.
- Even Batter Distribution: Use a kitchen scale or measuring cup to divide the batter evenly between your cake tins. Consistent layer thickness means uniform baking and a more professional-looking cake.
- Don’t Overmix: Once you’ve added the wet ingredients to the dry, mix just until combined. Overmixing can lead to a dense, tough cake because of excess gluten development.
Recipe FAQs
Yes, feel free to use any flavor of cake mix you like. The additional ingredients will still enhance its texture and taste.
No, almond extract is optional. It adds a distinct flavor, but you can omit it or replace it with more vanilla extract if you prefer.
Yes, but the layers will be thicker and will need a longer baking time. Keep an eye on them and test for doneness with a toothpick.
The cakes are done when they are golden brown, spring back when lightly pressed, and a toothpick inserted into the center comes out clean or with a few moist crumbs.
Store the leftover cake in an airtight container in the refrigerator. It should keep well for up to 3-4 days. In fact, it starts to taste better after 24 hours.

More Sweet Strawberry Recipes To Try
Still Hungry? Follow One Sweet Appetite on Instagram, Pinterest, and Facebook!

Strawberry Whipped Cream Cake
Ingredients
Cake:
- 1 (15.25oz) white cake mix
- 1 cup all-purpose flour
- 1 cup granulated sugar
- 1/2 cup melted butter
- 1 cup milk
- 1 cup sour cream
- 3 large eggs
- 1 teaspoon each vanilla and almond extract
Strawberry Whipped Cream
- 1 cup fresh strawberries washed and roughly chopped
- 2 cups heavy whipping cream
- 2/3 cup powdered sugar
- 1/2 teaspoon vanilla extract
Instructions
Cake
- Preheat the oven to 350°F (175°C). Lightly grease three 8-inch round cake tins and line the bottoms with parchment paper.
- In a large mixing bowl, whisk together one box of white cake mix, flour, and granulated sugar.
- To the dry mixture, add melted butter, milk, sour cream, eggs, vanilla extract, and almond extract.
- Using an electric mixer, beat the ingredients on a low setting for 30 seconds to combine. Then, increase the speed to medium and continue mixing for about 2 minutes, until the batter is smooth and well combined.
- Evenly distribute the batter between the three prepared cake tins.
- Place the tins in the preheated oven and bake for 25-30 minutes. The cakes are done when they are lightly golden on top and a toothpick inserted into the center comes out clean.
- After removing them from the oven, let the cakes cool in the tins for about 10 minutes. Then, carefully turn them out onto wire racks to cool completely.
Strawberry Whipped Cream
- Pulse berries in a high powered blender or food processor until smooth. Measure out 1/2 cup of puree and set aside.
- Add the heavy cream to a chilled mixing bowl. Whisk on high speed until peaks start to form.
- Stir in the vanilla, powdered sugar, 1/2 cup puree. Whip an additional 2 to 3 minutes, or until a light and fluffy texture is achieved.
Assembly
- Place the first cake layer on your serving plate or cake stand. If you’ve leveled the top, place the cut side down for a stable base.
- Spread a generous layer of your freshly made strawberry whipped cream over the top. Use an offset spatula to spread it evenly.
- Optional: place a layer of sliced strawberries on top of the whipped cream. Arrange them in a single layer for even distribution of flavor.
- Gently place the second cake layer on top of the first layer of cream and strawberries. Again, spread a layer of whipped cream and add more sliced strawberries if desired.
- Place the third cake layer on top. At this point, you can choose to cover the entire cake with whipped cream for a classic look, or leave the sides bare for a more modern, “naked” cake appearance.
- Refrigerate the cake for at least an hour before serving. This helps the layers to set and makes slicing easier.
Notes
- Room Temperature Ingredients: Make sure your eggs, milk, and sour cream are at room temperature before mixing. This helps them blend more seamlessly into the batter, resulting in a smoother, more uniform cake.
- Properly Preparing Pans: Don’t just grease your pans; line the bottom with parchment paper as well. This guarantees that your cakes will release easily without sticking or breaking.
- Even Batter Distribution: Use a kitchen scale or measuring cup to divide the batter evenly between your cake tins. Consistent layer thickness means uniform baking and a more professional-looking cake.
- Don’t Overmix: Once you’ve added the wet ingredients to the dry, mix just until combined. Overmixing can lead to a dense, tough cake because of excess gluten development.
Nutrition
Did You Make This Recipe?
Share it with me on Instagram @1sweetappetite and follow pinterest for more!

Find even more recipes!
Be sure to share it in the comments below and follow me on Pinterest, Facebook and Instagram for even more delicious recipes.