Circus Cookies
This post may contain affiliate links.
Homemade Pink and White Circus Cookies bring all the nostalgia of the classic frosted animal cookies, but with even better flavor! Buttery, crisp, and dipped in sweet icing, these bite-sized treats are dangerously addictive. Bonus: no surprise broken pieces at the bottom of the bag!
This is one of my favorite copycat recipes! Try these as well as my Dairy Queen Blizzard, Cosmic Brownies, and my Savannah Smiles.

Why You’ll Love This Recipe
- Nostalgic treat recipe – A homemade version of a childhood favorite that tastes even better than store-bought.
- Party dessert ideas – A fun, festive cookie perfect for birthdays, baby showers, and holidays.
- Decorated cookies without royal icing – A simple candy melt coating gives a smooth, glossy finish with no piping needed.
- Homemade frosted animal crackers – A buttery, crunchy cookie dipped in candy melts for that classic look and taste.
These pink and white animal cookies bring all the nostalgia of the store-bought classic, but with even better flavor. Buttery, crisp, and lightly sweet, they’re dipped in smooth candy melts and topped with colorful sprinkles for that signature look. Perfect for parties, gifting, or just reliving childhood memories one bite at a time.
The best part? They’re surprisingly easy to make. No complicated decorating or royal icing—just a simple dough, a quick dip, and a sprinkle of fun. Whether you’re making them for kids (or the kid in you), these cookies are guaranteed to be a hit!

Ingredients You’ll Need
These Homemade Pink and White Circus Cookies have all the buttery, nostalgic flavor of the classic treat—without the mystery ingredients. Simple pantry staples come together for the perfect crisp, frosted bite!
- Butter – Use unsalted butter for better control of the flavor. Let it soften at room temperature for easy mixing.
- Sugar – Regular granulated sugar sweetens the cookies while helping create a light, crisp texture.
- Honey – Adds just a hint of floral sweetness and gives the cookies their signature depth of flavor.
- Salt – A little goes a long way to balance the sweetness and enhance the flavors.
- Baking Soda – Helps the cookies bake up light and crisp. Make sure it’s fresh for the best results.
- Vanilla & Lemon Extract – Vanilla adds warmth, while a touch of lemon extract brings that subtle citrusy note, just like the classic version.
- Flour – All-purpose flour gives the cookies their perfect structure. Be sure to measure correctly—spoon and level instead of scooping!
- Whole Milk – Just a splash keeps the dough soft and helps bind everything together.
- Candy Melts – These melt smoothly for that signature glossy pink and white coating. White chocolate chips work too, but you’ll need to add a little coconut oil for easier dipping.
- Rainbow Sprinkles – Because no circus cookie is complete without them! Use nonpareils for the classic look.
With these simple ingredients, you’ll have a batch of sweet, nostalgic cookies that taste even better than the store-bought version. Let’s get baking!

Jesseca’s Recipe Review
These cookies take me right back to childhood, but they taste even better than the store-bought ones! They’re perfectly crisp, lightly sweet, and coated in a smooth, glossy icing that melts in your mouth. Plus, making them at home means no broken pieces at the bottom of the bag—just fresh, buttery cookies every time.
Tip from Jesseca:
For the best dipping consistency, melt the candy melts in short bursts in the microwave, stirring in between. If the coating feels too thick, add a teaspoon of coconut oil to make it smoother and easier to work with!
Substitutions and Variations
These Circus Cookies are easy to customize! Whether you’re out of an ingredient or just want to switch things up, here are some simple swaps and fun variations to try.
Substitutions
- Honey: Maple syrup or light corn syrup can be used in place of honey, though the flavor will be slightly different.
- Flour: Use a 1:1 gluten-free flour blend if you need a gluten-free option.
- Candy Melts: White chocolate chips or almond bark work well, but you may need to add a teaspoon of coconut oil for a smooth coating.
Variations
- Chocolate Circus Cookies: Swap the vanilla cookie base for a chocolate version by replacing ¼ cup of flour with cocoa powder.
- Holiday-Themed Cookies: Use red and green sprinkles for Christmas, pastels for Easter, or themed sprinkles for birthdays.
- Extra Flavor Boost: Add a little almond extract for a nuttier, bakery-style flavor.
- Mini Animal Shapes: If you want that classic animal cracker feel, use mini animal-shaped cookie cutters.
- Sprinkle-Free Version: If you’re not a fan of sprinkles, drizzle the cookies with melted white or dark chocolate for a fun twist.
No matter how you make them, these cookies are guaranteed to be a nostalgic hit!


Copycat Circus Cookies Recipe
Making Homemade Pink and White Circus Cookies is easier than you’d think! With a few simple steps, you’ll have crisp, buttery cookies coated in a sweet, glossy glaze—just like the classic favorite.
How to Make Circus Cookies
- Make the Dough – Whisk together the butter, sugar, honey, vanilla, and lemon extract. Stir in the dry ingredients and milk until a soft dough forms.
- Chill – Divide the dough, wrap it in plastic, and refrigerate for at least an hour.
- Roll & Cut – Roll out the dough to ¼-inch thickness and cut into desired shapes.
- Bake – Transfer to a baking sheet and bake at 350°F for 8 minutes.
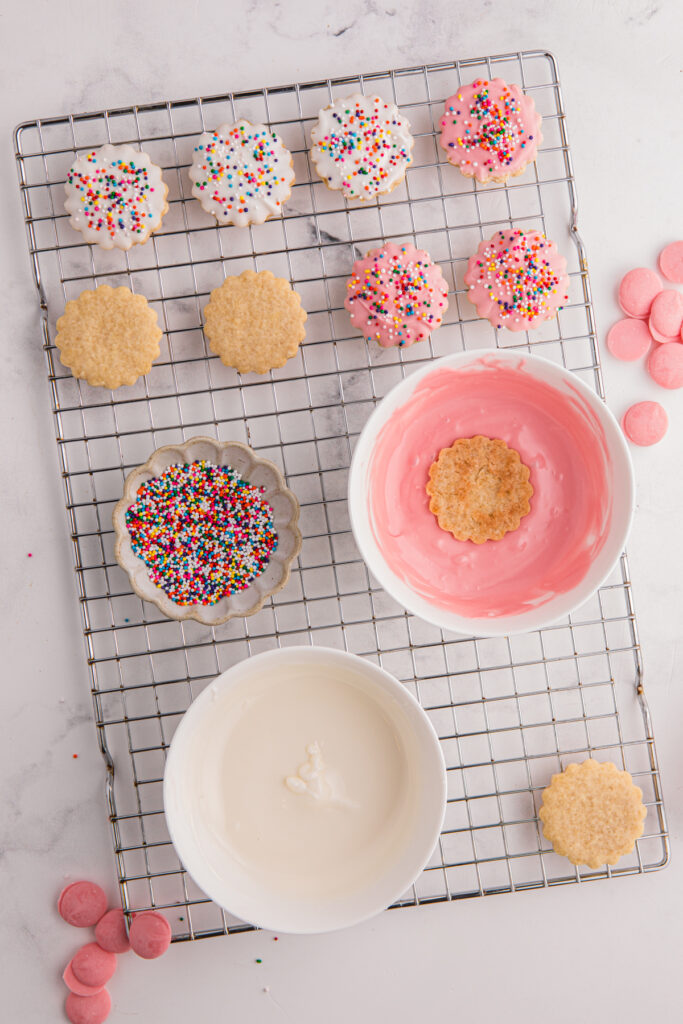
- Decorate – Let the cookies cool, then dip in melted candy melts and top with sprinkles.
That’s it! These nostalgic cookies are buttery, crisp, and perfect for any occasion.


Storage and Make-Ahead Instructions
These Homemade Circus Cookies store beautifully, making them perfect for prepping ahead or enjoying over several days. Here’s how to keep them fresh and delicious!
Make-Ahead Instructions
- Prepare the Dough in Advance: Mix the dough, wrap it tightly in plastic wrap, and refrigerate for up to 3 days before rolling and baking.
- Freeze the Dough: For longer storage, freeze the dough for up to 2 months. Thaw in the fridge overnight before rolling and baking as usual.
Storage Tips
- At Room Temperature: Store fully decorated cookies in an airtight container at room temperature for up to 1 week. Place parchment paper between layers to prevent sticking.
- Refrigerate: If your kitchen is warm, store the cookies in the fridge for extra freshness. Let them come to room temperature before serving.
- Freeze for Later: Baked (but undecorated) cookies can be frozen for up to 2 months. Thaw before dipping in melted candy melts and adding sprinkles.
With these simple storage tips, you can enjoy these nostalgic treats anytime!

Recipe FAQs
Yes! The dough can be refrigerated for up to 3 days before rolling and baking. You can also freeze it for up to 2 months—just thaw overnight in the fridge before using.
Chilling helps the cookies hold their shape while baking and prevents spreading. It also makes rolling and cutting much easier.
Yes, but white chocolate is thicker and may need a teaspoon of coconut oil or vegetable shortening to make it smooth enough for dipping.
Use rolling pin guides, measuring rings, or place two rulers on each side of the dough as a guide to ensure a ¼-inch thickness.
Store in an airtight container at room temperature for up to 1 week. If your kitchen is warm, refrigerate them to prevent the candy coating from softening.
Bake them for an extra minute or two, but be careful not to overbake. Letting them cool completely on a wire rack also helps them crisp up.

Want to save this recipe?
Enter your email below & we’ll send it to your inbox. Plus get great new recipes from us every week!

Copycat Circus Cookies
Ingredients
- ¾ cup butter (soft)
- ¼ cup granulated sugar
- 3 tablespoon honey
- ½ teaspoon salt
- ½ teaspoon baking soda
- ½ teaspoon vanilla extract
- ¼ teaspoon lemon extract
- 2½ cup all-purpose flour
- 1 tablespoon whole milk
- Pink and white candy melts
- rainbow colored sprinkles
Instructions
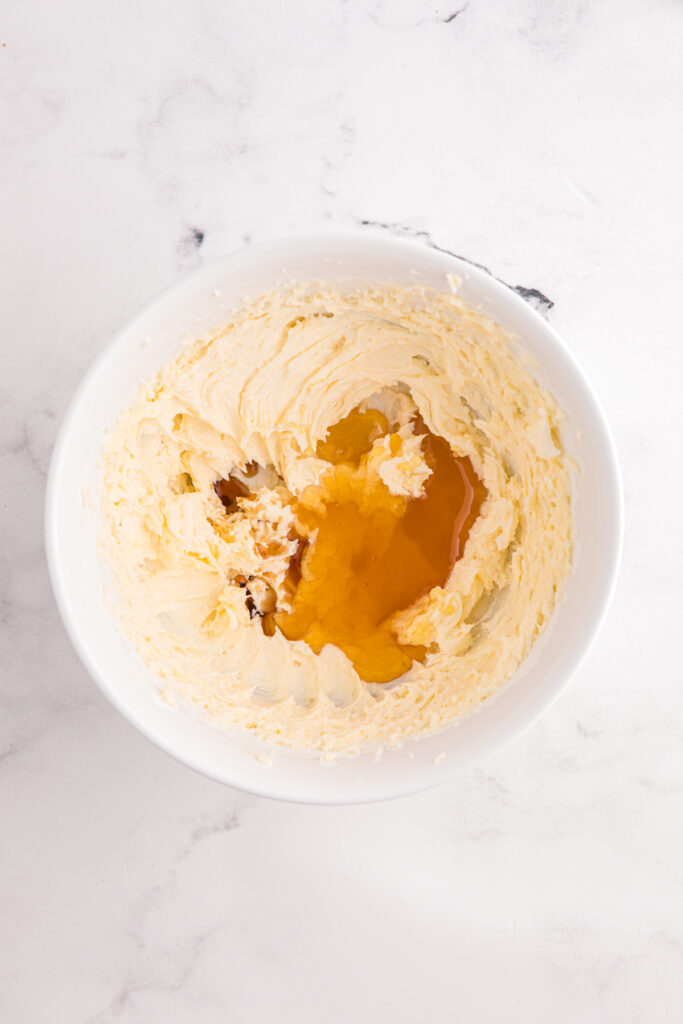
- In a large mixing bowl, whisk together the softened butter and granulated sugar until light and fluffy. Add the honey, vanilla extract, and lemon extract, stirring until fully incorporated.
- In a separate bowl, combine the salt, baking soda, and flour. Gradually add the dry ingredients to the wet mixture, alternating with the milk. Stir until a soft dough forms.
- Divide the dough into two equal portions, wrap each in plastic wrap, and refrigerate for at least 1 hour. Chilling helps the dough firm up, making it easier to roll and cut.
- Preheat the oven to 350°F. Lightly flour a clean surface and roll out the dough to ¼-inch thickness. Use cookie cutters to cut into desired shapes.
- Arrange the cut-out cookies on a lined baking sheet, leaving a little space between each. Bake for 8 minutes or until the edges are lightly golden.
- Transfer cookies to a wire rack and let them cool completely. Dip each cookie into melted candy melts, allowing the excess to drip off. Immediately sprinkle with rainbow sprinkles before the coating sets.
- Let the cookies sit until the coating hardens, then enjoy your homemade circus cookies!
Notes
Nutrition
The nutrition facts provided are calculated using a third-party tool and are estimates only. Actual nutritional content may vary based on the ingredients and brands you use, as well as portion sizes. For accurate results, please consult a registered dietitian or nutritionist.