Pizza Roll-Ups
This post may contain affiliate links.
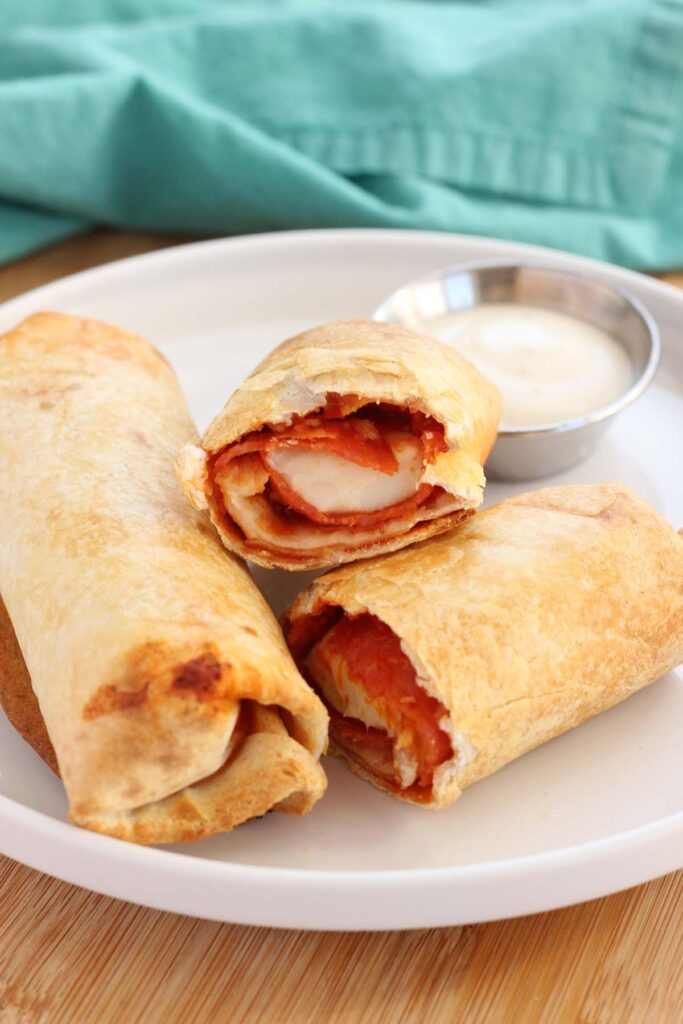
Move over frozen pizza rolls—these easy pizza roll-ups are taking snack time to the next level! Made with crispy air-fried (or pan-fried) tortillas, gooey string cheese, zesty pizza sauce, and pepperoni, they’re the ultimate quick and kid-approved bite. Ready in minutes with just a handful of ingredients, this is perfect for busy weeknights, after-school munchies, or game-day cravings!
The beauty of this recipe is that it can be served as a fun appetizer or light dinner! Pair it with a salad, garlic cheesy bread, or just a solo meal.
Why You’ll Love This Recipe
- Quick & Easy – Ready in under 10 minutes with minimal prep.
- Few Ingredients – Only four basic ingredients that you probably already have.
- Kid-Approved – Perfect for picky eaters and fun to customize.
- Crispy & Cheesy – All the best parts of pizza in a crunchy, handheld bite.
With over a decade of recipe testing, I can confidently say these air fryer pizza roll ups are a game-changer. Crispy on the outside, gooey on the inside, and ready in minutes, they’re the perfect snack, quick meal, or party bite—no oven required. Whether air-fried or pan-fried, they deliver all the cheesy, crunchy goodness of pizza with half the effort.
What makes them even better? Endless customization. Keep it classic with pepperoni, swap in BBQ chicken, or load them with veggies. Picky eater approved and meal-prep friendly, they’re a foolproof favorite for busy nights. If you love fast, easy, and ridiculously good food, this recipe is for you.

Ingredients You’ll Need
With just four simple ingredients, these pepperoni roll ups come together in no time! Here’s what you need, plus a few pro tips to make them extra delicious.
- Tortillas – Use small flour tortillas for easy rolling and the perfect crunch. Want extra crisp? Lightly toast them before rolling!
- Pizza Sauce – A thicker sauce works best to prevent sogginess. Try homemade or your favorite jarred brand!
- Pepperoni (or other fillings) – Classic pepperoni is a win, but feel free to swap in ham, cooked sausage, veggies, or even pineapple for a fun twist.
- String Cheese – This melts perfectly for that gooey, stretchy bite. Want extra cheesiness? Add shredded mozzarella before rolling!
That’s it! Just a few simple ingredients and you’ve got a snack (or easy meal) that’s crispy, cheesy, and totally addicting. Let’s roll!

Jesseca’s Recipe Review
These pizza roll-ups are a game-changer! Crispy on the outside, cheesy on the inside, and ready in minutes. My teenager, who is not easily impressed by snacks, gave them a solid thumbs-up—which is basically a five-star review in our house.
Tip from Jesseca:
For the ultimate crisp and even cooking, preheat your air fryer and place the roll-ups seam-side down to start. This keeps them from unraveling and ensures they get perfectly golden on all sides. If pan-frying, press them gently with a spatula to help seal the edges.
Substitutions and Variations
One of the best things about this pepperoni and cheese roll up is how easy they are to customize. Whether you need a swap for dietary preferences or just want to mix things up, here are some ideas to try.
Substitutions
- Pizza Sauce – Marinara, alfredo, pesto, or even a drizzle of garlic butter can switch up the flavor.
- Cheese – String cheese works great for easy rolling, but shredded mozzarella, provolone, or cheddar all melt beautifully.
- Protein Options – Try cooked sausage, diced chicken, crumbled bacon, or even plant-based pepperoni for a twist.
Variations
- Supreme Style – Add chopped bell peppers, olives, or onions for that loaded pizza flavor.
- Buffalo Chicken – Swap pizza sauce for buffalo sauce and use shredded rotisserie chicken and cheddar.
- BBQ Chicken – Use barbecue sauce, shredded chicken, and Monterey Jack for a smoky kick.
- Breakfast Roll-Ups – Fill with scrambled eggs, cooked bacon or sausage, and cheddar for a morning-friendly version.
These are just a few ideas—feel free to get creative and make them your own!


Tortilla Pizza Roll Ups
These easy pizza roll-ups come together in minutes and are perfect for a quick snack or meal. With just a handful of ingredients and a few simple steps, you’ll have a crispy, cheesy bite that rivals any frozen pizza roll.
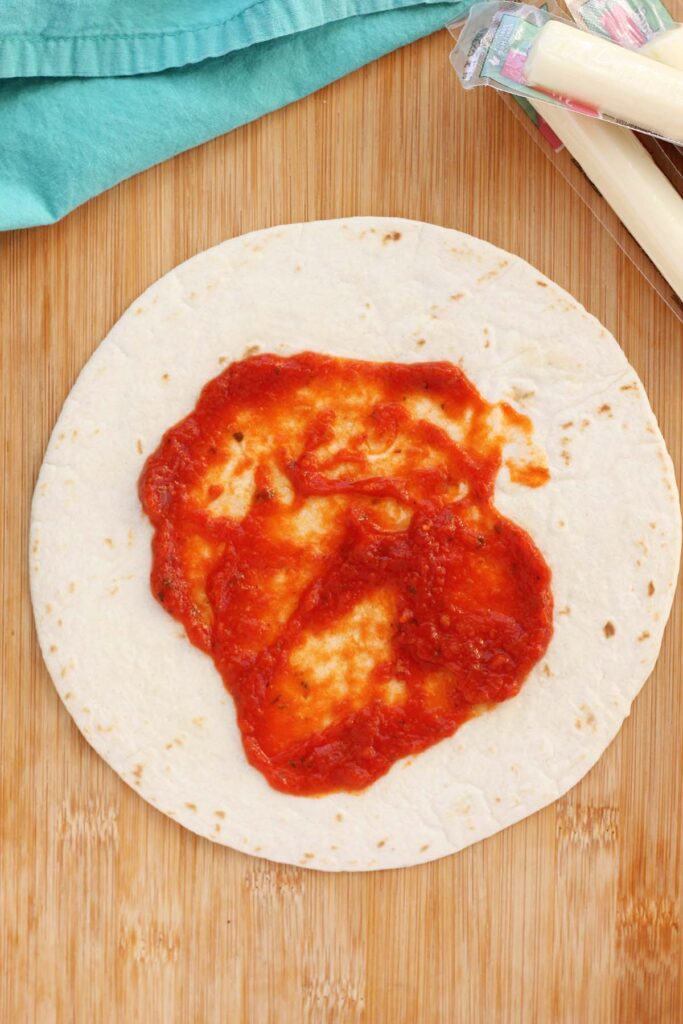
- Assemble – Spread pizza sauce on a tortilla, leaving space at the edges. Add pepperoni and a string cheese.
- Roll – Fold in the sides slightly, then roll it up burrito-style.
- Cook – Air fry at 370°F for 5–7 minutes, flipping halfway, or pan-fry over medium-low heat for 1–2 minutes per side until golden and crisp.
That’s it! Serve hot with your favorite dip and watch them disappear.

Storage and Make-Ahead Instructions
These pizza roll-ups are great for meal prep and store surprisingly well! Whether you want to make them ahead for a quick snack or save leftovers, here’s how to keep them fresh.
Make-Ahead Tips
- Assemble and refrigerate – Roll up the tortillas as instructed, but don’t cook them. Store in an airtight container in the fridge for up to 24 hours before cooking.
- Freeze for later – Wrap unbaked roll-ups tightly in plastic wrap and store them in a freezer-safe bag. When ready to eat, air fry directly from frozen at 370°F for 8–10 minutes or pan-fry until heated through.
Storage & Reheating
- Refrigerate leftovers – Store cooked roll-ups in an airtight container in the fridge for up to 3 days.
- Reheat for best texture – Air fry at 350°F for 3–4 minutes or warm in a pan over low heat until crispy again. Avoid microwaving, as it can make them soft and chewy.
With these tips, you can always have a crispy, cheesy pizza roll-up ready to go!


Recipe FAQs
Yes! You can assemble them up to 24 hours in advance and store them in the fridge before cooking. If freezing, wrap them tightly and cook from frozen, adding 2–3 extra minutes in the air fryer.
Too much sauce can make them soggy. Use a thin layer and leave space at the edges to prevent leaking. Also, make sure to preheat your air fryer for the crispiest texture.
Absolutely! Swap pepperoni for cooked sausage, shredded chicken, or sautéed veggies. You can also try different cheeses like cheddar, provolone, or Monterey Jack.
Yes! Just pan-fry over medium-low heat for 1–2 minutes per side until golden and crisp. You can also bake them at 400°F for 8–10 minutes, flipping halfway through.
Roll them tightly and place them seam-side down when cooking. You can also brush a little water or egg wash along the edge before rolling to help seal them.

Still Hungry? Follow One Sweet Appetite on Instagram, Pinterest, and Facebook!
Want to save this recipe?
Enter your email below & we’ll send it to your inbox. Plus get great new recipes from us every week!

Air Fryer Pizza Roll-Ups
Ingredients
- 4 fajita size tortillas
- 1/2 cup pizza sauce
- 1½ cup pepperoni
- 4 string cheese
Instructions
- Lay a tortilla flat on a clean surface. Spread a thin layer of pizza sauce, leaving at least one inch of space around the edges to prevent leaking.
- Layer pepperoni slices in the center, then place one string cheese on top. If using shredded cheese, sprinkle it evenly across the pepperoni.
- Fold in the sides slightly, then roll the tortilla up burrito-style, making sure it’s snug to prevent the filling from spilling out.
Air Fry:
- Preheat your air fryer to 370°F. Place the roll-ups seam-side down in the basket and cook for 5–7 minutes, flipping once halfway through, until crisp and golden.
Stove Top:
- Heat a nonstick pan over medium-low heat. Place the roll-ups seam-side down and cook for 1–2 minutes per side until crispy and the cheese is melted.
- Let them cool slightly before serving with marinara, ranch, or garlic butter for dipping.
Nutrition
The nutrition facts provided are calculated using a third-party tool and are estimates only. Actual nutritional content may vary based on the ingredients and brands you use, as well as portion sizes. For accurate results, please consult a registered dietitian or nutritionist.