
Red Velvet Waffles
This post may contain affiliate links.
If breakfast and dessert had a love child, it would be these red velvet waffles. Made with a simple cake mix (because we love a good shortcut), they’re fluffy, slightly chocolatey, and fancy enough to impress—without actually requiring much effort. Even my picky teen, who usually side-eyes anything “too extra,” gave these the ultimate seal of approval. So yeah, they’re that good.
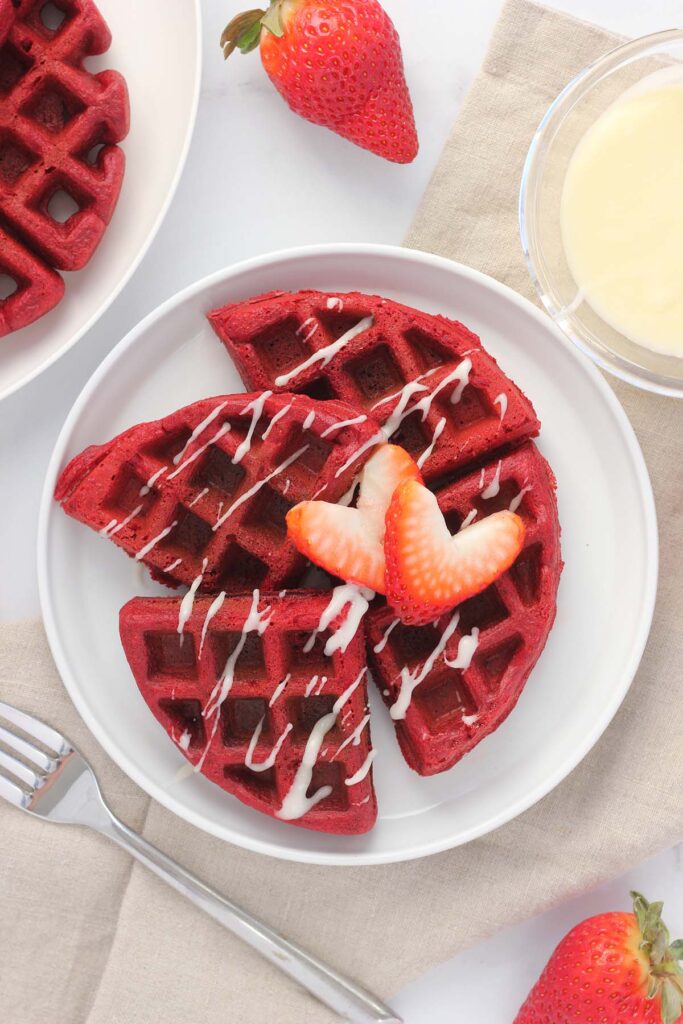
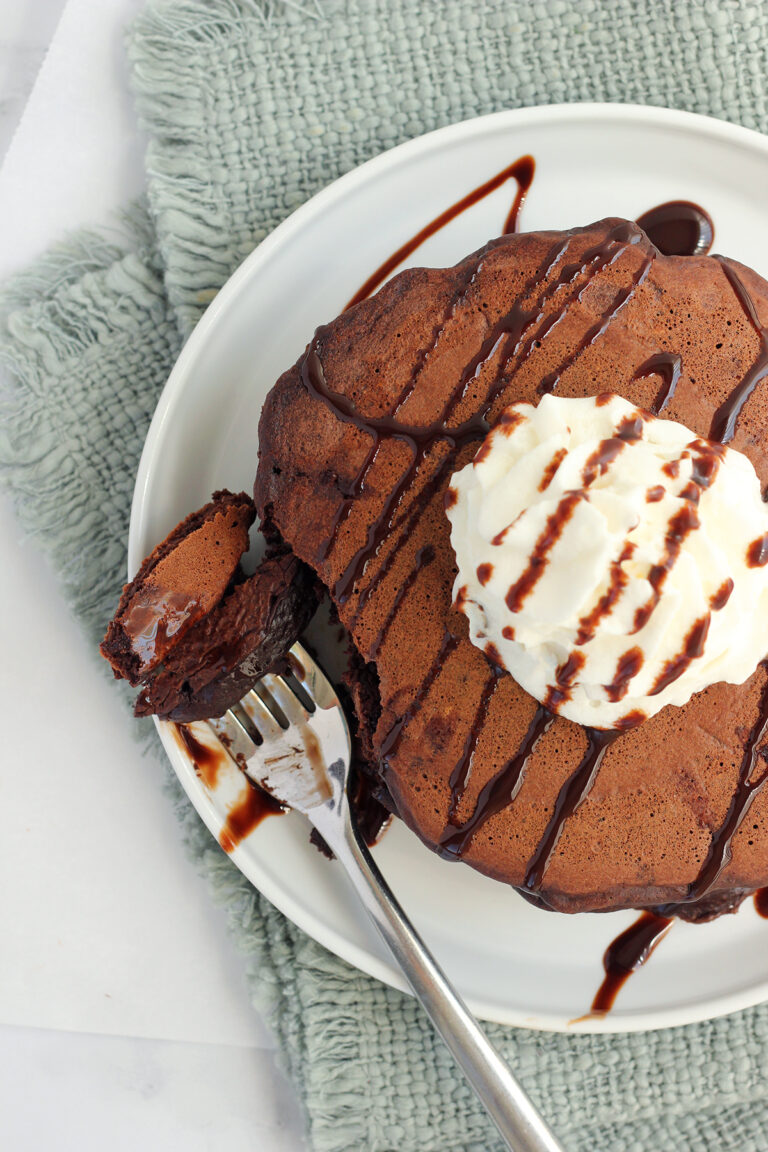
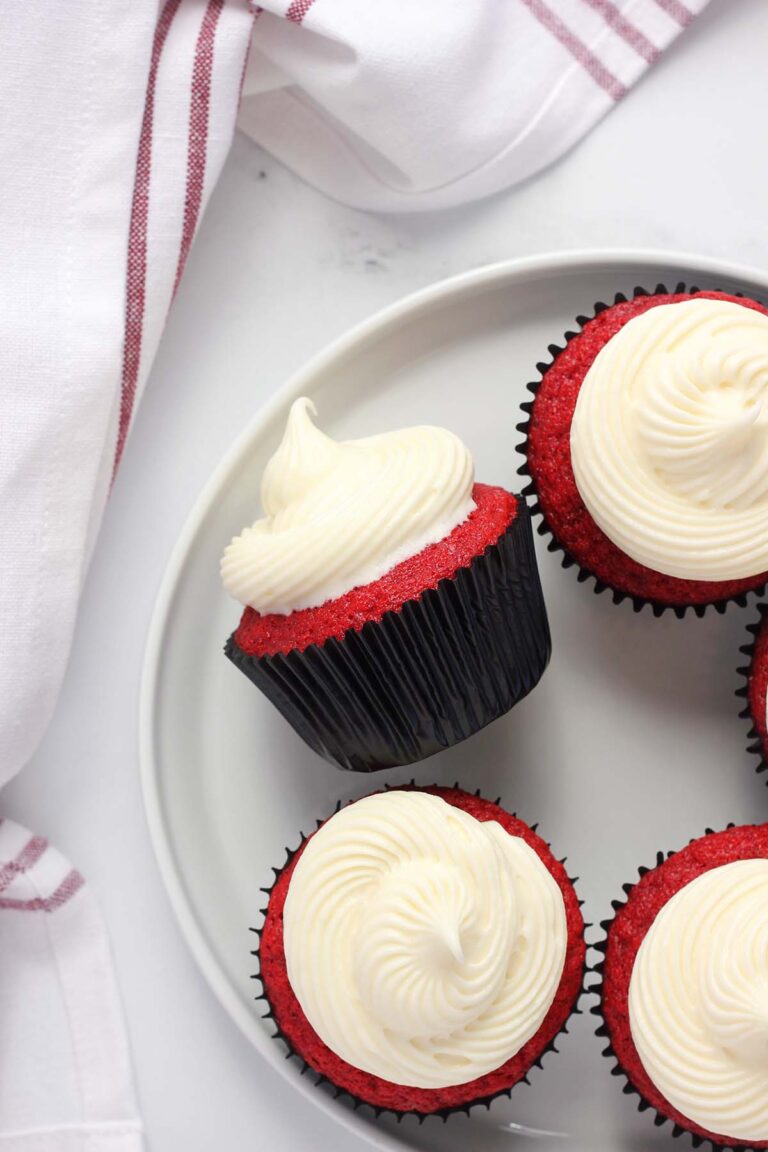
Make it a meal and serve these waffles with homemade whipped cream, cream cheese frosting, or warm pancake syrup!
Why You’ll Love This Recipe
- Cake Mix Shortcut: Minimal ingredients, maximum flavor, and zero fuss.
- Soft & Fluffy Texture: Light, airy, and perfectly crisp on the outside.
- Great for Special Occasions: Perfect for Valentine’s Day, birthdays, or Mother’s Day brunch.
- Works for Breakfast or Dessert: Because waffles can be both.
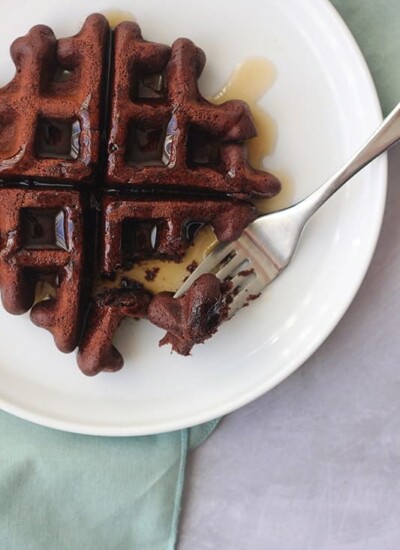
If breakfast needs a little extra main character energy, these red velvet waffles are here to deliver. Made with a cake mix (because we’re all about working smarter, not harder), they’re ridiculously easy, slightly chocolatey, and crisp on the outside while staying soft and fluffy inside. Basically, it’s like your favorite red velvet cake and a classic waffle had a delicious little baby.
But these? These got the ultimate seal of approval—probably because they’re the perfect excuse to eat dessert for breakfast. Top them with cream cheese frosting, a dollop of whipped cream, or a drizzle of syrup, and you’ve got a plate of pure happiness. Whether you’re making them for Valentine’s Day, a birthday, or just because it’s Tuesday, these waffles are guaranteed to impress with minimal effort.
Ingredients You’ll Need
One of the best things about this red velvet waffle cake? It keeps things stupidly simple. With just a few ingredients (most of which you probably already have), you’ll have rich, chocolatey red velvet waffles in no time. Here’s what you’ll need:
- Red Velvet Cake Mix: The ultimate shortcut! This gives you that classic red velvet flavor with a hint of cocoa. Look for a mix that includes pudding for extra moist waffles.
- Ingredients Called for on the Box: Usually eggs, oil, and water. Just follow the package instructions like a pro. Swap water for milk for a richer flavor.
- Non-Stick Spray: A must for waffle success! Nobody wants a waffle disaster stuck to the iron. Use a baking spray with flour for the best non-stick results.
That’s it! Three simple ingredients, and you’re on your way to a plate full of waffles that taste like they came from a fancy brunch spot (but secretly took almost zero effort).
Variations and Substitutions
Let’s say you’re feeling a little rebellious or just need to work with what’s in your pantry—don’t worry, I’ve got you covered. Here are some easy swaps and fun twists to make these red velvet waffles your own:
- Cake Mix Swap: Not a fan of red velvet? Use chocolate, vanilla, or even spice cake mix. Tip: Add a drop or two of red food coloring to chocolate mix for that signature hue.
- Milk Instead of Water: Swap water for milk or buttermilk to make your waffles even richer and fluffier. Tip: Almond or oat milk works great too!
- Add Chocolate Chips: Want to up the chocolate game? Toss in a handful of chocolate chips or white chocolate chunks. Tip: Mini chocolate chips melt perfectly into every bite.
- Mix in Some Zest: Add a teaspoon of orange or lemon zest for a citrusy zing that pairs surprisingly well with red velvet.
- Protein Boost: Add a scoop of your favorite protein powder to the mix. Now you can say these waffles are basically a health food, right?
Feel free to get creative! These waffles are a blank canvas ready for your culinary masterpiece.
Red Velvet Waffles Recipe
This recipe is as easy as it gets—just mix, pour, and waffle your way to breakfast bliss. If you can make a cake, you can make these red velvet waffles with zero stress. Here’s the simple game plan:
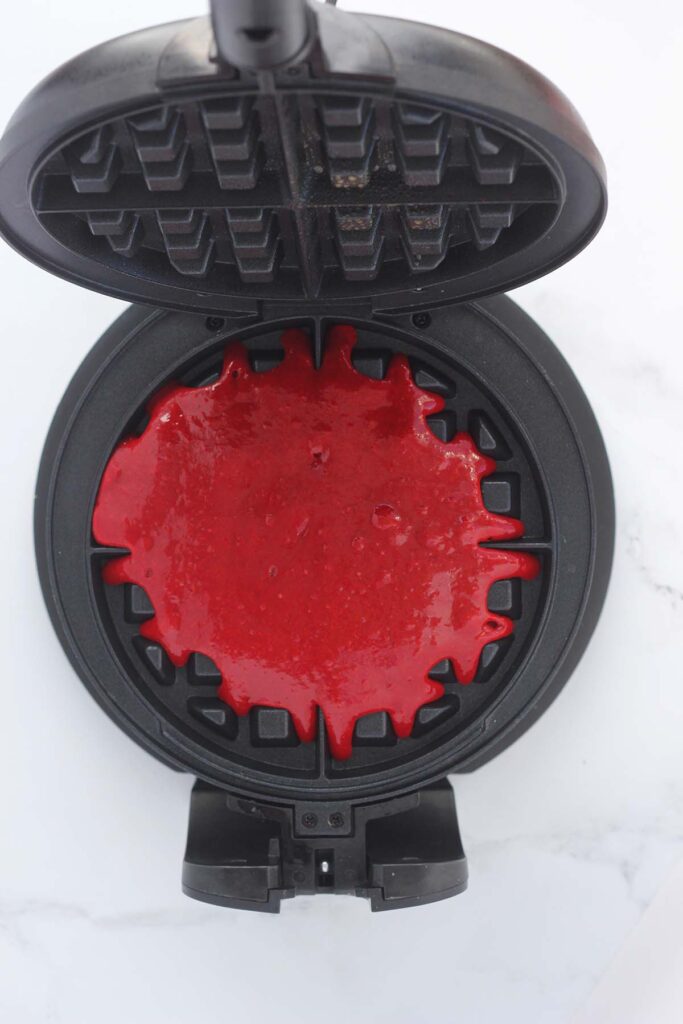
- Preheat the waffle iron – Get it nice and hot, then spray with non-stick spray.
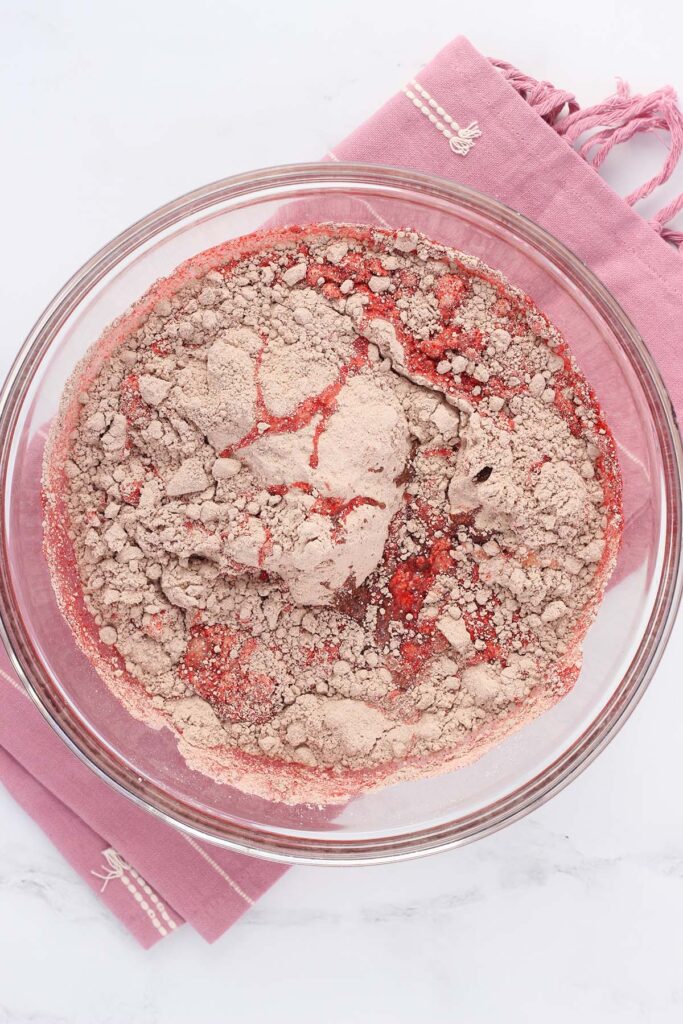
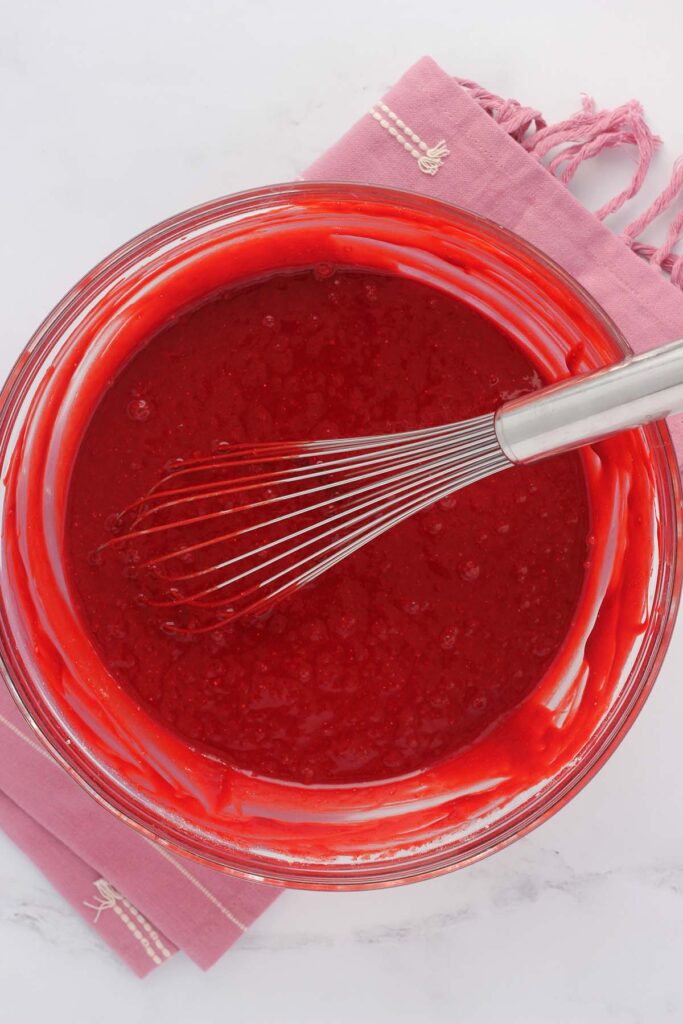
- Prepare the batter – Mix the red velvet cake mix with the ingredients called for on the box. Stir until smooth.
- Cook the waffles – Pour the batter into the waffle iron (don’t overfill!), close the lid, and cook until crisp.
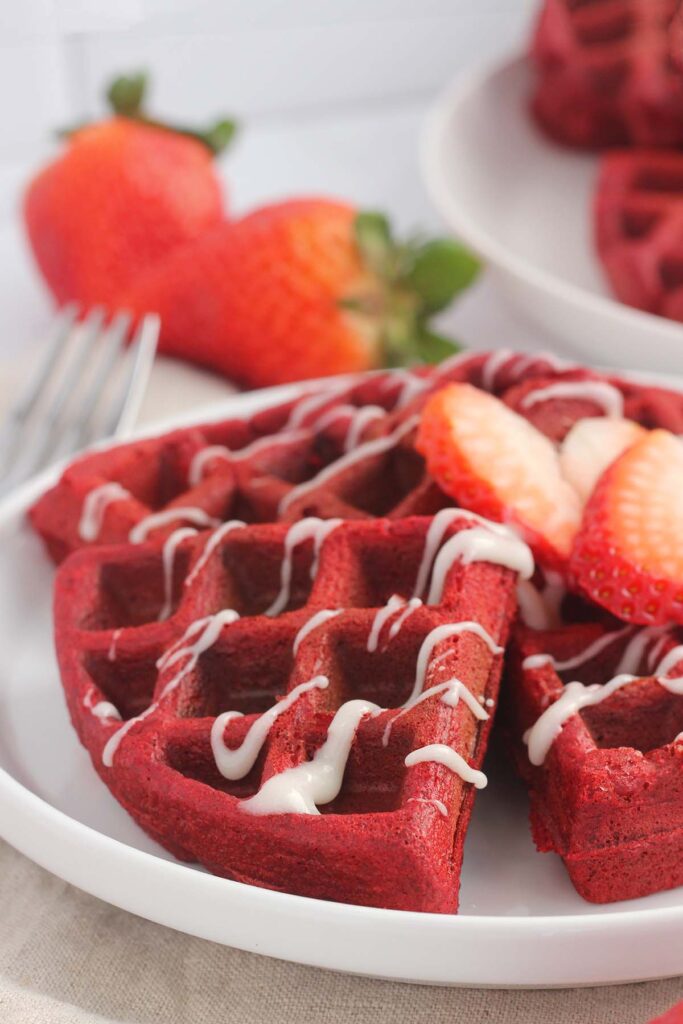
- Serve and enjoy – Top with whipped cream, syrup, or even a drizzle of cream cheese frosting.
That’s it! In just a few minutes, you’ll have waffles that look fancy but took almost no effort—our favorite kind of recipe.
Storage and Make-Ahead Instructions
These red velvet waffles are just as good the next day—if you can resist eating them all at once. Here’s how to store and prep them in advance for stress-free mornings:
Storing Leftovers
- Refrigerate: Let the waffles cool completely, then store them in an airtight container or zip-top bag in the fridge for up to 3 days.
- Freeze: Place cooled waffles in a single layer on a baking sheet and freeze for 30 minutes (this prevents sticking). Then, transfer them to a freezer-safe bag for up to 3 months.
Reheating
- Toaster or Air Fryer (Best Option): Pop frozen or refrigerated waffles in the toaster or air fryer at 350°F for 3-5 minutes until crispy.
- Oven: Place waffles on a baking sheet and warm at 300°F for about 10 minutes.
- Microwave (Least Recommended): While it works, microwaving makes them soft instead of crispy.
Make-Ahead Tips
- Mix the Batter in Advance: Prepare the batter up to 24 hours ahead and store it covered in the fridge. Give it a quick stir before using.
- Pre-Cook and Freeze: Make a batch, freeze them, and reheat for a quick grab-and-go breakfast anytime.
Now you’ve got a plan to enjoy red velvet waffles whenever the craving hits—whether it’s a lazy Sunday morning or a busy weekday!
Tips for Success:
Preheat your waffle iron fully: A hot waffle maker ensures crispy edges and an even cook. If it’s not hot enough, you’ll end up with soggy waffles.
Don’t overfill the waffle iron: Cake mix batter expands! Stick to about ½ to ¾ cup of batter per waffle to avoid spills.
Use milk instead of water: Swapping the water for milk (or buttermilk) makes the waffles richer and more flavorful.
Let the batter rest: Give the batter 5 minutes to sit before cooking. This helps hydrate the mix and results in fluffier waffles.
Spray the waffle iron between batches: Even if it’s non-stick, a quick spritz of cooking spray helps prevent sticking. Use a baking spray with flour for extra insurance.
Crisp them up in the oven: If you’re making multiple waffles, keep them warm in a 200°F oven on a wire rack to maintain crispiness.
Recipe FAQs
Absolutely! While red velvet gives that classic slightly chocolatey flavor, you can swap it for chocolate, vanilla, or even funfetti for a different twist. Just be aware that the texture may vary slightly.
Make sure your waffle iron is fully preheated before adding the batter, and spray with non-stick spray between batches. If your waffle maker tends to stick, try using a baking spray with flour for better release.
For extra crisp waffles, let them cook a little longer until the steam slows down. You can also place them in a 200°F oven on a wire rack while finishing the batch—this keeps them warm without getting soggy.
Yes! You can mix the batter up to 24 hours in advance and store it in the fridge. Just stir it well before using, as the ingredients may separate slightly.
Definitely! Let them cool completely, freeze them in a single layer for 30 minutes, then transfer to a freezer-safe bag. They’ll last up to 3 months and can be reheated straight from frozen.

Still Hungry? Follow One Sweet Appetite on Instagram, Pinterest, and Facebook!
Want to save this recipe?
Enter your email below & we’ll send it to your inbox. Plus get great new recipes from us every week!

Red Velvet Waffles
Ingredients
- 1 (13.25oz) red velvet cake mix + water, oil, and eggs called for on the box
Cream Cheese Topping
- 4 oz cream cheese (softened)
- 4 tablespoons butter (softened)
- 1½ cups powdered sugar
- 1 teaspoon vanilla extract
- 2-4 tablespoons milk
Instructions
Red Velvet Waffles
- Plug in your waffle iron and let it heat up. A hot waffle iron ensures a crispy outside and fluffy inside. Once heated, spray generously with non-stick spray to prevent sticking.
- In a large mixing bowl, combine the red velvet cake mix with the ingredients listed on the box (typically eggs, oil, and water). Stir until the batter is smooth and lump-free. If you want extra richness, swap the water for milk or buttermilk.
- Pour the batter into the center of the preheated waffle iron. Use about ½ to ¾ cup of batter per waffle, depending on the size of your waffle maker. Close the lid and cook according to the manufacturer’s instructions, usually 3-5 minutes, or until the waffles are set and slightly crispy on the edges.
- Carefully remove the waffle using tongs or a fork. Repeat with the remaining batter, making sure to re-spray the waffle iron as needed.
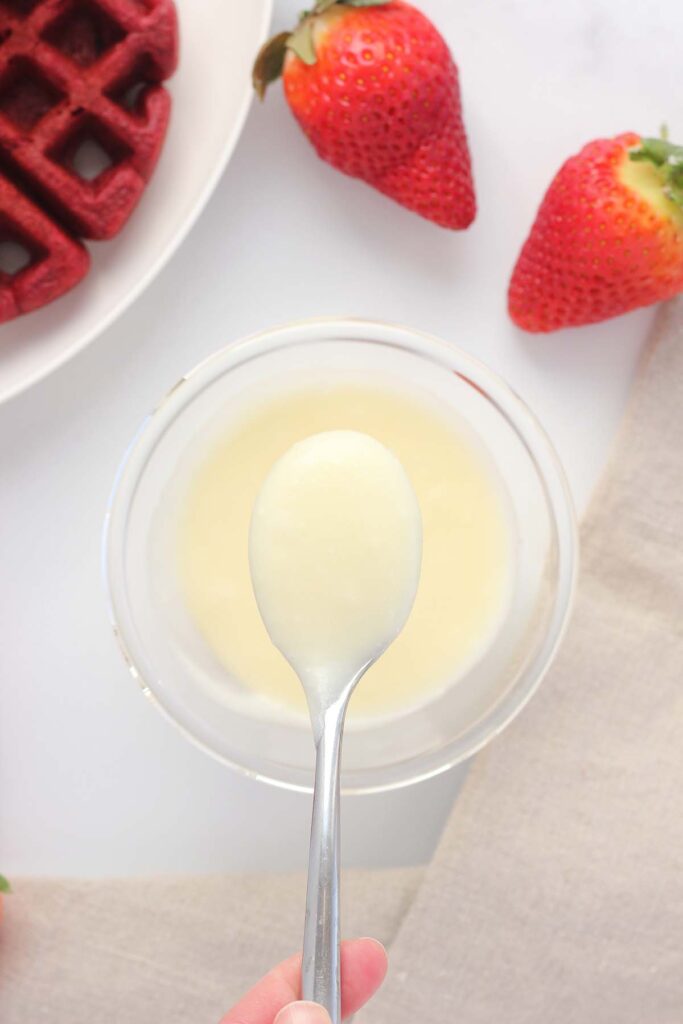
Cream Cheese Topping
- In a mixing bowl, beat the softened cream cheese and butter together with a hand mixer until smooth and fluffy, about 2 minutes.
- Gradually mix in the confectioners’ sugar and vanilla extract, beating until fully combined. The mixture will be thick at this stage.
- Slowly add the milk, a little at a time, whisking until you reach your desired consistency. If you want a thicker glaze, use less milk; for a thinner drizzle, add a little more.
- Drizzle the glaze over warm red velvet waffles and let it melt into every delicious bite!
Notes
The nutrition facts provided are calculated using a third-party tool and are estimates only. Actual nutritional content may vary based on the ingredients and brands you use, as well as portion sizes. For accurate results, please consult a registered dietitian or nutritionist.


Thanks for sharing this hack! I have been making these waffles from scratch for a while now. Your way saves a lot of time and money. I did substitute buttermilk for the water in the recipe, which made them nice and fluffy.
Love that tip. Thank you for sharing! Using buttermilk sounds like the perfect upgrade for extra fluffy waffles. So glad this shortcut helped save you some time (and a few dishes).