Grilled Chicken Legs
This post may contain affiliate links.
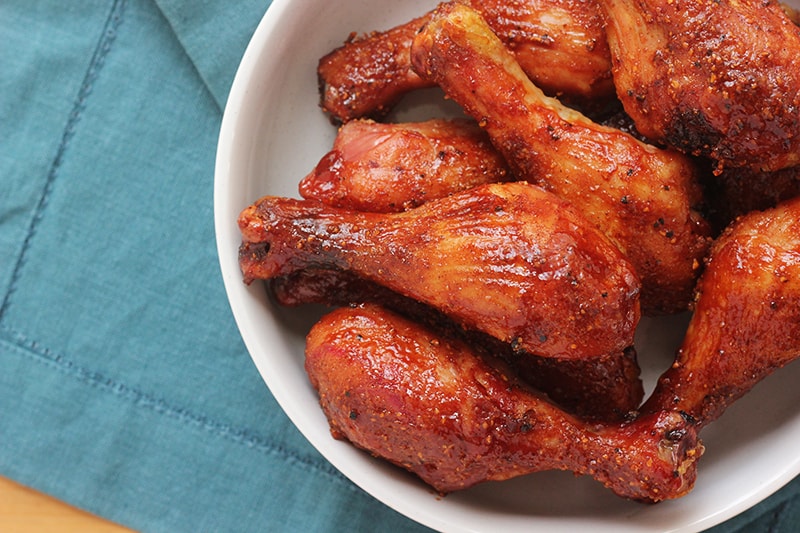
Grilled BBQ chicken legs hit that sweet spot of easy prep and big flavor. You get juicy, tender meat with a sticky, caramelized coating and just enough char from the grill. After plenty of testing to nail the timing and heat, this method keeps things simple while still delivering consistent, really solid results every time.
Searching for some drool worthy sides? Try serving this chicken with my Jalapeno Popper Mac and Cheese or Ranch Pasta Salad!
Why You’ll Love These BBQ Drumsticks
- Family-Friendly Grilled Chicken: Even picky eaters love the crispy skin and saucy flavor.
- Backyard BBQ Ideas: This recipe is a crowd-pleaser and pairs perfectly with all your summer sides.
- Meal Prep Chicken Recipes: Make a batch ahead of time for easy lunches or dinners throughout the week.
- Simple Summer Grilling Recipe: Minimal ingredients and big flavor make this a summer staple.
Growing up, BBQ chicken drumsticks were my dad’s thing. Every summer, same routine, same smoky backyard, and yes… the chicken was almost always a little too dry. It’s one of those family jokes that somehow stuck, but so did the memory of him standing over the grill, putting in the effort to make something special for us.
Now I’m the one everyone looks to when it’s time to fire things up, and I took that nostalgia and made a few tweaks along the way. This version keeps all the classic flavor but fixes the biggest issue, giving you juicy, tender chicken with that sticky, caramelized BBQ finish. It’s simple, reliable, and the kind of recipe that turns into your go-to once you try it.
BBQ Chicken Legs Ingredients
Great grilled BBQ chicken doesn’t need anything fancy, but the quality of what you use matters. A few simple ingredients, chosen well, are what give you that juicy texture and bold, classic flavor.
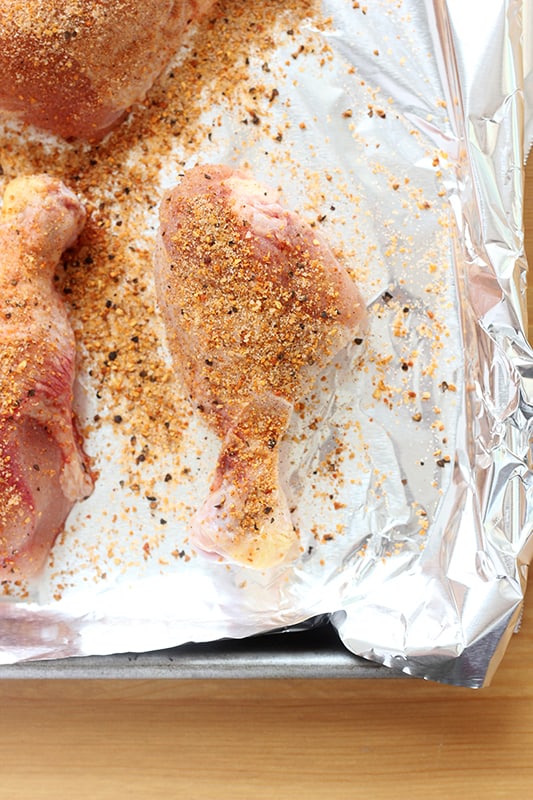
- Chicken legs (drumsticks). Look for similar-sized pieces so they cook evenly. Pat them dry before seasoning to help the skin crisp up on the grill.
- Olive oil. Helps the seasoning stick and keeps the chicken from drying out. You can swap with any neutral oil like avocado or vegetable oil.
- Seasonings. Salt, pepper, garlic powder, and paprika. Don’t skip this base layer. Season generously for the best flavor throughout, not just on the surface. You can also opt for smoked paprika for a deeper, slightly smoky flavor. Use what you have.
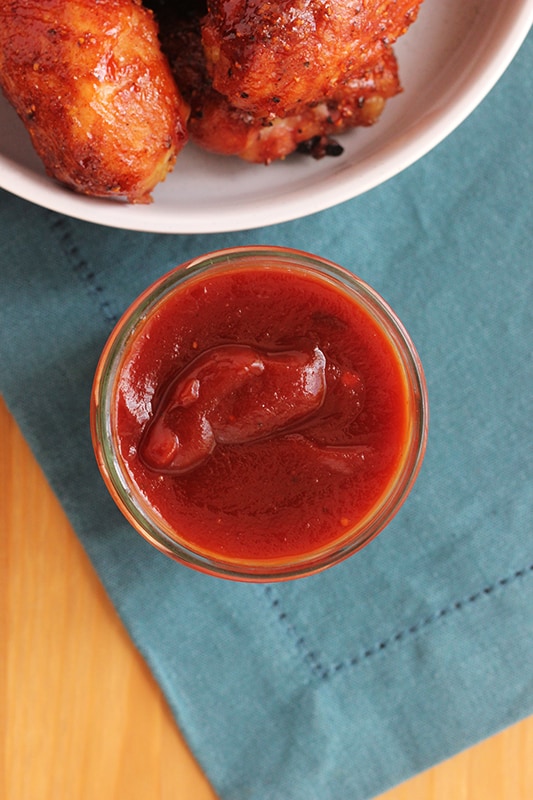
- BBQ sauce. Use your favorite store-bought brand or homemade. Thicker sauces tend to cling better and caramelize nicely on the grill.
- Optional: brown sugar. A small sprinkle can boost caramelization and add a hint of sweetness, especially if your BBQ sauce is on the tangier side.
Everything here is easy to find at any grocery store, and you likely have most of it in your pantry already. Keep it simple, use what you love, and you’ll end up with chicken that tastes like you put in way more effort than you actually did.

Jesseca’s Recipe Review
This recipe completely changed how I feel about grilled chicken. The texture is spot on, juicy inside with that lightly crisp, caramelized outside, and the flavor actually soaks in instead of just sitting on top. It’s the one I reach for anytime we grill because I know exactly how it’s going to turn out, and that kind of consistency matters when you’re feeding people you care about.
Tip from Jesseca:
Wait to brush on the BBQ sauce until the last few minutes of cooking. It keeps the sugars from burning and gives you that perfect sticky finish instead of charring too early.
Substitutions and Variations
This recipe is easy to adjust based on what you have on hand, your flavor preferences, or even the season. A few small tweaks can give you a totally different result without adding extra work.
- Switch the sauce. Try honey BBQ for a sweeter finish, spicy BBQ for heat, or even a mustard-based sauce for a tangy twist. Any thick sauce will work here.
- Use a dry rub instead. Skip the sauce and coat the chicken in your favorite spice blend. This gives you more of a classic grilled, slightly smoky flavor without the sticky finish.
- Add heat. Mix a little cayenne or chili powder into your seasoning, or stir hot sauce into the BBQ for a kick that’s easy to control.
- Make it a little lighter. Use a lower-sugar BBQ sauce or brush on just a thin layer at the end. You’ll still get great flavor without it feeling too heavy.
- Try different cuts of chicken. This method works well with thighs or bone-in chicken pieces too. Just adjust the cooking time as needed.
- Seasonal twist. In the summer, add a squeeze of fresh lemon or a sprinkle of fresh herbs right before serving to brighten things up.
You don’t need to overhaul the recipe to make it your own. A simple swap or small addition can shift the flavor just enough to keep it interesting while still keeping things easy.
Why Your BBQ Chicken Turns Out Dry (and How to Fix It)
If you’ve ever pulled chicken off the grill only to find it a little too dry, you’re not alone. It usually comes down to a few small things that make a big difference, and once you know what to look for, it’s an easy fix.
- Too much direct heat. Cooking chicken legs straight over high heat the entire time will dry them out before they’re fully cooked. Start them over indirect heat so they cook through gently, then finish over direct heat for that char.
- Adding sauce too early. BBQ sauce has sugar, which means it burns fast. If you add it at the beginning, it can scorch before the chicken is done. Wait until the last few minutes to brush it on.
- Overcooking “just to be safe”. It’s easy to leave chicken on the grill too long out of caution. Drumsticks are more forgiving than chicken breasts, but they still dry out if pushed too far. Aim for fully cooked but still juicy, not falling apart and dry.
- Skipping a little oil or fat. A light coating of oil helps lock in moisture and keeps the outside from drying out too quickly. It also helps your seasoning stick better.
The good news is none of this requires extra work, just a slight shift in how you grill. Once you dial this in, you’ll get juicy, flavorful chicken every time instead of hoping for the best.
BBQ Chicken Legs On The Grill, Questions And Answers
Absolutely! Bake at 400°F for 35–45 minutes, flipping halfway through. Brush on BBQ sauce in the last 10 minutes and finish under the broiler for that sticky, caramelized finish.
165°F is the safe minimum, but for super tender, fall-off-the-bone drumsticks, aim for 175°F. The extra time helps break down tough connective tissue.
Make sure the grill grates are clean and well-oiled before adding the chicken. Let the drumsticks cook undisturbed for a few minutes before flipping—they’ll naturally release when ready.
You’ll need to thaw them completely first for even cooking and proper seasoning. Thaw in the fridge overnight for best results.
Poke near the bone—if the juices run clear and there’s no pink near the center, they’re likely good to go. But a thermometer is a worthy investment for peace of mind.
Totally up to you! Sweet, spicy, smoky—it’s all fair game. Just make sure to wait until the end to brush it on to avoid burning.
Storage and Make-Ahead Instructions
Got leftovers or planning ahead? This recipe holds up really well with a few simple steps.
- Storage: Let the chicken cool completely, then store in an airtight container in the refrigerator for up to 3–4 days. Keep any extra sauce separate if you can to help maintain the texture.
- Freezing: You can freeze cooked chicken legs for up to 2–3 months. Wrap tightly in foil or place in a freezer-safe bag. For best results, freeze without extra sauce and add fresh when reheating.
- Make-Ahead: You can season the chicken up to 24 hours in advance and keep it covered in the fridge. This actually helps the flavor soak in and makes prep even easier when you’re ready to grill.
Reheating:
- Oven (best option): Warm at 350°F for 15–20 minutes, loosely covered with foil. Remove the foil at the end to help the skin crisp back up.
- Air fryer: Heat at 350°F for 5–8 minutes for a quicker option with crispier skin.
- Microwave: Works in a pinch, but the skin will soften. Cover loosely and heat in short intervals.
With the right storage and reheating, you’ll still get really great flavor and texture, even the next day.
Want to save this recipe?
Enter your email below & we’ll send it to your inbox. Plus get great new recipes from us every week!

Ingredients
- 10 chicken legs (drumsticks)
- 2 tablespoons oil
- 3-4 tablespoons chicken rub or seasoning
- 1/2 cup BBQ sauce (optional)
Instructions
- Trim off any loose skin from the drumsticks. Pat each one dry with a paper towel to help the seasoning stick and ensure crispy skin.
- Rub the drumsticks lightly with oil, then sprinkle generously with your favorite chicken seasoning or rub.
- Allow the seasoned drumsticks to rest at room temperature while you heat the grill or smoker. This helps them cook more evenly.
For Gas or Charcoal Grill
- Preheat your grill to medium-high heat (about 375–400°F). If using charcoal, let the coals burn down until covered in white ash.
- Place the drumsticks directly on the grill grates. Cook for 18–20 minutes, turning every 5 minutes to prevent burning and to get even grill marks.
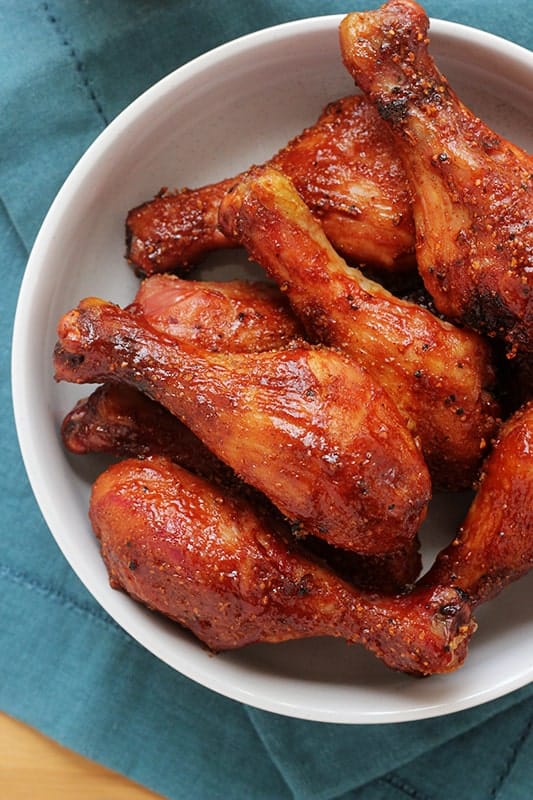
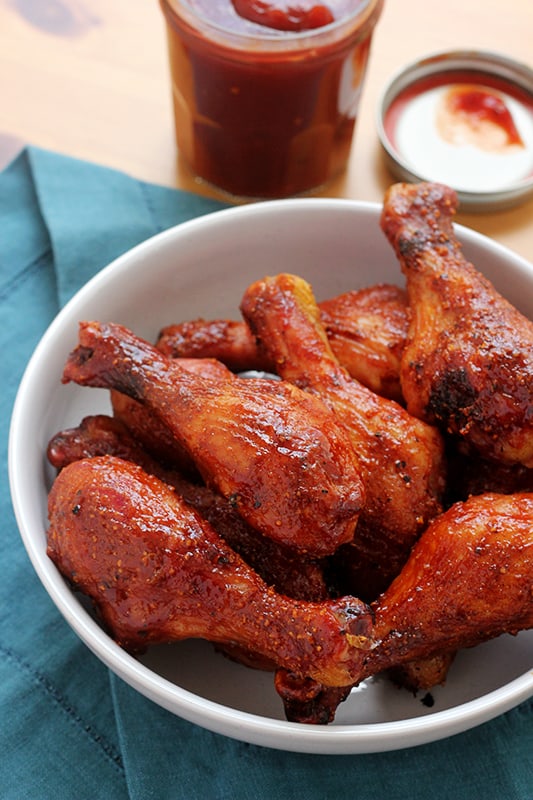
- Once the internal temperature reaches 165°F, brush the drumsticks with BBQ sauce. Continue cooking for 5–7 more minutes, or until the internal temperature hits 175°F.
- Remove from the grill and let the drumsticks rest for 5 minutes before serving.
For Smoker
- Set your smoker to 275°F and let it preheat for about 15 minutes with the lid closed.
- Place drumsticks directly onto the grates. Cook for 30 minutes, flip, and cook for another 10 minutes.
- Once the chicken reaches 165°F, brush on BBQ sauce if desired. Continue cooking until the internal temperature reaches 175°F.
- Let the smoked drumsticks rest for 5 minutes before serving.
Notes
- Patting the chicken dry helps give you that nice crispy skin.
- The best way to not overcook your chicken is to check it with a meat thermometer.
- Try different sauces and different rubs to give your chicken a twist in flavor.
- Serve with a side of bbq sauce!
Equipment
The nutrition facts provided are calculated using a third-party tool and are estimates only. Actual nutritional content may vary based on the ingredients and brands you use, as well as portion sizes. For accurate results, please consult a registered dietitian or nutritionist.