
Oreo Bunny Truffles
This post may contain affiliate links.
These Oreo Bunny Truffles are a fun and festive way to celebrate Easter! Made with Oreo cookies, cream cheese, and white chocolate – It is the perfect Easter dessert recipe!
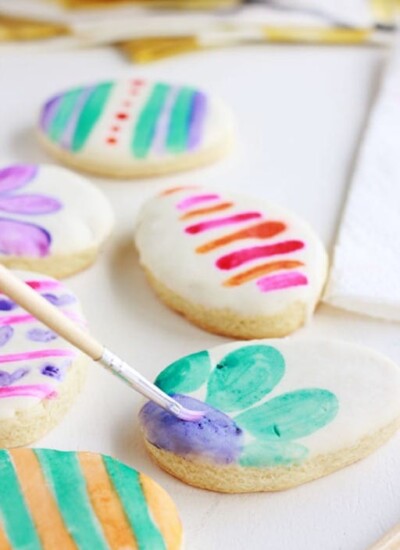
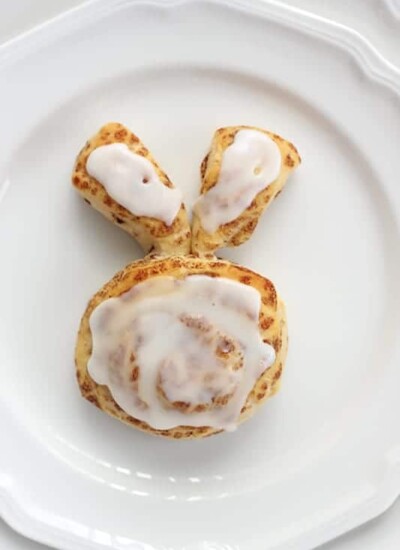
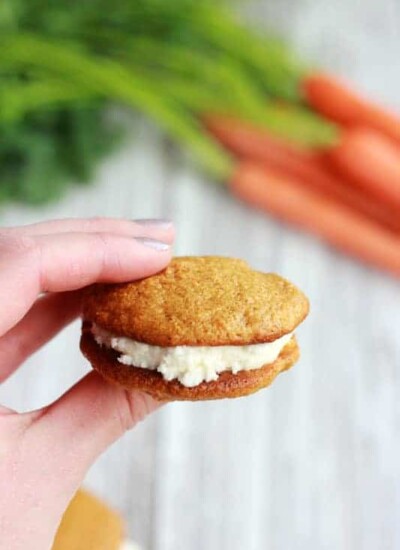
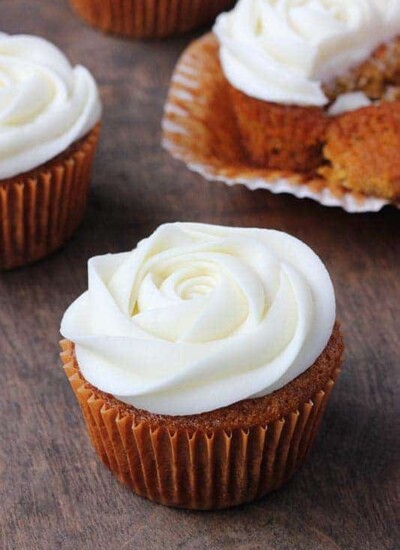
Be sure to take a look at all of the Easter Recipes we have here on the site! A few of my favorites? Watercolor Easter Egg Sugar Cookies, The BEST Carrot Cake, Bunny Cinnamon Rolls!

Recipe Features:
- Adorable Holiday Treat: These are so cute and the perfect addition to a holiday dessert spread! Almost too cute to eat.
- Make-Ahead: You can make these truffles up to one week in advance and keep stored in the refrigerator.
- Practice Makes Perfect: If your first attempt doesn’t turn out perfect, keep trying! Once you get the hang of dipping two truffles together it is a piece of cake!
These truffles are one of the very first I ever posted to the blog, and one of the number one fan favorites! You can’t beat an adorable holiday treat that is packed with chocolate. To this day, these are one of my personal favorites. Simple to make with a bakery worthy finish. I’ve even made them on TV a few times to share with our local fans!
This Easter recipe is super simple. So simple that I am confident you can make. Follow this step by step bunny truffle tutorial and make your very own!
Want even more sweetness? Try this cadbury creme egg dip!
Easter Oreo Truffle Ingredients
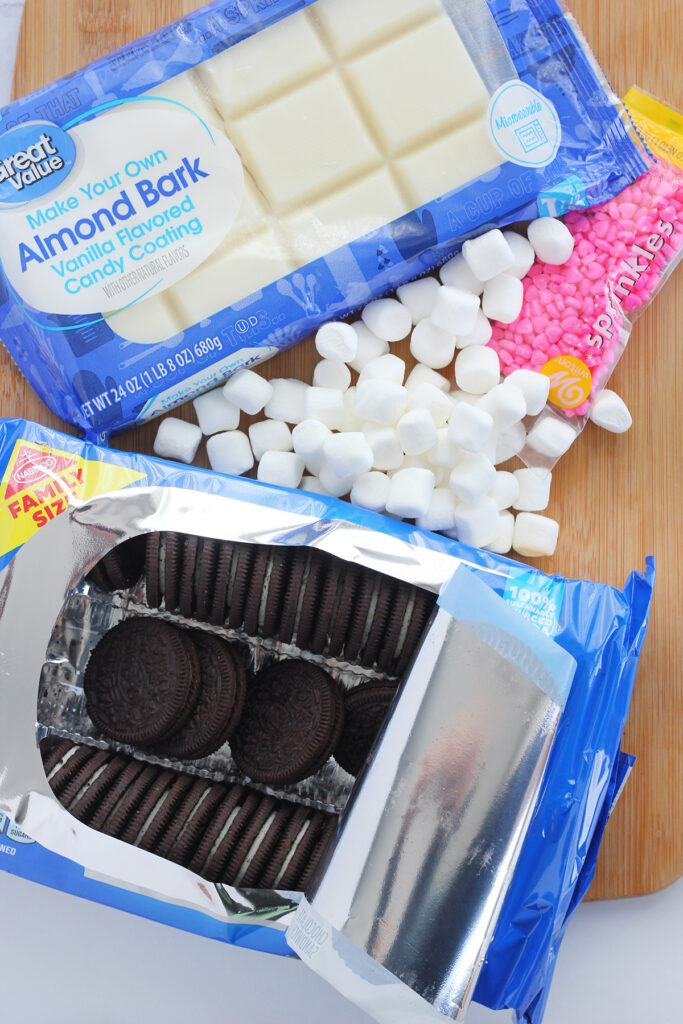
The base of these adorable bunnies are surprisingly simple! All of the magic starts with my 2-Ingredient Oreo Truffles. Once you have the base prepared it’s as simple as adding chocolate and sprinkles! Here is everything you will need:
- 1 bag of Oreo cookies
- 1 (8oz) package of cream cheese
- mini marshmallows
- pink sanding sugar
- heart sprinkles
- vanilla almond bark or white candy melts
- blue food color or an edible marker
- Jimmies and rainbow sprinkles, optional
How To Make Truffles Shaped Like Bunnies
To help make things easier to understand, I’ve broken down the process. First up, making the truffles! While the recipe is photographed with chocolate, you can also make these as lemon truffles!
- CRUMBS: Place oreo cookies, filling and all, into a blender or food processor. Pulse until they become a crumbled powder texture and no large crumbs remain.
- MIX: Transfer the cookies to the bowl of a stand mixer that is fitted with the paddle attachment, or a mixing bowl with a hand mixer. Combine the Oreo’s with softened cream cheese and mix for 1 to 2 minutes, or until a dough forms.
- SCOOP: Use a small cookie scoop, or spoon, to form 2 tablespoon sized balls. Roll gently in your hands until a circle forms.
- CHILL: Place the truffles onto a parchment, or silicone baking mat, lined cookie sheet and refrigerate for at least 20 minutes, or up to a few hours.
Building Bunny Truffles
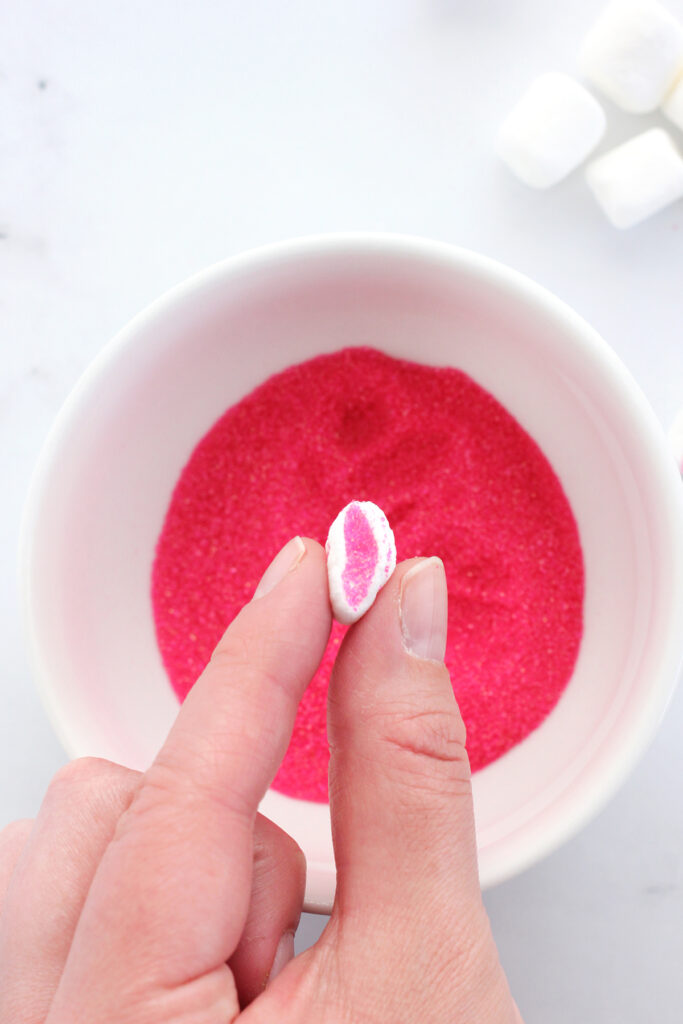
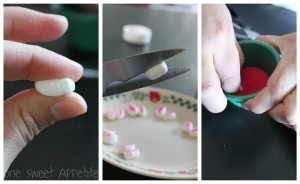
- EARS: While the truffles are chilling, start prepping the ears. Take a mini marshmallow and squeeze between your fingers to slightly flatten. Cut in half using clean scissors. Dip the cut sticky side of each marshmallow into pink sanding sugar. Set aside and repeat until you have enough ears for each bunny.
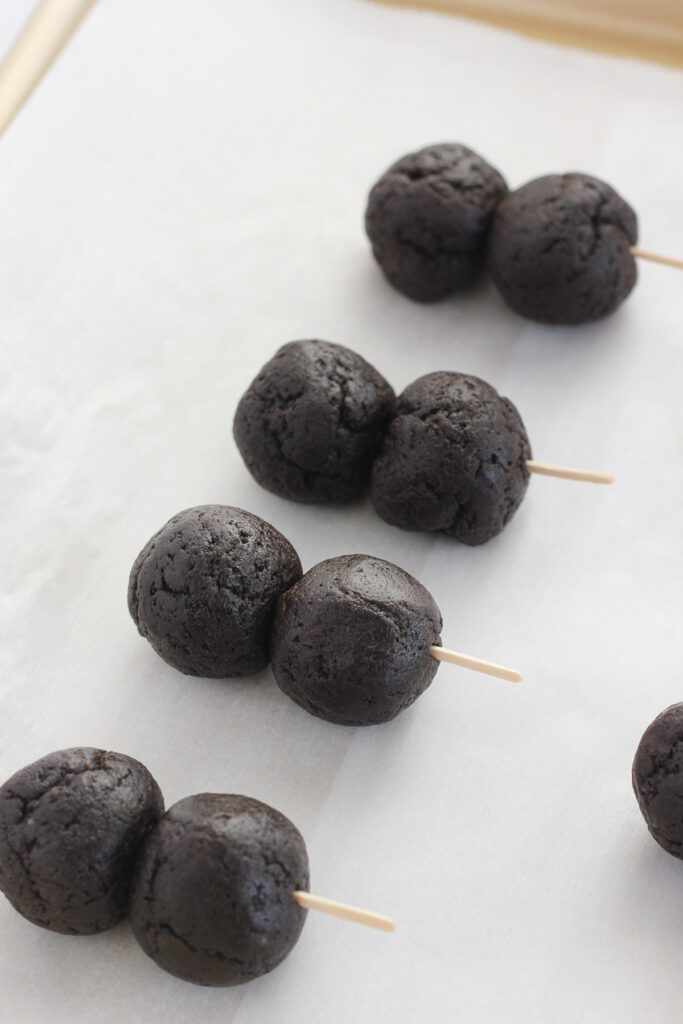
- PREP: Remove the truffles from the refrigerator. Prepare for dipping by carefully pushing two truffles onto a toothpick. DO NOT push the toothpick all the way through the second truffle.
- DIP: Melt the chocolate according to the package directions, adding a little shortening if the chocolate is too thick for dipping. Holding the end of a toothpick, quickly dip a truffle bundle into the chocolate, covering the entire surface. Let excess chocolate drip of and place onto a fresh parchment paper.
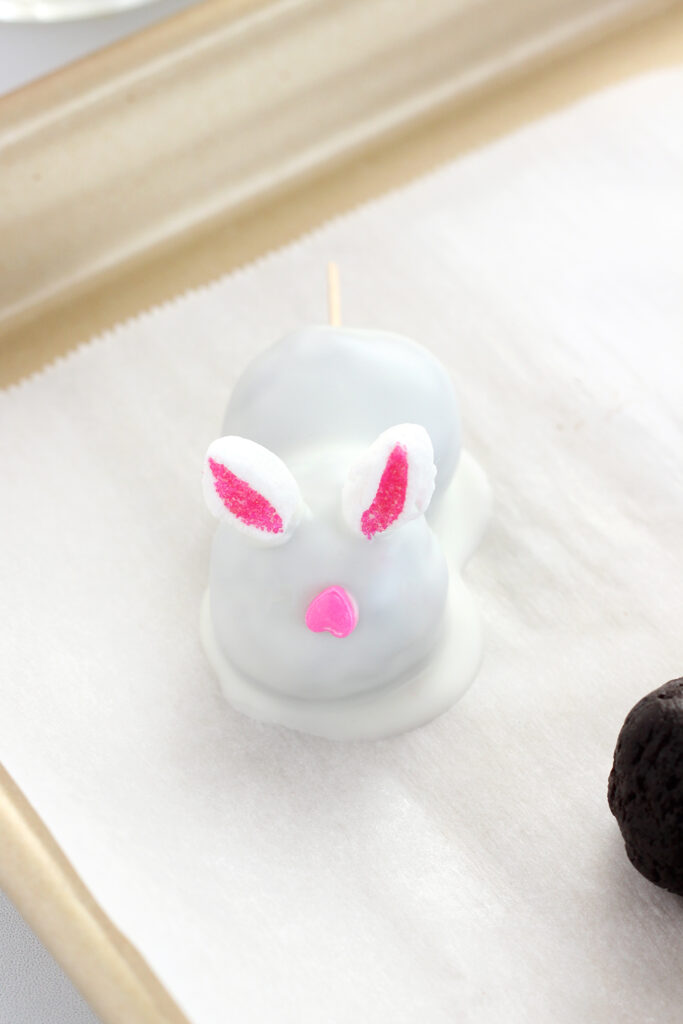
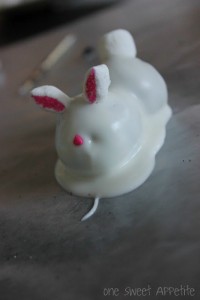
- DECORATE: Working quickly, attach the ears on the top of the ball that does not have the toothpick poking out and an upside down heart for the nose.
- SET: Let the chocolate sit until fully set, about 20 minutes.
- FINISH: Carefully pull out the toothpick from each druffly. Dip the end of one mini marshmallow in chocolate and place over the hole left with the toothpick. Use food color or an edible marker to create the eyes.
Recipe Notes:
The best way to thin chocolate is to add a spoonful or two of shortening to the chocolate while you are heating it. This helps to thin the chocolate making it easier for dipping.
These truffles will last one week if stored in an airtight container inside the refrigerator.
Yes. I recommend freezing the truffle before decorating. Freezing fully decorated will cause the marshmallows to go stale.

Must-Try Easter Recipes
Still Hungry? Follow One Sweet Appetite on Instagram, Pinterest, and Facebook!
Want to save this recipe?
Enter your email below & we’ll send it to your inbox. Plus get great new recipes from us every week!

Easter Bunny Truffles
Ingredients
- 1 15.5 oz bag Oreo Cookies
- 8 oz cream cheese
- 24 oz white almond bark or white chocolate
- mini Marshmallows
- pink sanding sugar
- small heart sprinkles
- blue gel food color
- toothpicks
Instructions
Making the Oreo truffles:
- Place oreo cookies, filling and all, into a blender or food processor. Pulse until they become a crumbled powder texture and no large crumbs remain.
- Transfer the cookies to the bowl of a stand mixer that is fitted with the paddle attachment, or a mixing bowl with a hand mixer. Combine the Oreo’s with softened cream cheese and mix for 1 to 2 minutes, or until a dough forms.
- Use a small cookie scoop, or spoon, to form 2 tablespoon sized balls. Roll gently in your hands until a circle forms.
- Place the truffles onto a parchment, or silicone baking mat, lined cookie sheet and refrigerate for at least 20 minutes, or up to a few hours.
Preparing Decorations
- While the truffles are chilling, start prepping the ears. Take a mini marshmallow and squeeze between your fingers to slightly flatten. Cut in half using clean scissors.
- Dip the cut sticky side of each marshmallow into pink sanding sugar. Set aside and repeat until you have enough ears for each bunny.

Assembling Truffles
- Remove the truffles from the refrigerator. Prepare for dipping by carefully pushing two truffles onto a toothpick. DO NOT push the toothpick all the way through the second truffle.
- Melt the chocolate according to the package directions, adding a little shortening if the chocolate is too thick for dipping. It's helpful to do this in a measuring cup or deep glass.
- Holding the end of a toothpick, quickly dip a truffle bundle into the chocolate, covering the entire surface. Let excess chocolate drip of and place onto a fresh parchment paper.
- Working quickly, attach the ears on the top of the ball that does not have the toothpick poking out and an upside down heart for the nose.

- Let the chocolate sit until fully set, about 20 minutes.
- Carefully pull out the toothpick from each druffly. Dip the end of one mini marshmallow in chocolate and place over the hole left with the toothpick. Use food color or an edible marker to create the eyes.
Nutrition
The nutrition facts provided are calculated using a third-party tool and are estimates only. Actual nutritional content may vary based on the ingredients and brands you use, as well as portion sizes. For accurate results, please consult a registered dietitian or nutritionist.


what did you use the blue color for, the grass?
I used it for the eyes. You can easily use an edible food pen to substitute or edible eye candies
These are so adorable! Do these have to be refrigerated? I’d like to make and ship them. Will they be ok being shipped and not refrigerated? Do you think they are too fragile?
I’m not sure that they would handle well with shipping but I haven’t tried it out for myself.
Can you make these little guys with blue ears instead? Would they look okay with blue sugar instead of pink for their little ears?
sure can!
Can these be made ahead? If so how far in advance?
yes, I would say keep them no longer than a week in the fridge. The marshmallow ears won’t be as fresh.
Thanks
These are super cute! Think I will make them tonight.
Let’s say you could see the shoal, sea rock and roll, ocean, as well as tropical isle someplace, around the globe on Google Roadmaps, satellite tv for pc see? And what in case you might focus into block
I am in most cases to blogging and that i reallyappreciate your articles. This great article has really peaks my interest.My goal is to bookmark your web blog and keep checking for brand new details.
I did fine making these until it came to the almond bark, my truffles slipped off and the almond bark wasn’t all that runny, when I turned up the heat it started to brown :/ so that didn’t work either. Maybe I should have frozen the truffles.
Love these! Remind me of my snowmen oreo truffles, but the spring version! Too cute.
Hey there! These look adorable and I really want to make them this Easter. Just to re-ask Marys question: Did you use the whole container of oreos and bar of cream cheese for one batch? How many bunnies / servings did it yield overall?
I did use the entire bag of oreos as well as one 8oz package of cream cheese. I ended up with 18 bunnies and 12 truffles.
Great, Thanks! 🙂
What a Cute way to make truffles. How about a bit of marshmallow for that bunny tail?
These look way too cute to be eaten! My little ones are going to love making them! Thanks for sharing a brilliant idea. I will be pinning this right away so we can make them for Easter. Mel, visiting from #weeklylinkparty1
Let me know how they turn out!
Heya this is somewhat of off topic but I was wondering if blogs use WYSIWYG editors or if
you have to manually code with HTML. I’m starting a blog soon but have no coding knowledge so I wanted to get advice from someone with experience. Any help would be enormously appreciated!
Did you use the whole container of oreos and bar of cream cheese for one batch? How many bunnies / servings did it yield overall? These are adorable and I’d love to do them for a family gathering.
Well these are just too darn cute! Thanks so much for bringing them into my life!! 🙂
Wow! I was not a follower last year and never saw these but I LOVE these! I can’t wait to make these. SO creative!!
Well Dezi, I’m glad I reposted, and happy to have you following now! :0)