
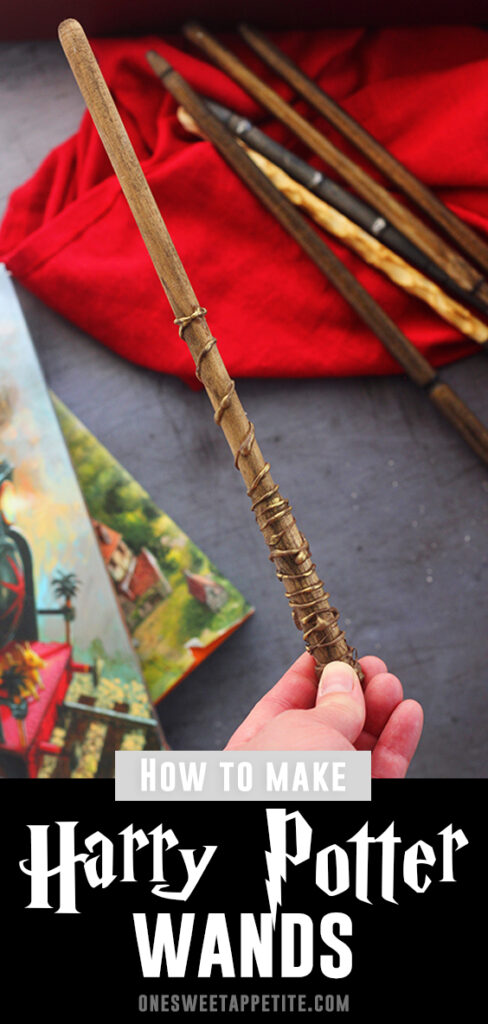
DIY Harry Potter Wands
This post may contain affiliate links.
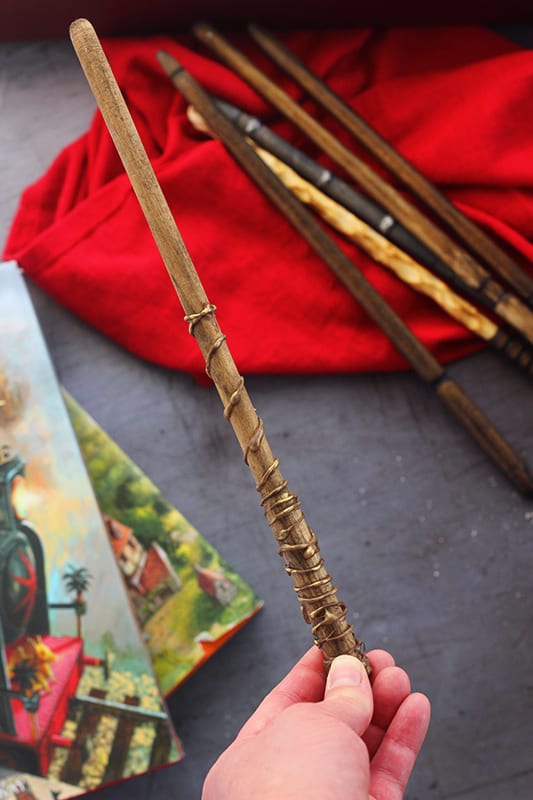
DIY Harry Potter Wands Tutorial. Ready to level-up your wizarding skills without breaking the bank at Ollivanders? Say “Accio wand-making guide!” and get ready to DIY your way into Hogwarts glory. Today, we’re ditching the exotic phoenix feathers and dragon heartstrings to make Harry Potter wands out of dowels. Trust me, they’re so spellbinding even Hermione would approve.
Love the wizarding world? Be sure to check out some of these top posts: Hagrid Cake, Butterbeer Poke Cake, and my DIY Harry Potter Photo Booth.
⚠️ Heads Up, Wizards and Witches! ⚠️
Before you get all “Accio drill!”, remember that power tools are not toys, even in the magical world. Only adults or supervised teens should operate a drill for this DIY wand project. No cutting corners here, safety is not an optional spell!
So, put on those safety goggles and get an adult to supervise if you’re underage. We don’t want any “drillius accidentus” ruining the magic, okay? Happy crafting, and may your wand choose you!
Why You’ll Love These Dowel Wands:
- Budget-Friendly Magic: Why splurge on official merch when you can create a wand for the cost of a latte? Wooden dowels are super affordable.
- Custom Creations: Unlike the mass-produced wands, you can customize your dowel wand right down to the last whittled notch. Your wand, your rules!
- Crafty Bonding: Making wands can be a fun family activity or a magical date night. Nothing says “I love you” like a hand-carved wand, am I right?
This post has been YEARS in the making. Seriously. A small backstory before we dive in. I threw my son the MOST insane Harry Potter Themed Birthday Party. You see, he is obsessed with the series and we thought it could be something fun we could do for cheap. Total we spent $50 and it was MAGICAL.
The star of the show were the homemade wizard wands. My husband made them out of wooden dowels and we had an entire Ollivanders experience. Each kid was sorted and had the wand pick THEM. When the party was over I had FULL GROWN ADULTS fighting over who got the leftover wands. I kept them.
To this day I get calls from family and friends trying to talk me into parting ways with the few we have left. I just can’t bring myself to do it. They are that cool. So, I figure it’s time to share how we made them without any special tools.
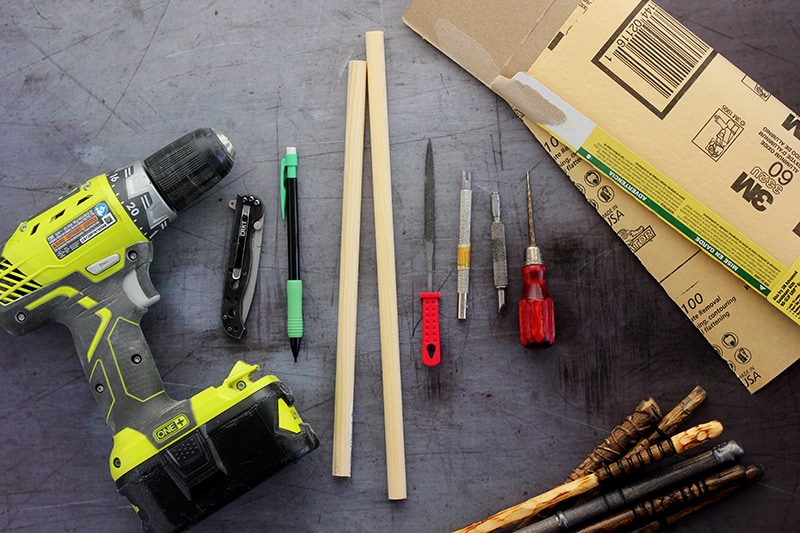
What You Need:
Before we go any further, I’m going to let you know that there very well could be an easier way to do this. I did not want to purchase special equipment and used all items we already had on hand, besides the dowels.
The first wand took me an hour and half to make while I figured out the process. After that it took me about 30 minutes per wand from start to finish.
- Dowels (affiliate): I used 1/2 inch. You could need larger depending on the bit size of your drill
- A drill (affiliate): This is the one we have and LOVE
- Carving tools (affiliate): We used items we had on hand but this is an amazing set that helped us speed through the last four wands.
- Sandpaper (affiliate): 100, 80, and 60 grit
- Paint or stain (affiliate)
- Gloss finishing spray (affiliate)
- Protective gear- Leather glove is a MUST as well as goggles. A mask might not be a bad idea either.
Step By Step Instructions:
Before we get started I need to state that you should NOT USE THE DRILL AS A WOOD LATHE. All of the carving work needs to be done BEFORE you add the dowl to the drill. The drill is used to lightly sand the wands into shape. YOU WILL HURT YOURSELF IF YOU TRY TO CARVE WHILE THE DOWEL IS IN THE DRILL.
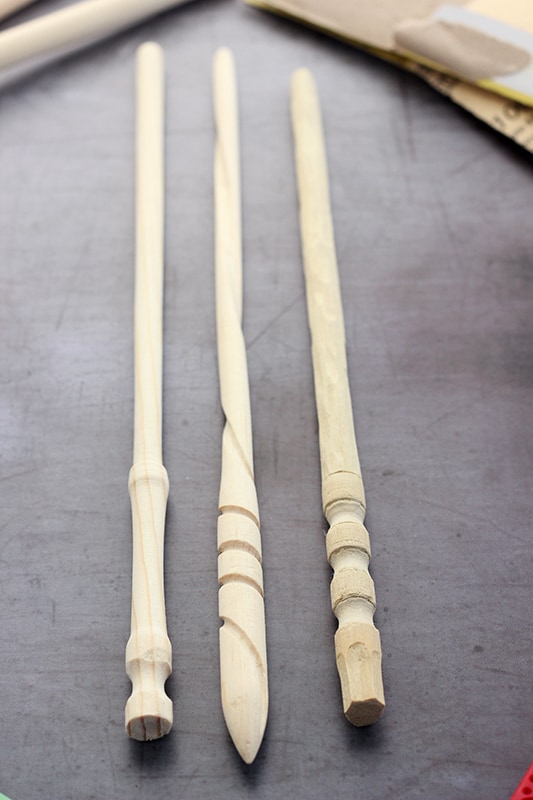
- Start by cutting your dowels OR you can buy a pack (affiliate) that is pre cut for you. We had a longer dowel that we cut into 3 pieces between 10″ to 12″ long.
- Use a knife or carving kit to start a design. We kept this mainly to the handles. You need the design to be fairly deep and also need to leave roughly 1 inch of space at the very end of the dowel (it will get divots from the drill).
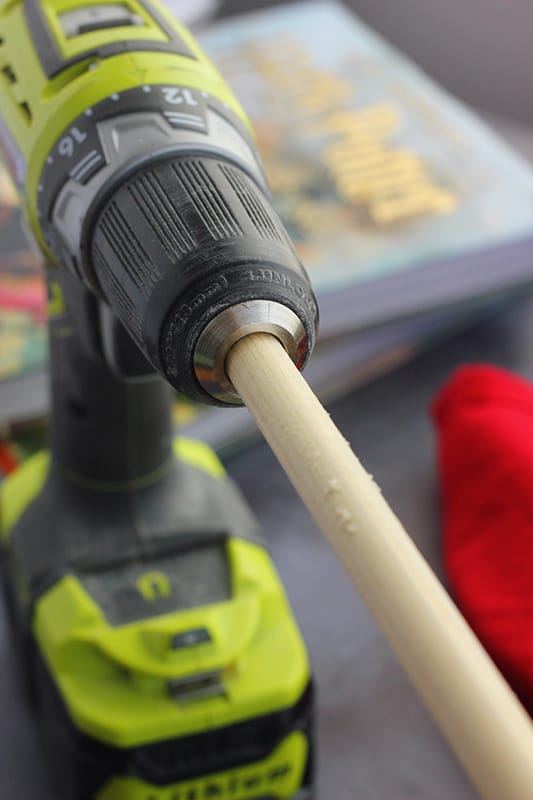
- Once you have a basic design, place the dowel into the drill in place of the bit, handle side in. Tighten the drill to hold the dowel in place.
4. Wearing a leather glove (I know, not pictured but I learned this the hard way), start sanding the dowel while you turn on the drill. This creates a sort of DIY lathe.
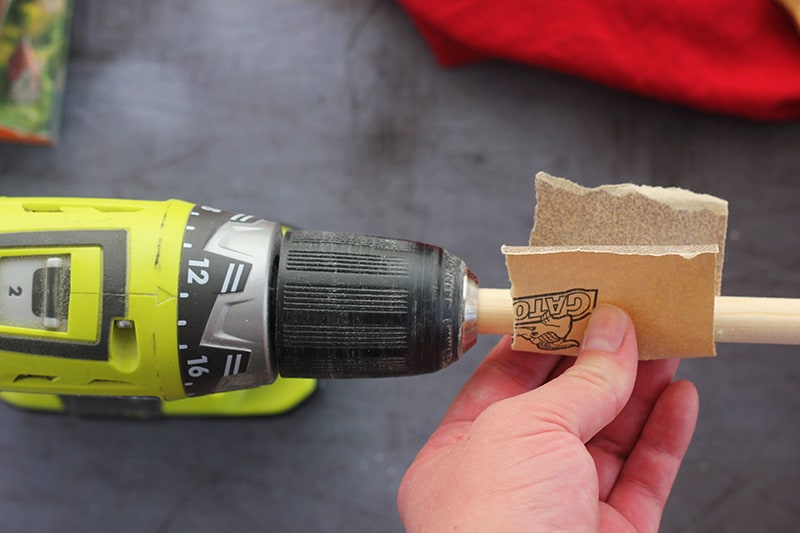
5. Continue to sand, using the different grits, to form the tip of the wand and gently clean up the carved handle.
6. Once the tip of the wand has reached a shape you are pleased with, remove it from the drill. Use the sand paper to soften the end. It will have divots from the drill that will need to be smoothed out.
7. Clean the dowels well to remove all of the dust.
8. Stain or paint each wand. Finish with a good spray of sealer and let them dry completely.
Tips and FAQs:
Now, I am NOT a craft blogger. If you have any questions PLEASE comment below. I’m happy to help walk through the process. Here are some tips and tricks we learned along the way.
- Be patient! This is not easy with the first wand. My dad tried and gave up pretty quickly. It takes a little practice. Once I figured it out I could whip up a wand in about 15 minutes.
- Get creative. You really can’t mess these up. If you accidentally take too much out… consider it added character! I feel like the Wizarding World really is full of fun wonky style anyway.
- Chopstick Harry Potter Wands are definitely easier to make. However, these wands are party favors that will be kept for years. It’s been almost 6 years since we held this party and the kids STILL play with them together. In fact, my sisters kids (in their 20’s) begged me to make some for their birthday back in January.
How to add detail to DIY Wizard Wands:
Carving is the biggest way to add a little character to each wand making it unique, but here are a few other great ideas we used:
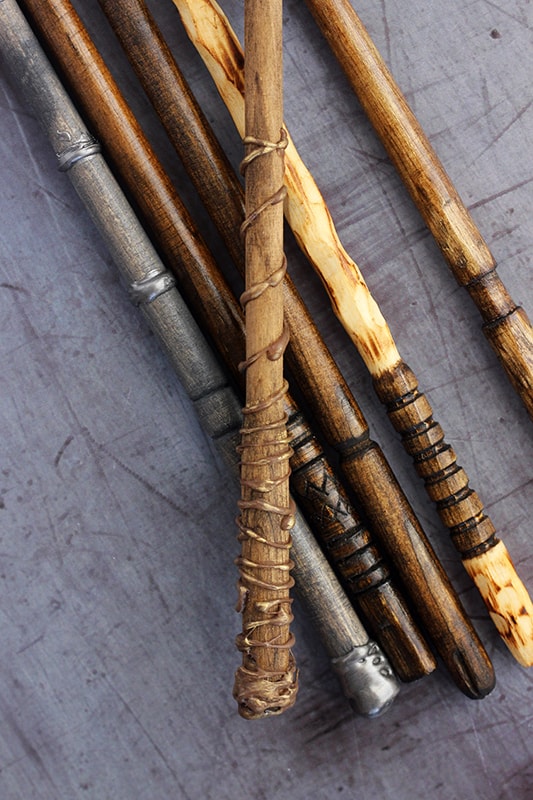
- Hot Glue: One request was a Hermione style wand. I stained a basic wand brown. Once it dried I used hot glue to give it that 3d twist around the base. Once it hardened I brushed on brown paint just on the glue with a touch of gold.
- FIRE: Ok, this one was all my husband. He used a torch to give some burned look on some of the wands that was well received by the new owners.
- Name the wands! This is where it gets really fun. Add a small tag with the wands information. Example: Silver lime wood with a dragon heartstring core, 11 ½” and slightly yielding flexibility.
How to use paint as stain:
Another thing we did was use basic craft paint (affiliate) as stain. This is SO EASY and can save you big money.
- Add 1 part paint and 1 part water to a plastic cup or bowl. Stir well with a stir stick.
- Paint onto your wand. Rub off immediately and allow to dry completely.

More Harry Potter Content To Check Out


Still Hungry? Follow One Sweet Appetite on Instagram, Pinterest, and Facebook!
Want to save this recipe?
Enter your email below & we’ll send it to your inbox. Plus get great new recipes from us every week!
How to make Harry Potter wands
Equipment
- Drill
- Protective gear- Leather glove is a MUST as well as goggles. A mask might not be a bad idea either.
Ingredients
- 1- 1/2 inch dowel or larger depending on the bit size of your drill
- Carving Tools or pocket knife
- Sand Paper– 100 80, and 60 grit
- Paint or stain
- Gloss finishing spray
Instructions
- 1. Start by cutting your dowels OR you can buy a pack that is pre cut for you. We had a longer dowel that we cut into 3 pieces between 10″ to 12″ long.
- 2. Use a knife or carving kit to start a design. We kept this mainly to the handles. You need the design to be fairly deep and also need to leave roughly 1 inch of space at the very end of the dowel (it will get divots from the drill).
- 3. Once you have a basic design, place the dowel into the drill in place of the bit, handle side in. Tighten the drill to hold the dowel in place.
- 4. Wearing a leather glove (I know, not pictured but I learned this the hard way), start sanding the dowel while you turn on the drill. This creates a sort of DIY lathe.
- 5. Continue to sand, using the different grits, to form the tip of the wand and gently clean up the carved handle.
- 6. Once the tip of the wand has reached a shape you are pleased with, remove it from the drill. Use the sand paper to soften the end. It will have divots from the drill that will need to be smoothed out.
- 7. Clean the dowels well to remove all of the dust.
- 8. Stain or paint each wand. Finish with a good spray of sealer and let them dry completely.
Video
Notes
- Be patient! This is not easy with the first wand. My dad tried and gave up pretty quickly. It takes a little practice. Once I figured it out I could whip up a wand in about 15 minutes.
- Get creative. You really can’t mess these up. If you accidentally take too much out… consider it added character! I feel like the Wizarding World really is full of fun wonky style anyway.
- Chop Stick Harry Potter Wands are definitely easier to make. However, these wands are party favors that will be kept for years. It’s been almost 6 years since we held this party and the kids STILL play with them together. In fact, my sisters kids (in their 20’s) begged me to make some for their birthday back in January.
How to add detail to DIY Wizard Wands:
Carving is the biggest way to add a little character to each wand making it unique, but here are a few other great ideas we used:- Hot Glue: One request was a Hermione style wand. I stained a basic wand brown. Once it dried I used hot glue to give it that 3d twist around the base. Once it hardened I brushed on brown paint just on the glue with a touch of gold.
- FIRE: Ok, this one was all my husband. He used a torch to give some burned look on some of the wands that was well received by the new owners.
- Name the wands! This is where it gets really fun. Add a small tag with the wands information. Example: Silver lime wood with a dragon heartstring core, 11 ½” and slightly yielding flexibility.
Related Posts:
- Butterbeer Cupcakes
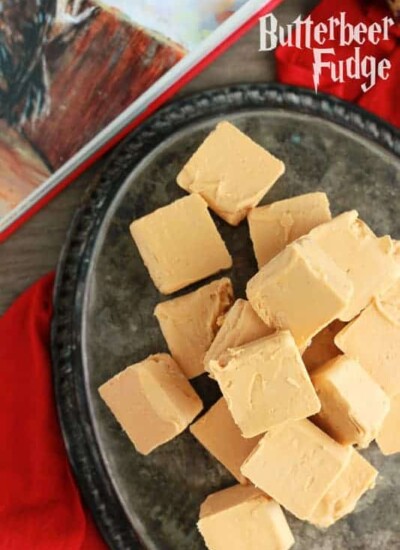
- Two Ingredient Butterbeer Fudge
- Simple Harry Potter Party
- Frozen Butterbeer
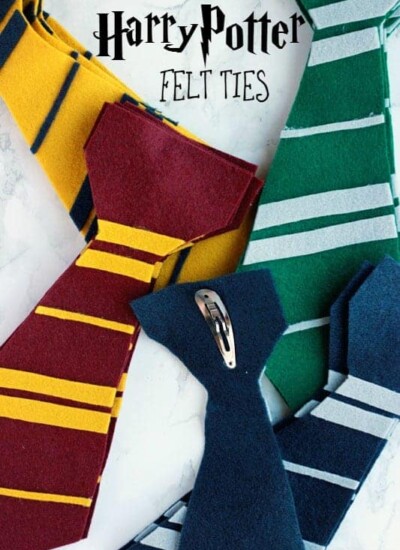
- Harry Potter Felt Ties
- Slytherin Party


Hello!
Did you use acrylic or tempura mixed with water?
We used acrylic.
Did you stabilize the drill with clamps or just hold the drill while sanding with the other hand?
Hi Wendy, I didn’t clamp the drill, but I also didn’t pull the trigger to make it go super fast. Just be sure to wear safety gloves and be careful.
Hi!
Wich is better paint, stain, or paint and water?
Hi Dominic, there’s no better. It’s just per your preference.
What kind of clear coat spray?
I used this one.
Hi! Currently planning a HP birthday for my daughter. I LOVE the wand idea and want to ask you where did you print the tags for the wands?
Hi Ary, we just did our own hand printed tags in a swirly font.
Hi Jessica,
I have been looking for ways to carve wands. Already purchased 5/8” dowels. Tried a bench grinder, dremil, and hand sander. Would like to try a drill. I have some carving tools. Any chance you could make a longer video of the whole process from the beginning (with carving), stabilizing the drill (did you use a vise), and how you made the point (did you use the sandpaper while the drill was spinning). I am a 69 year old woman who wants to make them with my grandchildren who are teens. Thanking you in advance. If you don’t have time to make the video, could you add details with photos in your “recipe”?
Hi Judy, I don’t have everything on hand right now, but if you are willing to wait just a few days I can put something together for you as long as you are making them for your grandkids (adorable gift idea) and not intending to sell them. I’ll start by saying this is very much macgyvered. Is the email you provided while submitting the correct one?
Hi! How did you stabilize the end of the wand opposite the drill? We can’t seem to stop it from wobbling so much that we can’t carve!
Hi Erin, with this project you really need to carve it before you add it to the drill. The drill is only for sanding to make the wand more smooth and define the carvings you already did.
These are so fun and inspiring!
I’m just wondering how did you create the carved swirl wand? (Not Hermiones, but the one shown in the picture with the 3 that hadn’t been stained yet)
Hi Bekah, That was made with careful carving. We used a pocket knife and wood carving tools like these ones from Michaels. As we carved out the swirl we kept slowly turning the wand to have it travel all the way up to the top. It takes a bit of practice and I recommend starting slow. You can always carve out more and make the notch deeper.