
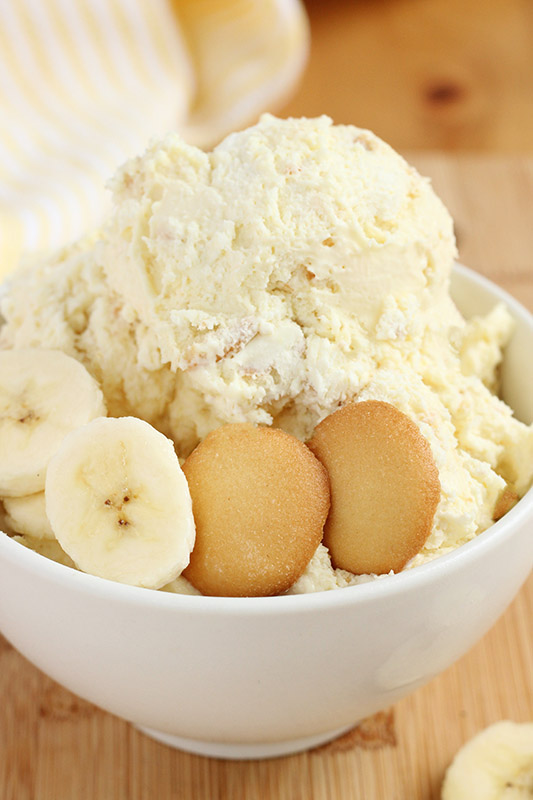
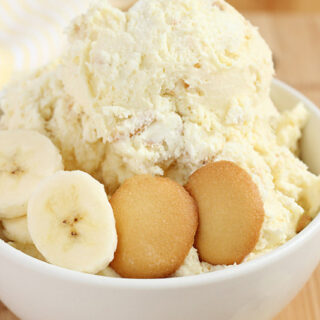
Banana Pudding Ice Cream
This post may contain affiliate links.
Banana Pudding Ice Cream is the no-churn treat you didn’t know you needed. Creamy, sweet, and loaded with chunks of cookies and fresh banana flavor, it tastes just like the classic dessert. With just a few ingredients and no ice cream maker required, this recipe is about to become your new go-to summer favorite.
No-churn ice cream is a summer staple. Start with our base Vanilla Ice Cream Recipe and use it as a starting point to really get creative! Some of our favorites? Strawberry Cheesecake Ice Cream and Chocolate Swirl!

What Makes This Recipe a Win
- No churn needed – You don’t need an ice cream maker or fancy equipment.
- Classic flavor – All the creamy banana pudding vibes packed into a frozen dessert.
- Easy ingredients – Just a handful of pantry and fridge staples.
- Quick to prep – Mix it, freeze it, and you’re done.
This Ice cream with banana pudding mix is the perfect mash-up of two classics—creamy homemade ice cream and the nostalgic dessert everyone loves. With just five ingredients and no special equipment, it’s a recipe that feels impressive but couldn’t be easier to pull off.
This recipe has been carefully tested to balance flavor and texture, ensuring the ice cream stays creamy and scoopable straight from the freezer. The result is a sweet, velvety treat with just the right crunch of vanilla wafers in every bite.

Before You Start
Banana Cream Pie Ice Cream ingredients are simple, but each one plays a big role in giving it that creamy, nostalgic flavor. Here’s what you’ll need:
- Heavy cream – Whipped to soft peaks, this creates the fluffy base that makes the ice cream rich and creamy without an ice cream maker.
- Sweetened condensed milk – Adds sweetness and keeps the texture smooth and scoopable straight from the freezer.
- Banana pudding mix – The secret ingredient that packs in classic banana flavor while helping the mixture set up perfectly.
- Vanilla extract – Just a splash rounds out the flavors and gives the ice cream that homemade taste.
- Vanilla wafer cookies – Crushed and folded in for a little crunch and that signature banana pudding vibe.
With only 5 ingredients and no complicated steps, you’ll have a dessert that feels indulgent but couldn’t be easier to make.
Craving a more traditional banana treat? Try my Homemade Banana Pudding Recipe.

Jesseca’s Recipe Review
This homemade banana pudding ice cream is one of those desserts that disappears faster than I expect. It’s creamy, sweet, and has just the right amount of crunch from the vanilla wafers. The banana pudding mix gives it that nostalgic flavor without any fuss, making it one of my go-to summer treats.
Tip from Jesseca:
Line your loaf pan with parchment paper before freezing. It makes scooping (and cleanup) so much easier when you’re ready to serve.
Variations and Substitutions
One of the best parts about this Banana Ice Cream is how easy it is to customize. Try these swaps to make it your own:
- Banana slices – Fold in a few thinly sliced bananas before freezing for extra fresh flavor and texture.
- Different cookies – Swap the classic vanilla wafers for shortbread, graham crackers, or even Biscoff cookies for a fun twist.
- Flavor boost – Add a pinch of cinnamon or nutmeg to the mix for a warm, spiced note.
- Extra creamy – Stir in a scoop of whipped topping along with the whipped cream for an even lighter texture.
These small tweaks let you take the same easy base recipe and turn it into something unique every time.

How To Make Banana Pudding Ice Cream
This southern banana pudding ice cream comes together in just a few easy steps. No ice cream maker needed!
- Mix the base: Stir together the sweetened condensed milk, banana pudding mix, and vanilla until smooth.
- Fold in the cream and cookies: Gently fold in the whipped cream and crushed cookies.
- Freeze and serve: Pour into a container, freeze until firm, then scoop and top with more cookies or sliced bananas.
That’s it! A creamy, dreamy dessert that tastes like banana pudding in ice cream form.
Helpful Tools
- Mixing Bowls: I am currently obsessed with this set of nesting mixing bowls (affiliate). They fit together nicely, saving precious cupboard space, and even have attachments that come in handy for all sorts of recipes.
- Silicone Spatulas: One of my MUST have items in the kitchen. This set of silicone spatulas (affiliate) is probably the most used item I own. I use them to for scraping bowls, cooking stovetop, and so much more.
- Ice Cream Scoops: I own six ice cream scoops, but this one is the most used. The pointed tip helps even the hardest ice cream scoop out like butter.

Recipe FAQs
Yes, sugar-free pudding mix works, but the texture may be slightly softer. Just be sure to still use the full-fat condensed milk for creaminess.
Nope! The dry pudding mix goes straight into the condensed milk mixture—it thickens and flavors the ice cream without any extra steps.
At least 6 hours, but overnight is best for a firm, scoopable texture.
You can! Slice them thin and dip lightly in lemon juice before folding in to prevent browning. Keep in mind they may soften the longer the ice cream is stored.
It’s best eaten within 1–2 weeks for peak flavor and texture. After that, it may develop ice crystals.
Storage and Make-Ahead Instructions
The beauty of no-churn ice cream is that it’s easy to make ahead and keeps well in the freezer.
- Make-Ahead: Prepare the ice cream mixture, transfer it to a freezer-safe container, and freeze overnight so it’s ready to scoop the next day.
- Storage: Keep covered with a lid or a layer of plastic wrap pressed directly onto the surface to prevent ice crystals. Stored properly, it will stay creamy for up to 2 weeks.
- Serving Tip: Let the container sit at room temperature for 5 minutes before scooping—this softens it just enough for smooth, easy serving.
With just a little planning, you’ll always have a batch ready for when the craving hits.
Want to save this recipe?
Enter your email below & we’ll send it to your inbox. Plus get great new recipes from us every week!
No Churn Banana Pudding Ice Cream
Ingredients
- 14 oz can sweetened condensed milk
- 1- 3 oz box banana pudding mix
- 1/4 teaspoon vanilla extract
- 2 cups heavy cream (whipped to stiff peaks)
- 1/2 cup mini vanilla wafers
Instructions
- In a large mixing bowl, combine the sweetened condensed milk, banana pudding mix, and vanilla extract. Whisk until the pudding powder is fully dissolved and the mixture is smooth.
- Add the whipped cream to the bowl. Using a spatula, gently fold it into the pudding mixture until just combined. Be careful not to overmix—the air in the whipped cream is what keeps the ice cream light and fluffy.
- Stir in the crushed vanilla wafers, reserving a few for topping if desired. Fold them in gently so they’re evenly distributed.
- Transfer the mixture into a loaf pan or freezer-safe container. Cover tightly with plastic wrap or a lid and freeze for at least 6 hours, or until solid.
- Scoop into bowls or cones and top with extra cookie pieces and sliced bananas for the full banana pudding experience.
Notes
Nutrition
The nutrition facts provided are calculated using a third-party tool and are estimates only. Actual nutritional content may vary based on the ingredients and brands you use, as well as portion sizes. For accurate results, please consult a registered dietitian or nutritionist.


Wonderfully creamy, great banana flavor. I placed in separate containers with banana in bottom and vanilla wafers on top. Extremely easy with Kitchen Aid. Everyone enjoyed.
I am so glad you like this recipe as much as we do. It’s one of our favorite no churn ice creams.
Do you use instant pudding mix?
yes. Instant pudding was what I used.
This looks marvelous. If I won the mixer I could make my bread without hurting so much.
Looks totally yummers! Just may have to try this weekend! It would be beyond Awesome to win! I’ve been wanting a kitchenaid for years!!!
Thanks for the chance to win!!
Wendy
Your recipes are amazing and I must try it now. Of course it would be fun to make it with the Kitchenaid attachment, too!
Sounds delicious! I’ve always wanted to make my own homemade ice cream but have never had the equipment to do so – fingers crossed I win the KitchenAid, I’ve heard so many people raving about them and cooking/baking is one of my main passions. Thank you for such a lovely giveaway, I’ll be bookmarking this recipe for later!
Emma x | Reverie Lane
Oh my! This looks fabulous. I have to confess I haven’t had homemade ice cream since I was a teenager, I think we are long over due! 😉 thank you so much & my fingers are crossed for the giveaway! xx
Amy